
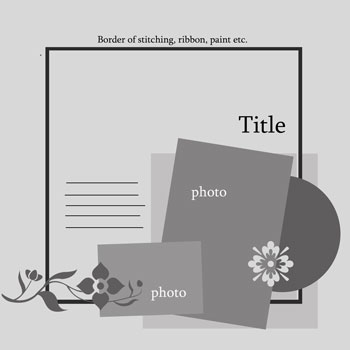
I had another layout sketch design for you to play with today! I hope you’ll enjoy it and play along. I designed this layout with a frame inspiration in mind. If you look at the border on this layout, it doesn’t designate another layer but a frame around the design. To create a frame around a design you can get creative and make one from a variety of elements. Draw the frame , stitch the frame, adhere ribbon for a frame, punch holes for a frame…whatever you wish to tie your design together. To play along with this challenge… check out the details here.
Lesley Langdon has created a beautiful sample with this layout that you won’t want to miss. Check it out!
papa’s girl
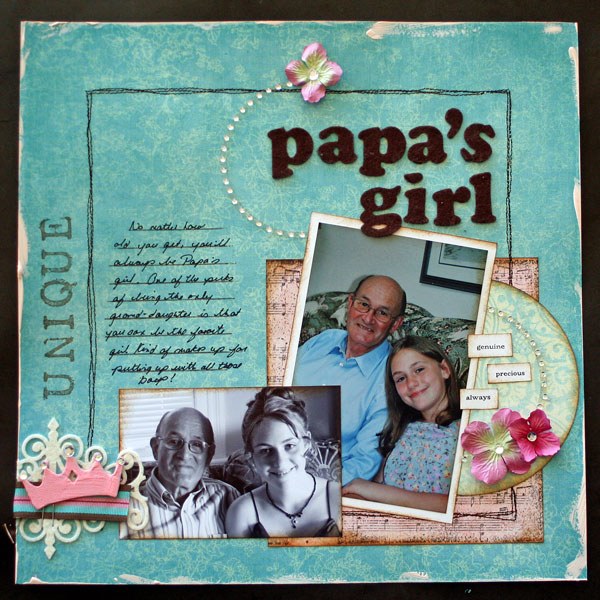
This design is about my dad and daughter. She is the only grand-daughter giving them a special relationship.
Journaling… No matter how old you get, you’ll always be Papa’s girl. One of the perks of being the only grand-daughter is that you can be the favorite girl. Kind of makes up for putting up with all those boys!
Here’s some quick notes about this project….
- Turn a mistake into a design feature. When a drop of paint got on the edge of my layout, I decided it would be fun to brush on a painted border
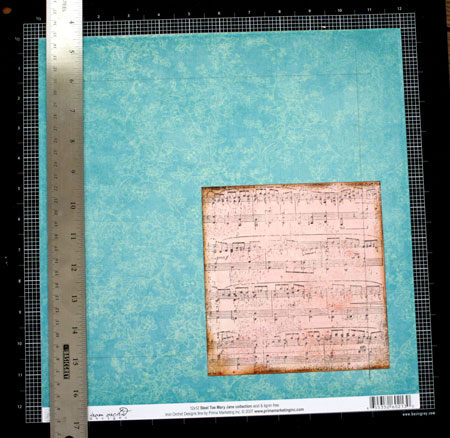
- Scrapblocks™ are a perfect 6×6 size making them great for stamping on layers…the music score layer is a Scrapblock™ stamped onto some plain patterned paper.
- To stamp my journaling lines on the layout, I inked up just the lines on the Writer’s Block Backgrounder.
- Oops…didn’t have enough p’s in my felt letters! To make it work I flipped an extra d upside-down.
- One of my favorite parts of this layout is the rhinestone circle treatment. I wanted to use the circle but it would have cut right over the picture in a not so great spot. So…I cut the circle right on its backing in half and then applied to the circle layer. To use the other half…I added it over the top to highlight the title and draw your eye through the design like a wave.
- You can use photos from different time periods together if they have a common theme. In this layout I made one of the photos black and white as the colors clashed.
- All the stamps in this project are by Cornish Heritage Farms. The Everyday Petites set is a sneak peek and will be released Thursday August 14th.
- To create a border around the page, I used my Making Memories Magnetic Precision Mat making it easy to line up an even border. Pencil in the border and erase marks after stitching.
 Have fun with the challenge!
Julia
Supply List:
Stamps:
–Big Inspiration (unique sentiment) from Mona Lisa Moments Line by CHF
– Writer’s Block Backgrounder by CHF
–Aged Sheet Music Scrapblock™ by CHF
-Everyday Petites from Mona Lisa Moments line by CHF
Paper:
–Steel Toe Mary Janes line by Prima
-white cardstock by Prism
Ink:
-Brushed Corduroy and Vintage Photo Distress ink by Ranger
-Black and Burnt Umber Palette Ink by Stewart Superior
Other:
felt letters by American Crafts
–flowers and felt lace by Prima Marketing
-sewing machine
-circle rhinestone by Heidi Swapp
–small rhinestones by MAMBI
-circle cutter by EK SUccess
-crown chipboard by Maya Road
-ribbon by Making Memories
-stapler
-Worn Lipstick & Tattered Rose Distress Crackle Paint by Ranger
16 responses to “Framed…a layout challenge”