Category Archives: Tutorials & Techniques

for my home…

My home is my favorite place to be. It’s not fancy. It’s an old well-loved farmhouse that is constantly being renovated. It’s come a long way and we are slowly making it our own. We do this by doing the work ourselves and adding pieces of our own style throughout.

One thing I always love incorporating is text. Lucky for me it’s a great trend in home dec lately and I thought it would be fun to create my own frame using some papercrafting products I had on hand.

Printed Canvas Frame

This product uses Natural Sticky Back Canvas by Claudine Hellmuth. I {heart} this product! You can run it through your printer! Of course, you can paint it, stitch it, stamp it, ink it, die cut it, etc. etc. etc. too!

The texture is so cool…

Want to make one?

Open the above file by clicking on it and then print onto some Sticky-Back Canvas. I’ve used the Natural as I love the warmed look. I print it out at 8×8″ in size and then place right onto a wood 8×8″ frame from Michaels. The edges of the frame are painted with Claudine Hellmuth Charcoal Black Studio Paint.

Easy peasy!

Have a creative day!

so fab & a blog hop

Hi! Thanks for joining me today! Are you ready for a fun blog hop?

I’m super excited to be part of a super talented team for Up the Street Scrapbooking. Up the Street has paper crafting kits each much that I look forward to using each and every time. Tara does an amazing job of putting together product that takes all the guesswork out of what goes with what. Love, love, love it!

Today I have a tutorial to share with you using bits and pieces of a past kit or two. Keep reading too as there is a giveaway today that  you’ll love. The March kit is almost here as well so stay tuned for some samples from that soon! I think it is…

So Fab

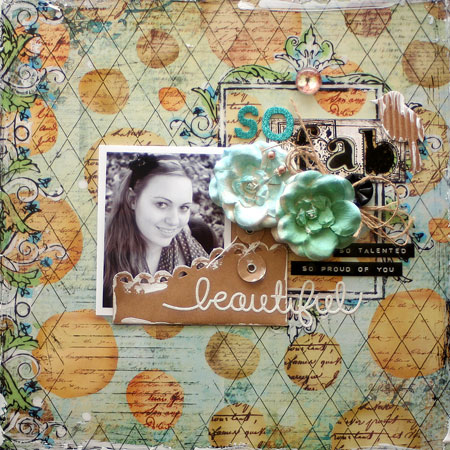
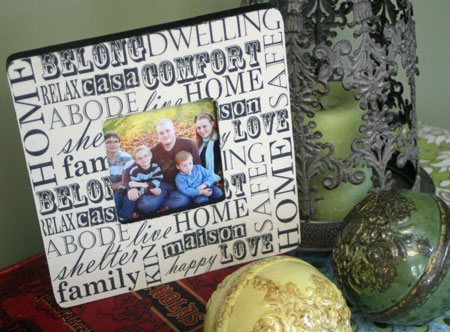
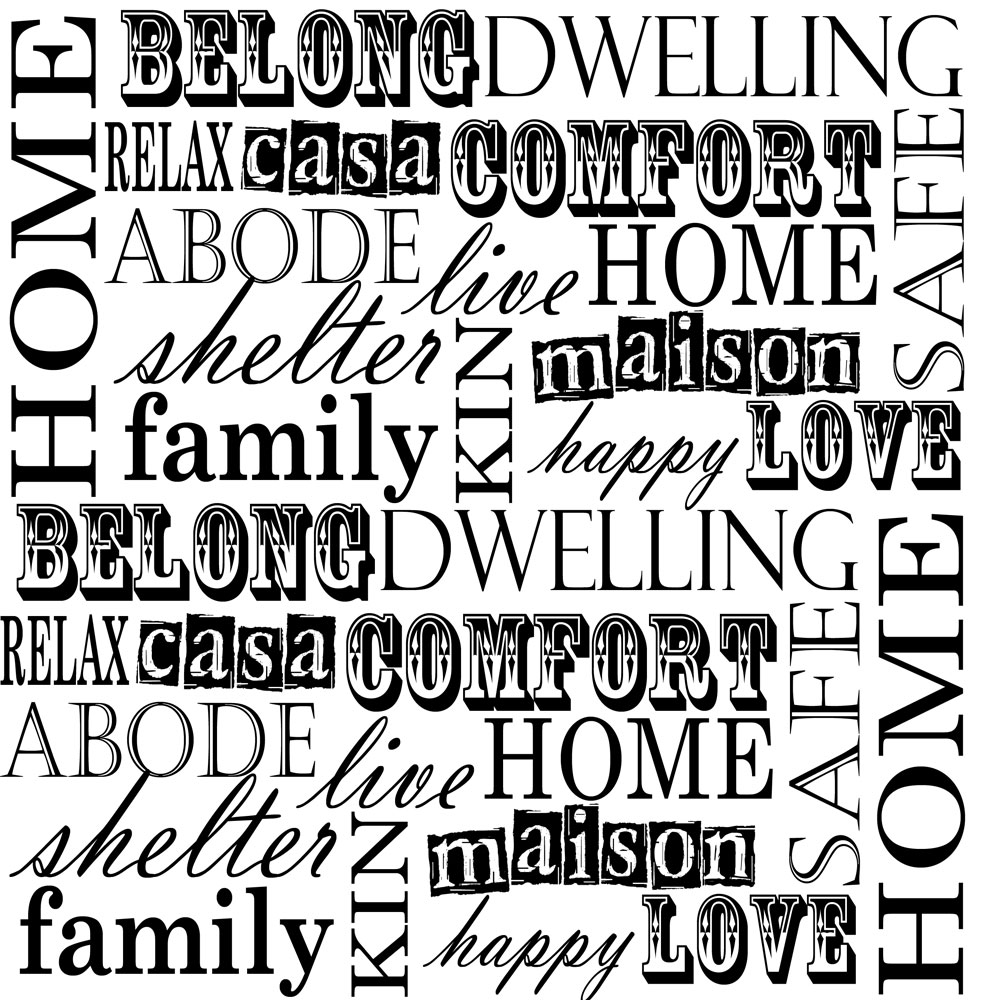
I was so excited to get artsy and have some fun with this layout. In one of the Up the Street Kits, there was this great Prima transparency. I’ve been saving it to do something special with it and it just seemed like the time to finally get to it.

Painting on the back of transparencies is a great way to add an artistic touch, as well as add color and layers of interest. Simply flip over the transparency and loosely paint the back of the transparency with acrylic paint. You don’t want it to be too precise or you’ll loose the painterly look. You can allow it to dry first if you wish but I placed mine right onto the patterned paper while wet. The acrylic paint will adhere right to the paper eliminating the need for adhesive.

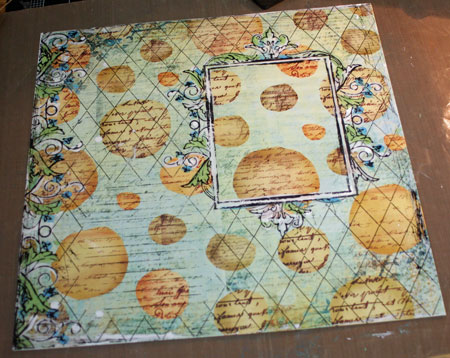
Here’s what it looks like flipped back to the right side and placed onto my patterned paper. Super easy and fun.

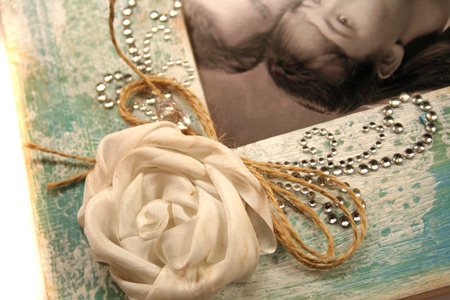
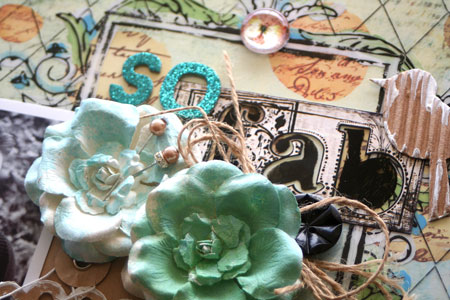
I’ve used bits and pieces left over from quite a few Up the Street Scrapbooking kits to put together this layout. A Maya Road envelope holds the photo and the beautiful flowers are misted with Glimmer Mist. I am SO into blue and green these days. It’s seriously time for spring!

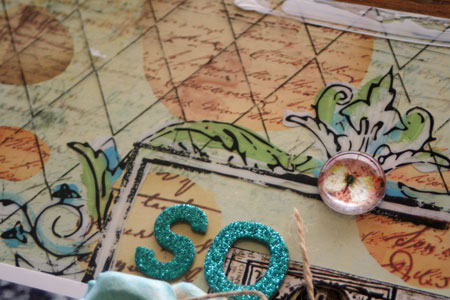
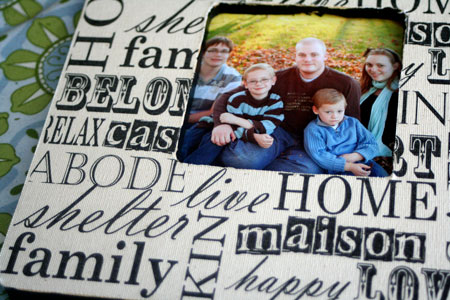
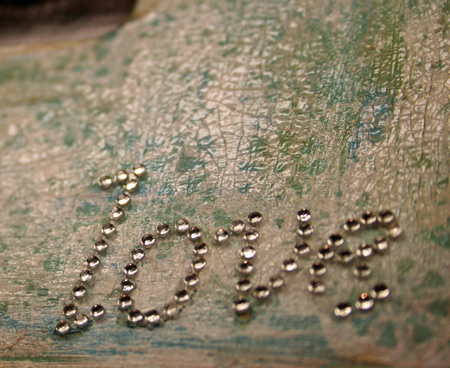
This photo is a detail shot of the painted transparency.

Finally, the title is a sticker from yet another kit that I’ve adhered to the transparency and then added in some permanent marker to highlight.

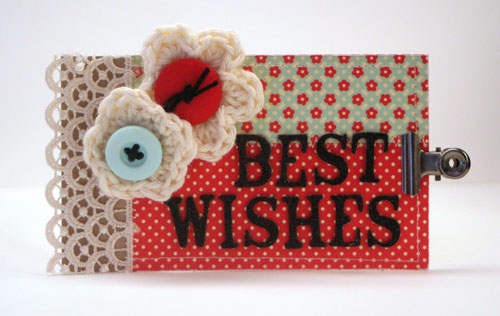
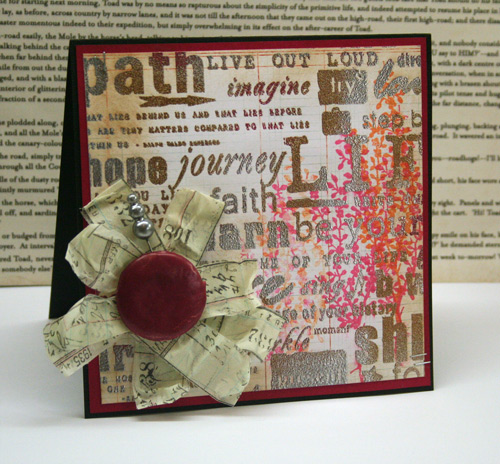
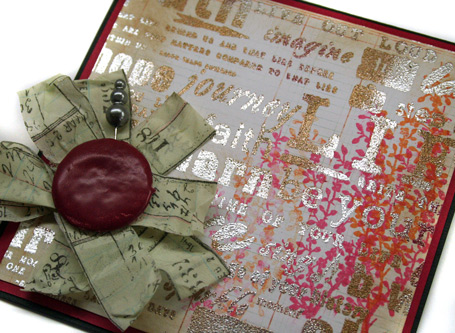
So what do you think of this Shabby Valentine kit?!

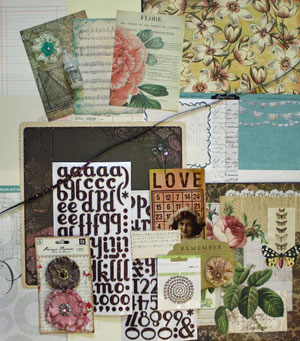
Gorgeous, huh? It’s the February Up the Street Scrapbooking kit and Tara has one to giveaway. Simply comment on my blog for a chance to win. Comment on the other blogs in hop as well for extra chances!

Next up on the blog hop is my uber-talented friend Lesley Langdon! I can’t wait to see what she’s come up with as it’s bound to be fabulous. Make sure you stop there next!

Thanks for joining me today!


mixing crafts

Some crafters are new to crafting when they start to paper craft but for most of us, well…

We’ve been crafting one thing or other as far back as we can remember.

That’s me. Knitting, quilting, sewing, crochet, smocking, stenciling, cross-stitch,  tole painting…even making soap has made it into my repertoire at some point. I know, I know! That one didn’t last too long. I’m sure I’ve missed a few too.

It’s fun to blast back to your past skills and add different crafting techniques to paper craft projects.

Crochet flowers are a fun trend and an interesting addition to this project. I made up my own easy pattern for these flowers. If you want to make them smaller and less bulky, just use finer cotton and a smaller crochet hook.

Julia’s Crochet Flowers

  1. Chain 6 and link together to form a circle
  2. Chain 1
  3. In the circle, single crochet 10 times
  4. Chain 1
  5. In first SC, 1 single crochet, 1 double crochet, 3 triple crochet, 1 double crochet, 1 single crochet
  6. Slip crochet in next single crochet.
  7. Repeat step 5 and 6 four more times.
  8. Slip crochet through beginning and tie off.

Supplies: kraft cardstock by Bazzill, Modern Homemaker 8×8 paper pad by October Afternoon, sewing machine, lace by Prima, Hinge Clip by Advantus, buttons by Basic Grey, Thickers by American Crafts, embroidery floss by Bazzill, crochet cotton (the kind used for dish cloths), 4.00 mm crochet hook

Happy creating!

a little joy tag and a whole lot of snow

Has anyone been following the 12 Tags of Christmas? Have you been to the CLASSroom to check out the 12 Tags of Christmas with a Feminine Touch? They are so fun and festive and a great way to try out new techniques.

This little JOY Tag is packed full of inky techniques and yesterday I had a wonderful time putting my own feminine spin on things. I hope you’ll join me today in the CLASSroom for the step outs. Also, don’t forget to stop by the CLASSroom each day and leave a comment. Ellen has some wonderful goodies to give away.

My last post was titled for the birds. Little did I know how apt that would be. We’ve been having record amounts of snow here. School is now closed for the third day straight.

And. it. is. STILL. Snowing.

Unbelievable!

One thing the snow has brought us though is many many birds to our new feeder. It’s on the porch so some of the birds were a bit shy but no longer are. We now have two pair of cardinals and they are so gorgeous.

The kids are enjoying the snow immensely. I’ve been trying to get some pictures but we have wide open spaces here, all you see is white and it’s hard to see in a photo exactly how much snow we have. We did have record amounts for one 24 hour period. Yesterday the total was up to 80 cm and it’s still snowing so for those of you who don’t do metric, I’m thinking it’s been at least a yard since Sunday.

I’m pretty excited. It looks like we’re going to have a very white Christmas.

Thanks for stopping by…

Easy Stamping

It’s Friday! Do you have plans for the weekend? We’re hoping to hit the beach as the weather sounds like it will be perfect. It’s easy summer fun.

Speaking of easy, adding color to stamps with dye markers is the theme of my Back to Basics post in the CLASSroom today. Want to join me?

Here’s the link.

watercolor-marker-flowers.jpg

Have a great weekend!

July Zva Blog Hop Winners announced

We’d like to congratulate the five July Zva Blog Hop winners!  Their names will be found on the following blogs:

Debbie Olson

Veronica Goh

Kim Moreno

Jillian Deiling Cassity

and…mine!

How exciting that one of the Zva blog hop winners comes from my blog today. Random.org chose number 40 and so, the winner is…

Sandra v.d. S.on 19 Jul 2010 at 1:26 pm  40 What a beautiful romantic LO! I love the flower!

Congrats Sandra v.d.S. Please e-mail me (link is in the sidebar near the top) and we’ll get that prize out to  you asap.

One winner from each of the 5 blogs will receive a Zva prize package worth $30.00.
Congrats winners!

I have another Zva Creative project to share with you today. It’s an altered frame project that I’ve created for a challenge at Splitcoaststampers.com Each year the SCS Dirty Dozen Design Team and Alumni host a fun week of challenges for the Fan Club Members. Fan Club Members help support the site and this is our way of saying thank you. I was thrilled to be part of the Dirty Dozen in 2006/2007.  Creating a sample for one of today’s challenges was a great way to have some stamping fun.Want to learn more about the Fan Club and challenges. You can find the details here.

doily-frame.jpg

Wow. A paperless project from me.  Pretty rare, huh? Pulling out my Claudine Hellmuth Studio Paints and getting messy was a lot of fun. To get this very old layered look, I kept brushing on layers of paint until I got the look I wanted. I worked wet in wet to blend the paints. I wanted to get the look of old furniture that has been painted time and time again and has bits of color coming through.

After I had the look I wanted, I stamped the surface with the Hero Arts Circle Lace Doily stamp. Instead of stamping with ink, I brushed the rubber with Blank Canvas Studio Paint and then stamped randomly on my frame.

flower-and-bling-detail.jpg

I’ve used two pieces of the Zva Creative Clear Swirl Frame CR01CB116 here to embellish the top corner of my project. The silk ribbon rose is handmade and I’ll have a tutorial for you on Friday for it.

doily-crackle-detail.jpg

Sorry about the poor quality of this shot but it was the one that show the crackled surface best. As a final step to make this project look vintage, I brushed the entire surface with a thick coat of Rock Candy Distress Crackle Paint. I love finished surface. The love is spelled out with some more Zva bling…the Alpha Page Crystal Clear Crystals CRB02BC111.

Supplies: wood frame, twine, white silk ribbon, CRB02BC111 & CR01CB116 rhinestones by Zva Creative, Claudine Hellmuth Blank Canvas, Landscape Green, Traditional Tan, Sable Brown, & Sky Blue Studio Line Paints by Ranger,  Circle Lace stamp by Hero Arts, Rock Candy Distress Crackle Paint, silk ribbon by May Arts

Thanks so much for joining me today!

Embossing

It’s been quite a while since I’ve done much embossing. When I first started stamping and bought that heat gun, I was enthralled. Watching that embossing process was so cool. And there are so many heat embossing techniques. Why don’t I use them much any more? Aha! Does this make a good Ways to Use it Challenge? It was fun to challenge myself to create am embossed design and I hope you’ll join me today in the challenge here.

Embossed Journey Card

embossed-journey.jpg

For this project, I used one of my favorite (and easy) embossing techniques.  A multi colored embossed surface using three different embossing powders. It probably has another name as well but I call it Triple Embossing.Here’s how you do it…

  1. Choose a  large stamp such as a background stamp or an image with a lot of inking surface. Ink with Versamark or embossing ink and stamp your paper.
  2. Sprinkle embossing powder A over approximately 1/3 of the surface. Remove excess.
  3. Sprinkle embossing powder B over another third of the surface. Remove excess.
  4. Sprinkle embossing powder C over the entire surface. Remove excess,
  5. Heat with heat gun until all the embossing powder is melted.

embossed-journey-detail.jpg

I love the way the embossed areas catch the light. You may also have noticed the huge brad in the project. It was  embossed with about 5 layers of Cranberry Adirondack Embossing powder to coordinate with my project. The stamping it done on some patterned paper, the Basic White 6×6 paper pad by Basic Grey.

Quick Tip: Use embossing powders from the same company so that they liquify at approximately the same time for good blending.

Supplies: Black cardstock by Bazzill, Cranberry Cardstock by Prism, Basic White 6×6 paper pad by Basic Grey,  Life ScrapblockSilhouette Blooms 1 by Cornish Heritage Farms, Cranberry Adirondack Embossing Powder, Tarnished Gold Embossing Powder, and Silver Embossing Powder by Ranger, Tim Holtz Tissue Tape by Advantus, Rosebud and Tangelo Memento Ink and Versamark Ink by Tsukineko

Happy creating!