Category Archives: published designs

Cards… June 2012

At the end of last year I received an e-mail from the editor of Cards Magazine asking me to be their featured designer for their June 2012 issue. To say I was honoured and excited would be an understatement.

Cards magazine is one of my favorite crafting magazines. The gorgeous projects, photography and beautiful glossy spreads always inspired. Cards is part of the Scrapbook Trends family of stunning magazines. You can subscribe, order single issues or download digital issues from their web-site here. If you’ve never stopped by their create: blog before, it’s a wonderful spot for inspiration and giveaways and you can find it here.

Today’s card design is one of my favorites of the five I created for Cards June 2012. I love it because I think it’s very me…all the things I love all hodge-podged together for a fun design.

Supplies:

Thanks for stopping by!

let’s party

This beautiful weather has me dreaming of all the wonderful things I hope to do outside this year. On the top of my to do list is to get my garden fixed up a little. We’re out in the country with a bit of space so I’m not quite sure where to start. I guess I’ll just have to start with baby steps and see where it takes me.

One thing I’ve always wanted to do was to have a garden party. I love nature and when creating for the Paper Crafts special issue, Party Ensembles, I really enjoyed working on this project.

My copy of Party Ensembles arrived at the end of last week. What a beautiful surprise! I couldn’t believe all the inspiration and how thick this issue is.

This 9 piece ensemble uses lots of texture and natural items for a soft and pretty look.

Each place setting would have a little gift favour box. I designed them all a little differently as everything in nature is unique.

The invitation uses a twig from my yard. The sentiment is printed on Sticky Back Canvas and then stamped for a subtle look.

The centerpiece is an altered wood birdhouse and wrapped in tulle ribbon.

Finally the place cards are made from Kraft cardstock and some sweet little cardstock frames from Maya Road.

If you’re looking for a few more peeks at this issue, you can find my Sew Much Fun Party Ensemble on Moxie Fab World.

Take care!

family of hearts

When I think back over the past year and the projects I’ve made, there are couple that really pop out in my mind as bringing me the most joy in creating them. While differing in style, they both are really very similar in that they are both very personal projects. They are both mini albums that I will keep and treasure.

Today I’d like to share one of those albums. It was created for the Moxie Fab World column in the September/October issue of Paper Crafts Magazine. Because of space and so many fabulous projects in this column, there’s only a couple pages of the album shown. I’ve had a few requests to see the rest of the album and so with Cath’s blessing, here it is…

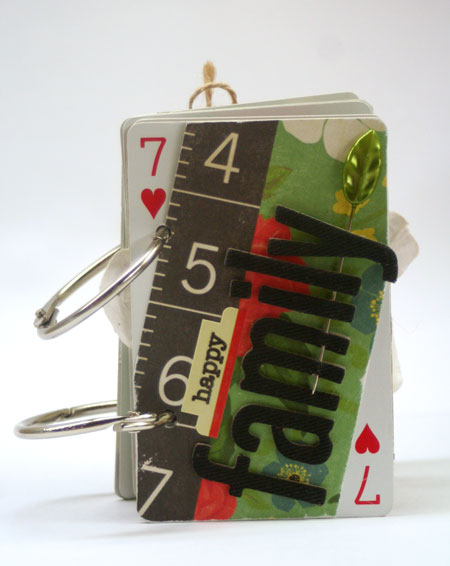
I think the thing that I really loved about creating this album is that it’s of my family but also, it’s a quirky little album using playing cards and it is so small and cute. This album uses the Echo Park Paper Co. For the Record line and it makes it really easy for everything to coordinate.

Each card was chosen for a reason. The front cover card is a 7 for the number of people in our family.

Of course, my sweet hubby just had to be the king…
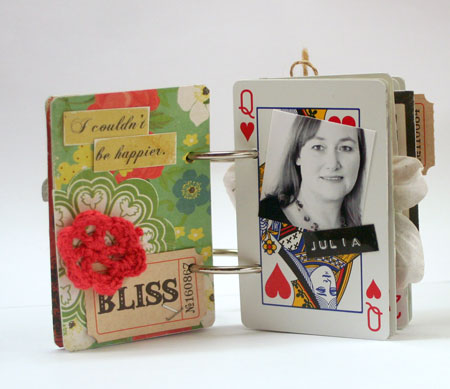
…and I’m his queen.

My oldest child, James, is the Jack.

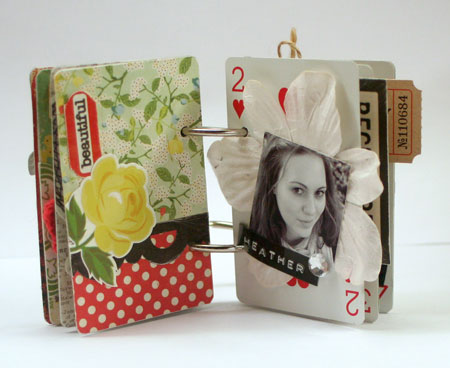
My daughter comes next and as second child, she is on the 2 of hearts.

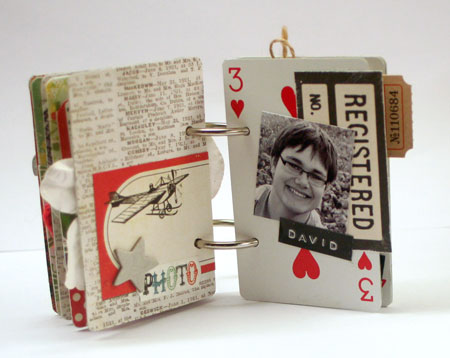
Next in line is of course, on the 3 of hearts.

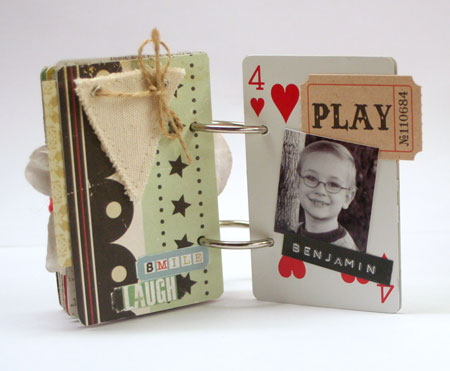
And then comes number four.

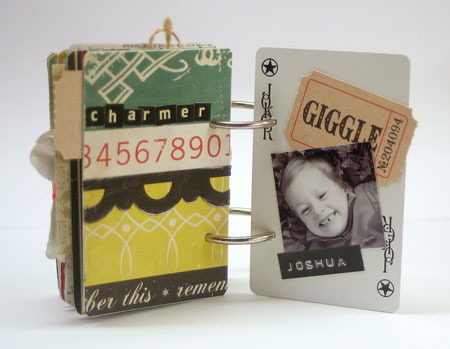
I thought about using a 5 of heart for my last child but he’s such a little bundle of personality, I just had to make him the joker.

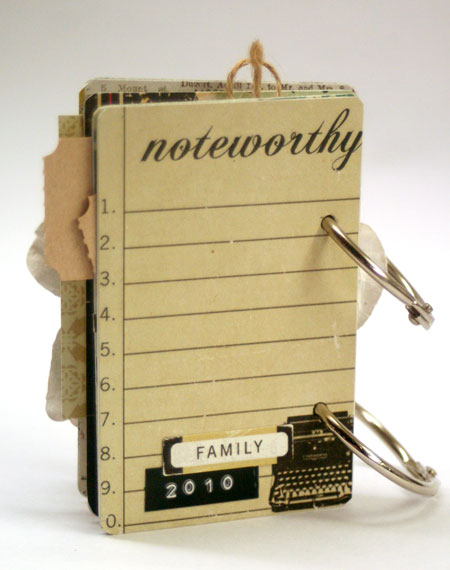
After creating my little album and covering the pages with papers, photos and embellishments, I punched holes with my Crop-a-dile and then bound it together with some clips from the office store.

I hope you’ll make your own little mini album now. This one was super quick and fun to put together and you can make the pages from almost anything.

Happy creating!

love always

One of my favorite things to do is stamp.I know I’ve said this before but the possibilities are endless. I’m always looking for fun new ways to use them.

Last spring I was excited to dream up this card and sent it off with a few others to the Paper Craft Magazine  2011 Stamping Royalty Contest. It was my favorite submission and I was so thrilled to find that Paper Craft’s liked it too. There are 15 Stamping Royalty winners, 3 in each category I believe, the all the projects are in this month’s issue of Paper Crafts Magazine.

Since this issue came out, I’ve been getting a few e-mails on just how to create this card. I thought I’d share the full instructions here as sometimes the ones in print often get edited due to space.

Instructions:

  1. Adhere Eclipse Tape to scrap of cardstock and die cut with bird die. The cardstock you can use on another project, it just helps if you have something to stick the tape to when die cutting.
  2. Adhere the die-cut Eclipse Tape to your card front. You want the piece with the negative shape of the bird.
  3. Stamp the definition stamp over the eclipse tape and then remove masking. You should be left with a stamped text bird image.
  4. Cover the stamped bird with the OTHER piece of masking material. Mist card front with white mist spray and allow to dry. Remove mask. Your bird is now complete.
  5. Stamp heart and cut out. Adhere along with knotted twine.
  6. Finish the design by stamping the sentiment.

Now if you still can’t figure it out…don’t worry. I’m going to be writing a tutorial on this technique making a similar card so that you can follow along pictorially. I’m hoping to have it done for tomorrow or Saturday so stay tuned. Hmmm… how about a holiday version? That may be fun!

Supplies:


Additional supplies: Mr. Huey’s White Mist by Studio Calico, twine

Have a beautiful day!

floral design

Everything is blooming these days.

I think June just may be my favorite time of year.  A summer of possibilities is on the horizon. My favorite perennials are blooming riotously. Beautiful!

Flowers in the house are beautiful but I have to tell you…I can’t arrange them to save my life. I can do an arrangement of one. Just one bloom.

Hey! It’s elegant that way, right?

So I’ll never be a floral designer but that’s OK. I’ll stick with arranging paper flowers. They are much more forgiving, they don’t wither and I can even create them myself.

How about a fun tissue paper flower on top of a little altered box? It’s created with the Tattered Florals Die and layers and layers of tissue paper. Mist with Glimmer Mist and then scrunch it up. Sweet & shabby.

Have you seen the latest Paper Crafts Magazine issue? The July/August 2011 issue. This project was published in it for the Creative Die Cuts feature. It’s a fabulous issue chock full of great ideas. If you like creating your own embellishments, you’ve GOT to check it out. Find it at your local craft store or bookstore or order direct on-line here.

Take time to smell the flowers…

a card creation

One of my very favorite magazines each year is Paper Crafts Card Creations. It’s totally packed with fabulous cards and inspiration that span every occasion you can imagine. This magazine hit the newsstands yesterday and it seriously lives up to all my expectations.

I’m so excited to have a few cards in this issue. My very favorite was shared yesterday on Paper Crafts Connection and so I’ll share my second favorite here with you today. It uses the sweetest fabric image from Crafty Secrets and I love the soft vintage look.

Supplies: Brushed Corduroy Distress Ink by Ranger, Fabric Scrap by Crafty Secrets, leaves by Prima, sewing machine, twine, Vintage Style Sew On Button by Jenni Bowlin, Safety Pin by Tim Holtz

Happy creating!

Canvas Love

Canvas is such a great surface to work with. Pretty much anything you can do with paper, you can do with canvas.

Maya Road creates the most fabulous canvas albums that make unique mini albums. But why not take them apart? You can use them for so much more.

I’m super excited about the new Paper Crafts Magazine special issue, 350 Cards & Gifts. It arrived in my mailbox last week and I’ve been sitting down and enjoying all the wonderful ideas and possibilities. It’s chock-full of fabulous gift ideas. You’ll love it!

You’ll find one of my favorite projects from this issue below. I’ve used a couple Canvas Banner Maya Road albums as the base for it.

For a quick photo op, I just tied it on the front of an old dresser but it’s going to be hanging in my entryway to welcome people in.

Don’t you love how using the canvas album as a base makes it super easy to create? This banner uses the Cosmo Cricket Circa 1934 line for a classic look.

Quick Tip: Cut out letters with a digital craft cutter for quick letters in any size you want. I’ve used the Silhouette here.

It’s always so difficult to photograph a banner for blogland so here’s a closeup.

Happy creating!