Category Archives: Maya Road

stamps and a b c’s

Stamped sentiment are wonderful aren’t they? You can use them over and over and over again. But what happens when you don’t have that perfect stamp to say what you mean?

How about an alphabet stamp set? You can use it unlimited times and create an unlimited amount of phrases for any occasion.

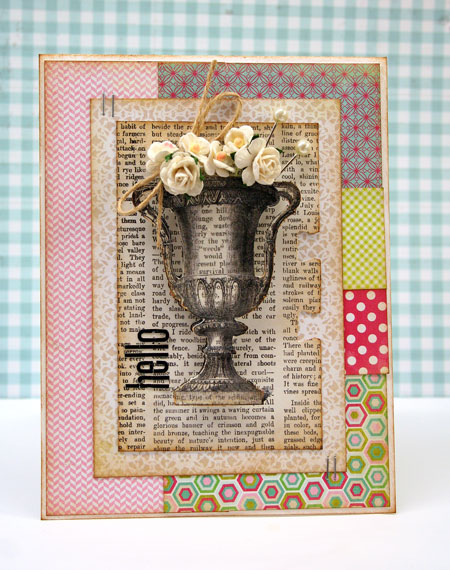
Today I’ve create a couple cards featuring alphabet stamp sentiments. I’m sharing the first with you here but you can find them both on the Maya Road Blog.

Quick Tip: Line up your alphabet letters on a clear acrylic block and stamp on scrap paper before committing to your project. That way you’ll make sure all the letters are lined up just the way you want them.

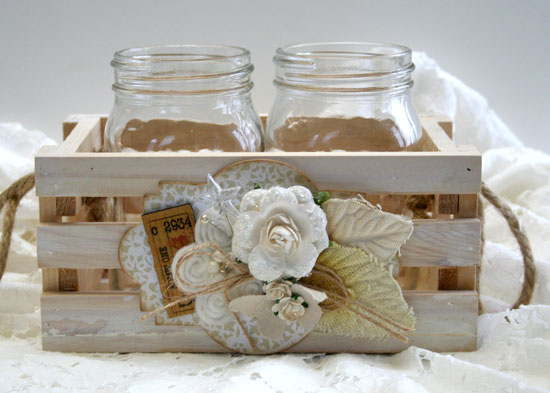
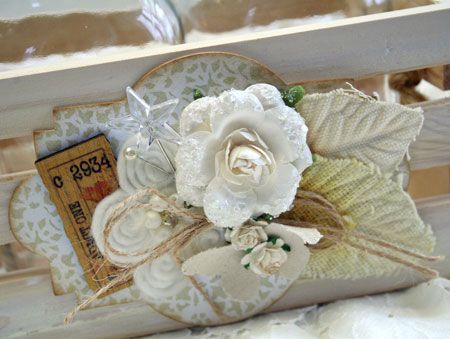
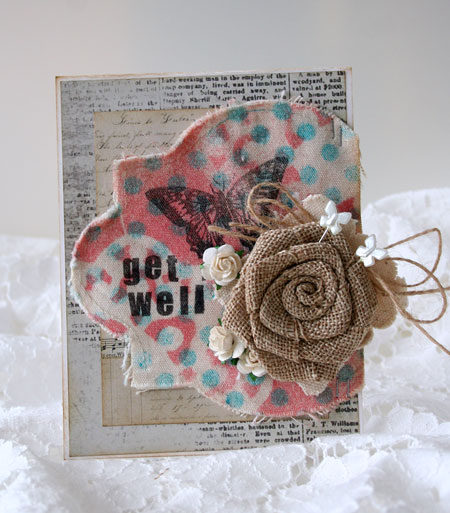
Once again I’m stamping on canvas. This was a page from a Maya Road canvas mini album. It’s been first misted with Maya Mists and the patterns are created by using the Maya Road Die Cut Kraft Doilies as a mask and then misting in blue over a Crafter’s Workshop Swiss Dot template.

Supplies:

Have a beautiful day!

open a window…a window card tutorial

There is something fun and unique about a window card. I love being able to peek inside a card window and get a little glimpse of what is to come.

So how about a window card using chipboard windows? I’m excited to share my sweet and shabby window card featuring Maya Road Chipboard. I  think the window boxes full of pretty blooms are my favorite part.

To help you recreate this card, I’ve put together a video tutorial to share with you. It’s featured today on the Maya Road blog so stop by and check it out.

Happy creating!

Circle Celebration

It’s been a while since I’ve created a layout. It’s hard to find the time to create them but when I’m done, I always wish I could make them more often. Scrapbooking is how I got into paper crafting and it will always call my name.

Recently we celebrated my “baby’s” 7th birthday. I’m so thankful for these days. He’s growing up, telling jokes, reading and broadening his horizons but I still get hugs and kisses, and the biggest thrill for him is for me to come on his school field trips. I know this isn’t going to last much longer so I’m hanging onto each sweet moment and tucking it away in my heart.

This fun layout features lots of prints and patterns from the Double Dutch line by Lily Bee Design. I’ve tied all the busy prints, colors and patterns together by punching them all with a 2.5″ circle punch.

Today I’m sharing this layout on the Lily Bee blog with additional photos. Stop by and say hello if you have the time.

Supplies:

Remember to celebrate each day…

Shabby Summer Centerpiece

I love paper crafting but I love using my supplies for more than just cards and layouts. Altering things around the house to make something new and unique makes for some fun projects. It’s a nice change of pace and today I’m sharing an altered wood crate basket that will add a fun shabby look to my kitchen table this summer.

I found this little wood crate on the top shelf in my craft cupboard just holding a bunch of odds and ends. I’m betting that some of you have see this crate before and maybe even have one of your own. It was an old Prima crate that held milk bottles of Got Flowers. My bottles have long since disappeared so two mason jars make fun little vases to bring the beautiful outdoors inside.

The wood crate as been given a white washed look by dabbing on some Picket Fence Distress Stain to all the wood surfaces. Because I’ll be changing up the flowers in the jars all summer long (gotta love those perennials), I’ve kept the accent soft, pretty and neutral so colors won’t clash.

To make the embellishment, I’ve covered some chipboard with patterned paper and then die cut it. By placing an XXL Glue Dot® onto the center of the panel, it makes a super easy way to cluster embellishments all on one adhesive. It also helps to focus them all into one place.


Last week my peonies were blooming, so here’s the top view with a pretty blossom. I have some roses about bloom so they’ll be next on my table. Can’t wait.

Totally off topic for paper crafting…does anyone have favorite easy-care roses? I’m looking for some new varieties that are hardy for a Canadian climate. One of my recent faves has been The Fairy which keeps blooming all season long.

Supplies:

I wrote this blog post while participating on the Glue Dots® design team.
Happy creating!

Fussy Cut Hello

Some of my favorite products to design with are journaling cards. They are such great little accent pieces with so many possibilies. While they were originally designed for scrapbooking layouts, I love using them on card designs.

Today’s design is one I’ve had in my head since I designed the Victoria Park index cards. I hope you like it…


Fussy cutting is an easy and fun technique using patterned paper and you can also do it with journaling cards. All you need for a popped-up fussy cut image is two of the same cards with an easily defined image. This image was cut out with tiny scissors and a Fingertip Craft Knife.

After cutting out the image, I adhered it with dimensional foam adhesive  and filled the vase with some sweet little flowers. To finish it off I brushed on a thin coat of Rock Candy Distress Crackle Paint to add some shine and a finely crackled texture.

I’ve been busy creating projects using the Lily Bee Design Index Journaling Cards along with some other Lily Bee Designers. Join us today on the Lily Bee Blog for some more journaling card inspiration!


Supplies:

Happy creating!

Gingham Congrats

Yesterday morning I was excited to be off to a bridal shower brunch. The daughter of one of my best friends is getting married this summer. Having already purchased the gift, a large collection of kitchen supplies in turquoise and green, it was easy to come up with a coordinating color scheme for the accompanying card. I had so much fun with the colors on this design, I know I’ll be pairing them up again.

Here’s the color combo if you’re interested…

Quick Tip: Lining up a perfectly horizontal sentiment is easy on lined, striped or gingham papers. An acrylic block with an etched grid on it paired up with these papers makes for perfect stamping.

My leaves are simply created with some felt cut with pinking shears.

Supplies:

Have a beautiful day!

classics for dad

June is always a wonderful month. It brings summer, school holidays, trips to the beach and Father’s Day. Today I have a gift project for dear old dad.

Is it just me or does anyone else find dads hard to create or buy for? I always find it so tricky. The other day I was going through my stash looking for some inspiration and came across this metal cd tin. Sorry…I’ve had it a while and I can’t remember where it came from but I’m sure a Google search would help you come up with a source. My guy is a music lover so I thought it would be fun to put all his favorites on a CD or two or three. His own personal music mix. My daughter actually made me up a CD while she was away at school this past year and I loved the gift.

Because this tin will hold classics, I went with a classic vintage style to alter the tin. The edges are wrapped with Tissue Tape and give it a fun feel.

The embellishments are made up of papers from the Boarding Pass line by October Afternoon and some chipboard accent pieces that I’ve covered or stained. Adhering them is easy with Craft Glue Dots®. Glue Dots® work great even on tough surfaces like metal and wood.

Supplies:

I wrote this blog post while participating on the Glue Dots® design team.
Happy creating!