Category Archives: Holiday

snow much

How about a little snow? It’s a great way to kick off the snowy month of December! I have another snow-themed project to share today and this time it’s a card. I love snowflakes on a clean and simple white card.

Yesterday I shared an ornament project for the latest Avocado Arts Brrr! and the Snow Peeps stamp set and this card uses the same set. I’ve gone for a totally different look using one of my favorite stamping techniques – reverse masking.

To create this card I first die cut a piece of Eclipse tape using a Sizzix die and then blocked off the outside edges of the card.  By stamping my snowflakes inside the negative shape area and then sponging the edges I get a beautiful shape and defined edges without the bulk of another layer.

Once again, some of the Avocado Arts team is sharing their creative takes on this set. Stop by for some great inspiration…


Thanks snow much for stopping by!

deck the halls

It’s that time of year again…

Time to deck the halls and make everything look so warm and festive. How about a little paper crafted decor piece that looks like a present but started off as a humble block of wood?

To create this fun block, I had hubby cut me an 8″ piece off an old 4×4″ piece of lumber we had on hand. I adhered some Lily Bee Jingle Patterned paper on each side of the wood block to add some color and then tied it with some hem tape ribbon to look like a present. To hold the ribbon exactly where I wanted it, I placed a Craft Glue Dot® under the bow and the initial starting point. This is a great gift wrapping tip as well!

My Poinsettia is made up of 9 leaves die cut with the Tattered Leaves die with their stems cut off. I formed each leaf with my hand or rolled it around a pencil for dimension. To put it together, Craft Glue Dots® work perfectly. The Glue Dots® also are rolled and placed into the center of the flower and then sprinkled with silver glass glitter for a festive look.


I wrote this blog post while participating on the Glue Dots design team.
Happy creating!

the greatest gift…

In all the hustle and bustle of the holidays, I always like to take the time to remember the real meaning of Christmas.

Today I have an inspirational Christmas card to share with you and a fun new acrylic block grid technique. I hope you’ll join me today in the CLASSroom for the tutorial.

Happy Friday!


ho ho ho

ho, ho, ho…I’m back with another holiday card design. I’m lovin’ this little Santa and his sleigh stamp and making it into a snowglobe was so sweet.

Today I’m back in the CLASSroom with this project so why not stop by and join me?

Have a fabulous weekend!

double masking…a tutorial

Last week I promised you a tutorial and finally, here it is! Thanks so much for your patience on the wait. You know how it is….”the best laid plans of mice and men”. I had great plans for last week but life happened. I did really enjoy having my daughter home for the week and I think you’ll agree with me that family comes first.

If you’re just joining me and wondering about the tutorial, I created a double masking technique for a card that I submitted to Stamping Royalty 2011. You can find the original design here. I’ve had some requests on how to do this and so I decided to recreate the original card but with a holiday spin on it.

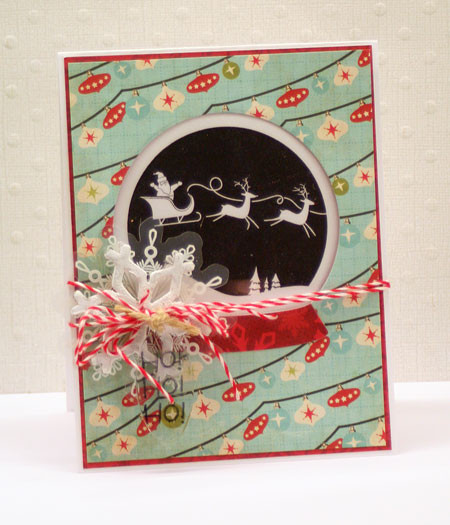
Double Masked Ornament Card

As you can see, the above card uses the exact same technique. Double Masking is great for using background stamps and also for using for your dies for more than just die cuts.

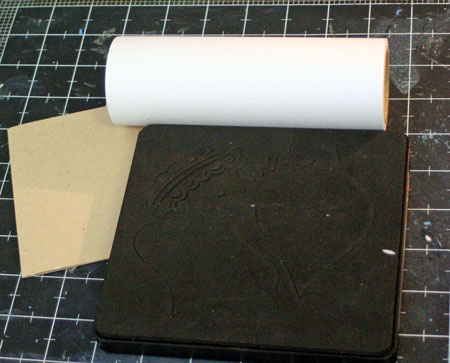
To start off with you’ll need your die (I’m using the Sizzix Ornaments #3 die) some Eclipse Tape or other masking material and your card base and some stamps and inks.

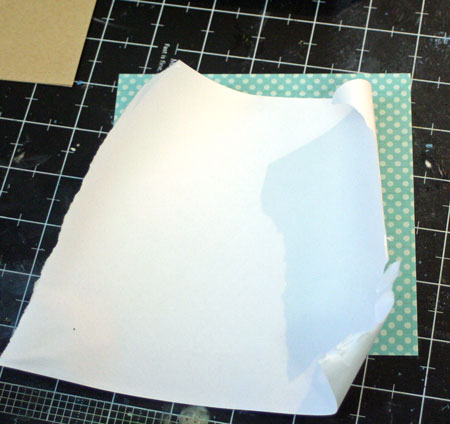
Eclipse Tape is a super light paper with a low tack back are is high on my favorites list for very easy and precise masking. To die cut it, I placed it on a piece of patterned paper so that it doesn’t stick to the die. You can use scraps or whatever you have on hand. I just decided to use this sweet dotted paper and keep the die cuts for another project. Multi-tasking at its best!

The the paper and Eclipse Tape through your die cut machine.

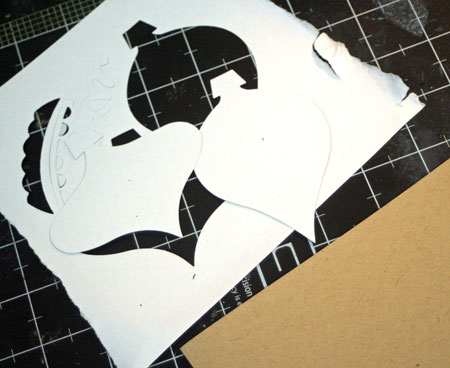
You’ll end up with both the reverse and positive images. Don’t throw anything away. You’ll need both pieces.

Place your die cut mask onto your card where you wish to stamp your image. As you can see, this die cuts more than one ornament at once. I just cover up those extra space with more tape so that I don’t stamp them by mistake.

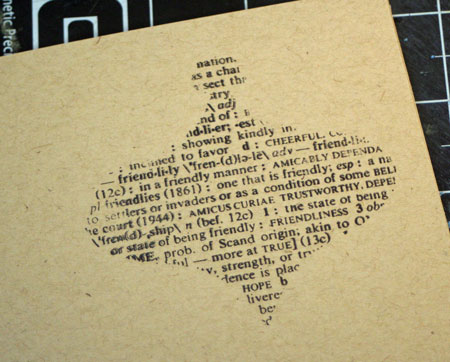
Stamp your background stamp onto the card and remove the mask. You’ll end up with something like this.

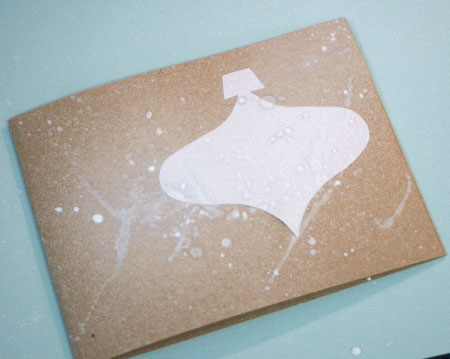
Next take the positive piece of mask and place it OVER the stamping.

Mist area around ornament. I’ve used Mr. Huey’s White Mist by Studio Calico.

Remove the mask and you are done double masking your design.

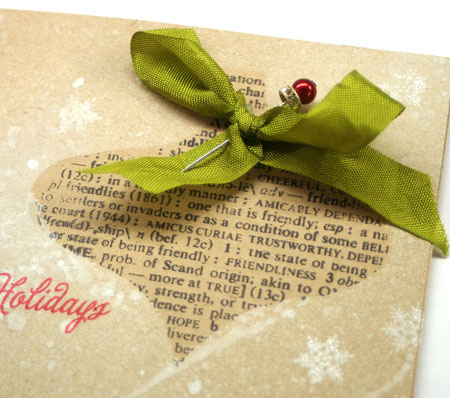
To finish it off, stamp the sentiment and add a few embellishments to make your card sparkle.

Supplies:

merry & bright

I got a shock the other day when looking at the calendar. It’s almost November! I know this probably isn’t a huge newsflash or anything but I guess I was just shocked at how quickly time is flying by. Didn’t school just start?

November means that it’s almost December and Christmas is just around the corner. So I looked at the calendar and do you know what? Just 54 more days until Christmas! Good job I’m sitting down. Good thing I’ve already started my Christmas cards! Like this one…

This card uses the new Avocado Arts Bring on the Holiday Cheer Stamp Set. I had a little fun thinking outside the box with this stamp set. What you can’t see in the above photo is that the stamp set does NOT have a solid tree stamp.It’s actually just the outline.

What I did to get the solid image is to actually put the stamp WRONG-side up on the acrylic block and then ink it up. Then I carefully peeled the stamp off the block and placed it onto my paper. To get a good impression, you need to press the stamp into the paper with your finger to make sure that all the areas stamp fully. Try it out on scrap paper first. It takes a few tries to get the hang of it.


To add my glitter to the tree garland, I simply traced the lines with a glue pen and then sprinkled on the glitter. Super quick and adds a lot of shine.

Looking for more fun and festive ideas with this set? Be sure to check out these Avocado Arts DT designers’ posts…


Supplies:


Happy holiday stamping!

a very merry christmas

It’s Christmas Eve and there is always so much to do. Today I’m busy baking pies, cleaning and getting the last few presents wrapped. The little boys are especially wound up as they can’t wait for morning to arrive. I’m looking forward to seeing their faces when they open their gifts. Priceless.

I will let them open one gift this evening though. It’s part of our Christmas Eve tradition, just as reading the story of the birth of Christ from the Bible is. I want to be sure that we all remember just what we are celebrating. Christmas is a beautiful time, a gift of hope.

Sleigh Ride Card

Here’s my last Christmas card of the year that I created to share with you today. I had so much fun creating it with lots of layers and details, distressing and stamping. The “snowy” accents are distress crackle paint and Melissa Frances Mica Flakes.

Supplies: cardstock by Bazzill, Father Christmas 6×6 paper pad & Father Christmas Punch Outs by Pink Paislee, felt Pearl Blossoms, Kraft Envelope, Chipboard Snowflakes and Pearl Trinket Pin by Maya Road, twine, Sanding Block and Tiny Attacher by Advantus, Picket Fence Distress Crackle Paint, Mica Flakes by Melissa Frances, Jet Black Archival Ink by Ranger, Christmas Greeting Stamp set by 7 Gypsies

I just want to thank you all for stopping by each day and wish you a very happy and joyful Christmas.

Blessings to you,