Monthly Archives: June 2012

Circle Celebration

It’s been a while since I’ve created a layout. It’s hard to find the time to create them but when I’m done, I always wish I could make them more often. Scrapbooking is how I got into paper crafting and it will always call my name.

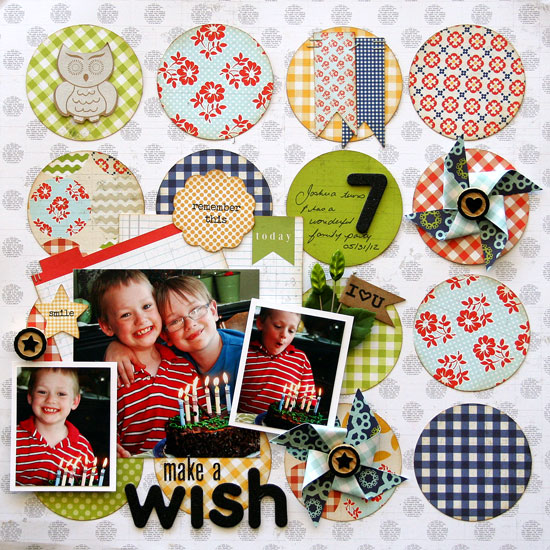
Recently we celebrated my “baby’s” 7th birthday. I’m so thankful for these days. He’s growing up, telling jokes, reading and broadening his horizons but I still get hugs and kisses, and the biggest thrill for him is for me to come on his school field trips. I know this isn’t going to last much longer so I’m hanging onto each sweet moment and tucking it away in my heart.

This fun layout features lots of prints and patterns from the Double Dutch line by Lily Bee Design. I’ve tied all the busy prints, colors and patterns together by punching them all with a 2.5″ circle punch.

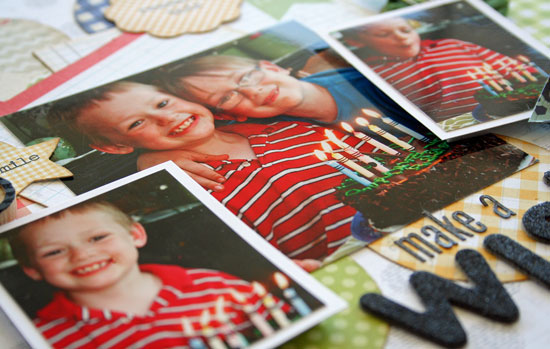
Today I’m sharing this layout on the Lily Bee blog with additional photos. Stop by and say hello if you have the time.

Supplies:

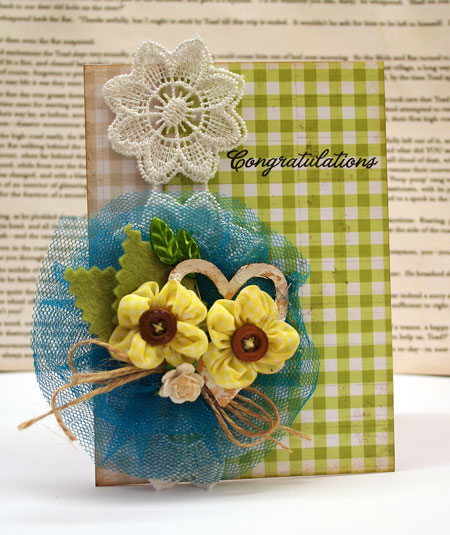
Remember to celebrate each day…

soft and green

Life seems to be madly spiraling out of control these days. Sometimes I feel that it’s all I can do to hang on by my fingernails. I love June but it always seems to be a crazy month. My children don’t finish school until the end of the month but there are concerts and field trips, exams and end of year projects and of course, CHA is right around the corner as well. Each day brings a new challenge.

These days being what they are, I haven’t had time to create anything new that I can share quite yet. Taking a break from my to do list, I looked through some blog post drafts and found this card from Spring 2011 that I STILL hadn’t shared. How can that be?!

I hope you enjoy it and just wanted to pop in and say everything is fine, just busy and I hope to be back creating soon.

Thanks for stopping by!

Frosted Glass…a technique

Frosted glass is such a great look.It reminds me of sea glass and is just so pretty. The translucence makes for such a dreamy element.

Did you know you can get a frosted glass look using acrylic embellishments and some simple stamping? Join me today in the CLASSroom as I share step outs and a tutorial on this technique. It’s a very cool look for you to try as temperatures rise outdoors.

Have a fabulous weekend!

Shabby Summer Centerpiece

I love paper crafting but I love using my supplies for more than just cards and layouts. Altering things around the house to make something new and unique makes for some fun projects. It’s a nice change of pace and today I’m sharing an altered wood crate basket that will add a fun shabby look to my kitchen table this summer.

I found this little wood crate on the top shelf in my craft cupboard just holding a bunch of odds and ends. I’m betting that some of you have see this crate before and maybe even have one of your own. It was an old Prima crate that held milk bottles of Got Flowers. My bottles have long since disappeared so two mason jars make fun little vases to bring the beautiful outdoors inside.

The wood crate as been given a white washed look by dabbing on some Picket Fence Distress Stain to all the wood surfaces. Because I’ll be changing up the flowers in the jars all summer long (gotta love those perennials), I’ve kept the accent soft, pretty and neutral so colors won’t clash.

To make the embellishment, I’ve covered some chipboard with patterned paper and then die cut it. By placing an XXL Glue Dot® onto the center of the panel, it makes a super easy way to cluster embellishments all on one adhesive. It also helps to focus them all into one place.


Last week my peonies were blooming, so here’s the top view with a pretty blossom. I have some roses about bloom so they’ll be next on my table. Can’t wait.

Totally off topic for paper crafting…does anyone have favorite easy-care roses? I’m looking for some new varieties that are hardy for a Canadian climate. One of my recent faves has been The Fairy which keeps blooming all season long.

Supplies:

I wrote this blog post while participating on the Glue Dots® design team.
Happy creating!

Classic Stamping

This morning I was feeling a little nostalgic and decided to turn my creativity to some classic stamping. A few years ago, I was quite addicted to stamping challenges as they are such a great way to jump start your creativity. Checking out the daily challenges at Splitcoaststampers.com was something I used to do daily but in the craziness of life, it’s been a very long time since I’ve done that.

Tuesday’s are color challenge day there and once I saw the color combo, I knew I’d find some time to play along. You can find it here if you’re interested in playing along.

One of the stamps that I’ve been wanting to use worked perfectly with today’s color challenge. It was easy to ink up with a couple dye markers, the yellow is a distress ink marker in Mustard Seed and the leaves are a Stampin Up marker, Certainly Celery. This stamp makes a beautiful focal image but it always looks lovely as a background. Did you notice I’d stamped it again tone on tone on the colored cardstock?

Supplies: Pool Party Cardstock and Dye Ink, Certainly Celery Marker by Stamping Up, also…

Happy stamping!

Fussy Cut Hello

Some of my favorite products to design with are journaling cards. They are such great little accent pieces with so many possibilies. While they were originally designed for scrapbooking layouts, I love using them on card designs.

Today’s design is one I’ve had in my head since I designed the Victoria Park index cards. I hope you like it…


Fussy cutting is an easy and fun technique using patterned paper and you can also do it with journaling cards. All you need for a popped-up fussy cut image is two of the same cards with an easily defined image. This image was cut out with tiny scissors and a Fingertip Craft Knife.

After cutting out the image, I adhered it with dimensional foam adhesive  and filled the vase with some sweet little flowers. To finish it off I brushed on a thin coat of Rock Candy Distress Crackle Paint to add some shine and a finely crackled texture.

I’ve been busy creating projects using the Lily Bee Design Index Journaling Cards along with some other Lily Bee Designers. Join us today on the Lily Bee Blog for some more journaling card inspiration!


Supplies:

Happy creating!

Gingham Congrats

Yesterday morning I was excited to be off to a bridal shower brunch. The daughter of one of my best friends is getting married this summer. Having already purchased the gift, a large collection of kitchen supplies in turquoise and green, it was easy to come up with a coordinating color scheme for the accompanying card. I had so much fun with the colors on this design, I know I’ll be pairing them up again.

Here’s the color combo if you’re interested…

Quick Tip: Lining up a perfectly horizontal sentiment is easy on lined, striped or gingham papers. An acrylic block with an etched grid on it paired up with these papers makes for perfect stamping.

My leaves are simply created with some felt cut with pinking shears.

Supplies:

Have a beautiful day!