Monthly Archives: May 2012

happy birthday sweet boy

Today is a special day in our house. We’re celebrating my youngest’s birthday and he’s turning seven. How time flies! He’s a charmer, has aspirations to be the greatest artist in the world, thankfully still likes to snuggle and asked for an iPhone for his birthday. Just so you know…he’s NOT getting one. Happy birthday sweet boy! Don’t grow up too fast!

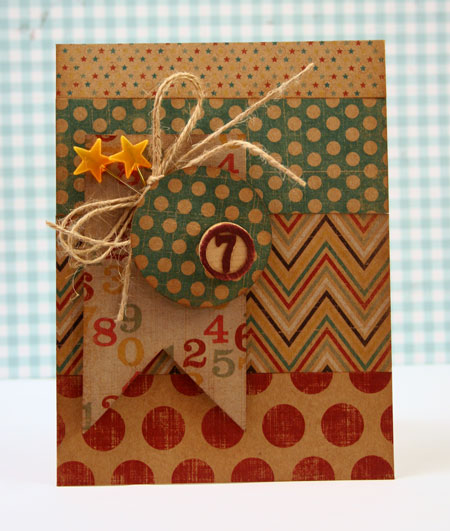
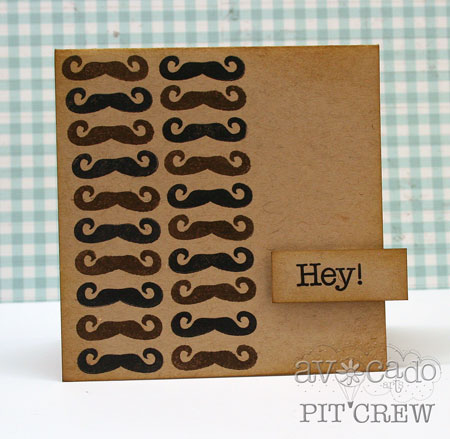
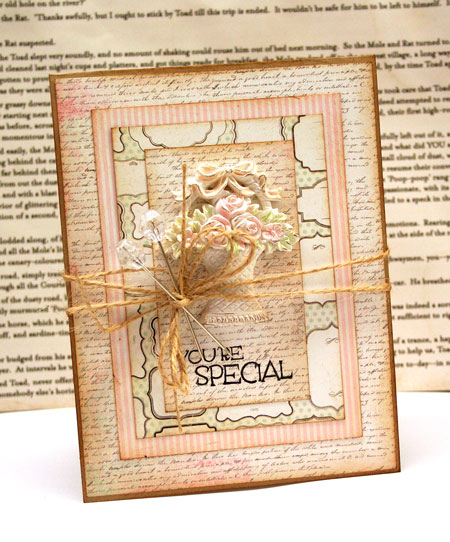
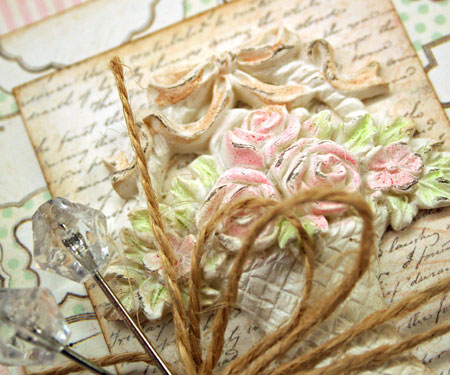
I cracked open a new pad of paper for this card and oh my, I have a new paper crush. It’s a kraft paper line by My Mind’s Eye and it’s perfect for parties or guys or anything. You know how I feel about Kraft and how I feel about patterned paper. Putting them both together….sigh.

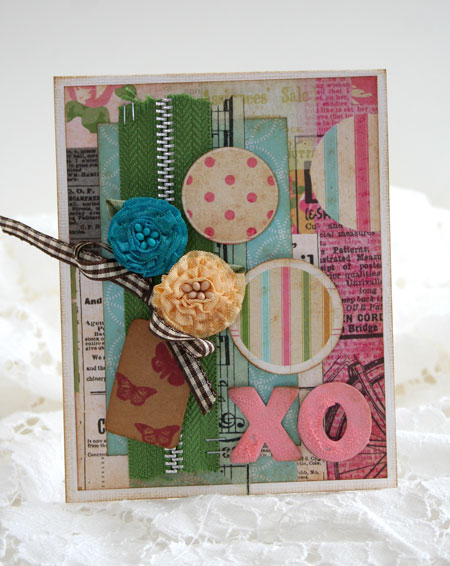
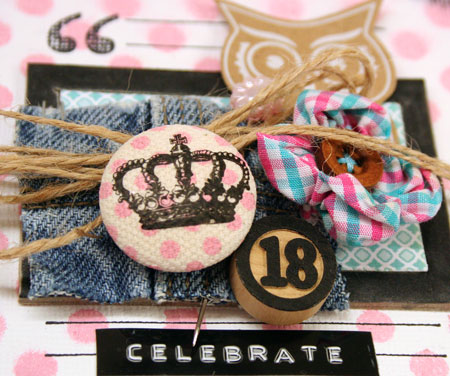
Quick Tip: Draw your eyes to the focal point of the design using diagonals. You can’t see the ends of the trinket pins in this design but your eye follows the line to the focal point (the 7 bingo piece) anyway.

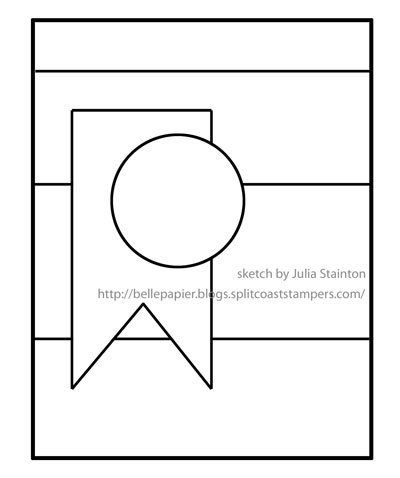
This is a simple sketch but a fun one. I wanted to remember it so I drew it up for myself. If you’d like to play with it, feel free. It’s great for using up scraps and playing around with lots of pattern.

Since it’s been a while since I’ve shared any photos, here’s a picture of him with his sister from the long weekend…

The water up here is still … ummmmm…brisk but we’re hearty Canadians, right?

Supplies:

Now I’m off to finish up the birthday dinner and wrap a few presents.

Hope you find something to celebrate today…

for the man

With four boys and my man in the house, my daughter and I can be seriously outnumbered. I’m surprised with the number ratio around here that I don’t’ create more masculine card designs but perhaps that is why I mostly design in a more feminine style. Things need balancing out.

Be that as it may, today’s card design is definitely for the guys. It plays up on the popular mustache trend for a simple and stylish design. No ruffles and do-dads for my manly men. 😉

These fun stamps are from the latest Avocado Arts stamp set, Let’s Catch Up. It’s a fun summertime set that you’ll love but it’s also a really get set to create with for the men in your life.

Quick Tip: vary the mustache colors for make it visually more interesting.

Today some of the Avocado Arts Design Team are sharing their designs using this same set. I always love their creative approaches so stop by and check them out for some added inspiration…

Supplies:

Happy stamping!

xo Maya Road

This week is a fun one at Maya Road as we partner up with Paper Crafter’s Library for a fun blog swap.

With this blog swap came a fun challenge to use 10 Maya Road products. They just couldn’t be any product but a specific 10. Wow! Much more difficult than I thought and I couldn’t use any trinket pins as they weren’t included on the list. You know how addicted I am to trinket pins!

A Bit About Paper Crafter’s Library

The world of paper crafting is HUGE! Whether you are a beginner, or you’ve been creating for years, the sheer number of different products, tools, techniques and project ideas can be overwhelming.After spending 6 years helping thousands of paper crafters around the world become more successful in the creative space through her series of kits, digital tutorials and online classes, Andrea Walford began looking for a new approach to education. In 2011 she launched Paper Crafter’s Library – the first, and still to this day, only website that provides an all-in-one learning solution for paper crafters. With almost 800 videos currently in their library and 4-5 new videos added each week, Paper Crafter’s Library offers comprehensive training on products, tools, techniques, and project ideas. From beginner through to advanced, whether your interest is in stamping, card making, scrapbooking, creating 3D items or altered art – you’ll find all the resources you need to navigate the world of paper crafting in ONE place, organized and indexed so that it’s quick and easy to find.

Stop by the Maya Road DT Blog today for more details and projects using these products and Paper Crafts Library as well. We have some great giveaways going on this week!

Thanks for stopping by!

seamless stamping

Layers, layers, layers. I love layers when I design.

Ever tried getting seamless stamped layers for an elegant card design? It’s an easy technique that makes a really interesting card design. Today I’m in the CLASSroom sharing how to create seamless tiers on your card designs. I hope you’ll join me for the tutorial and step outs!

Have a fabulous weekend and happy Memorial Day to my American friends!

fun & funky

A fun little random post today. I’m up to my eyeballs in work right now but I hate having too many days go by without saying hello. We had a wonderful long weekend with my family this past weekend. It feels like summer has finally arrived and we made the most of it. Of course you always pay for a long weekend and this has been one of my busiest weeks in a long time. I’ve created lots of fun projects for a later date though so it’s all good.

I’m sure you can tell that this is another one of my random-clean-up-the-desk cards. I am currently addicted to Crafter’s Workshop templates. They are so fabulous for misting backgrounds and this dot template is a classic for sure.

Here’s a closeup of the random mix and match of goodies…rub-ons, old denim jeans, bingo numbers, stamping, twine, die cuts and chipboard.

Quick Tip: By keeping the elements all clustered together it adds cohesiveness to the design.

Supplies:


Thanks for stopping by!

Shabby Elegance

We all have special people in our lives. For me one of them is my aunt, my mom’s sister. Growing up she was like a second mom and she still is a special part of our family. This card was designed for her.

The look I was going for with this card was somewhere between Shabby Chic and Elegant. I’m loving the soft look with the simple classic design.

Design Note: The beautiful pink and cream striped paper was running horizontal in the paper pad. A horizontal stripe is beautiful and I would have loved to use it that way. Why didn’t I? Note that it’s layered on top of the script paper which has a very horizontal visual element to it.  It would have been difficult to look at if both patterns were so similar right beside each other. By turning it 90°, it was a simple change for a better design.

My favorite part of this card design was playing around with the Melissa Frances resin applique. I’ve been hoarding quite a few of them for quite some time. Enough is enough…time to stop hoarding and using these beauties.

The white applique looks positively stunning in it’s pure white original format but I decided to try adding a subtle bit of color to it. I chose a few dye markers that I had on hand in some very subtle colors. The lighter the better in this case as you don’t want to take away from the beauty of this embellishment. Simply use the brush end of the marker to add in small bits of color to highlight parts of the element. Allow to dry for a few minutes before adhering to prevent smearing the ink.

Supplies:

Have a beautiful day!

off the cuff…

Canvas again. You know how I love it!

Ever seen the Maya Road Alterable Canvas Cuff? It’s a super cute cuff/bracelet that you can alter and wear. A very cool product idea.

Well, I wanted to create with one but I have to admit, I’m a pretty plain jane type of gal. It’s very rare that I wear anything around my wrists, even my watch. I really wanted to play with that cuff anyway so I went ahead and ordered it as an idea started spinning in my mind.

The lovely Alterable Canvas Cuff also makes a very lovely needle case. I’m quite tickled with how it turned out. My needles are pretty, safe and very easy to find.

A look at all the pretties decorating it…

…and a look at the back showing the masking and misting.

I’m sharing this project today on the Maya Road Design Team blog.You can see more photos, see the inside and read the project steps.

Oh…and if you love Maya Road as much as I do…they are releasing their Early Summer line. Gasp! It’s beautiful! Check it out!

PS There’s a giveaway! Seems to be a great week for those!

Supplies:

Have a fabulous weekend!