Monthly Archives: December 2011

holidays: wrapped up

Three more sleeps!

I’m making my list and checking it twice. Not to find out who is naughty or nice but to make sure I’m going to get everything done on time! I think it will all pull together in the end.

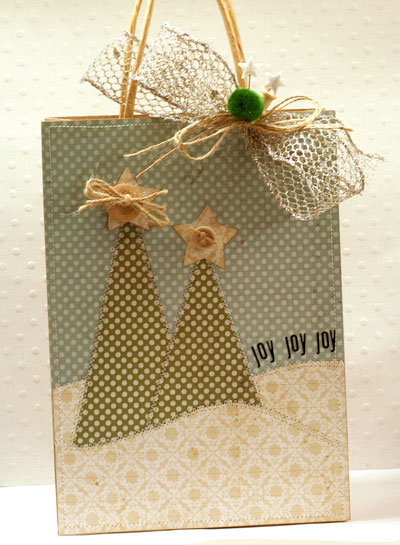
Yesterday I put together this paper crafted holiday gift bag to finish up my Christmas wrapping. I thought it would make a quick and easy but special way to wrap up a gift.

This project marks Day 22 of Holiday Inspiration on the Lily Bee Blog. Have you been stopping by to see all the fabulous ideas. I have quite a few marked off to try.

Supplies:

additional supplies: kraft gift bag, sewing machine, holiday ribbon
Wishing you the gifts of love, joy and peace this holiday season and for the year to come!

a little more christmas

Just four more sleeps until Christmas! I’m a little behind this year and I’m still trying to get out my Christmas cards. I’m thinking most of them will be late but better luck next year. At least my shopping and wrapping is all done.

My favorite Christmas present this year arrived home from school last night and is sleeping her exams off upstairs. Even without the snow I can really get into the holiday mood with all seven of us finally under the same roof again.

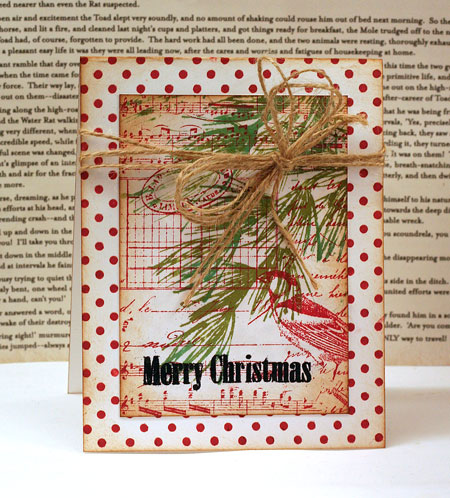
I quite forget where I saw it but a few weeks ago I came across some red and white embroidery and it inspired me to create this holiday card.  If you look closely, you’ll notice that none of the stamps except for the sentiment is from a specifically holiday set. By combining them together and choosing colors that are festive, you get a distinctly Christmas look. I love flexible stamps!

I’ve been having a fabulous time lately playing around with Distress Stains by Ranger. This card is another example of applying the stain directly to rubber and then stamping. My Pine Bough was first inked up with Peeled Paint Distress Stain and then I added in highlights of Broken China Distress Stain. Because I’ve added in the blue over the green, you get some beautiful blue spruce tones and I love the variation of the greens.

Quick Tip: When using Distress Stains or Adirondack Paint Dabbers, they have a release mechanism in the dabber. Press the dabber down onto some scrap paper to release the ink or paint flow.

Supplies:

Wishing you lots of Christmas Cheer!

what it takes…

What does it take to make the world go around?

It takes a whole lot of love, that’s what.
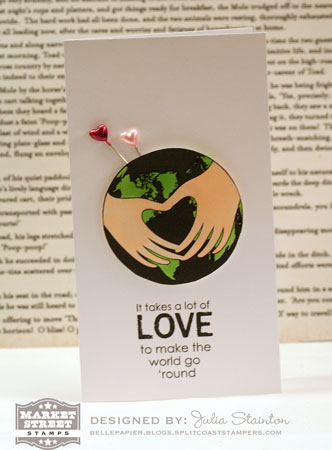
Here’s a sneak peek at a new Market Street Stamps release, It Takes Love.

I love this image and sentiment. And I can think of so many different ways to use it. What a great graphic image! For this design I’ve just stamped it simply and colored in the land and hands in Copic markers. Sometimes simple is just what you need.

Speaking of love and happiness, I couldn’t be more excited to be picking up my daughter at the train tonight. Having everyone together under the same roof again (if only for a few weeks) just has to be the best Christmas present for me this year. Girls’ lunch out is on the agenda for tomorrow. Yay!

If you’re new to Market Street Stamps, here’s how sneak peek week  works…

This month we have just three releases {we’ll call it a mini-release, ’cause why not?} so we’ll be peeking samples from each release today, tomorrow and Wednesday. We’ll have the final reveal and release on Thursday, December 22nd at 7 pm CST!
If this is the first time you’re joining us for a release week, here’s what we’re doing this month:
  • Show Sneak Peek images from our sets Monday, Tuesday and Wednesday.  Sneak peeks are scheduled for 7 pm CST.
  • On Thursday, our sets will be revealed and all the sets will go on sale at 7 pm Central Time.
  • For ONE WHOLE WEEK after that, new sets are 15% off individually or 25% off if you buy that month’s bundle (all sets in the release). Pretty sweet, huh? And we always ship within 24 hrs, and shipping is FREE over $50 every day!

You can find all the sneak peeks, contest details and release info here. Make sure you stop by to see other ideas of what you can do with this mini stamp set.

Take care and thanks for stopping by!

a little beauty

When I find myself with a little free time, I always love creating just for fun. It’s so relaxing to take a few minutes out of the hustle and bustle of the holiday preparations to totally switch gears.

For me this meant a little time to play with some new Distress Stains that I was dying to experiment with and some beautiful floral stamps.

The Distress Stains are really easy to use. They are just like a bingo dabber full of beautiful ink. The colors all coordinate perfect with the Tim Holtz Distress Inks and Distress Crackle Paint lines. Makes it so easy, doesn’t it?

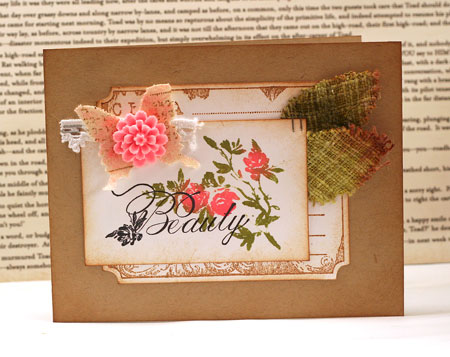
Distress stains are really great for dabbing on ink direct to the stamp. I love the watercolor look and how the colors subtly blend. To ink up this rose branch stamp I first dabbed on some Peeled Paint on the branches and leaves. I then dabbed on some Worn Lipstick Distress Stain over the flowers.  Don’t stress if it’s not perfect. It’s not supposed to be. If you’re looking for a perfectly inked look, add in your color with dye-based markers.

The little die cut canvas butterfly was also inked with distress stain…Spun Sugar for a soft and pretty color. It’s also stamped on with the background stamp to add some detail.

Quick Tip: Some of the distress stain will transfer onto your second color distress stain dabber. I dab it a few times onto some scrap paper to remove the picked up color.

Supplies:

Have a beautiful Friday!

please send some snow

Christmas always seems to sneak up on me but never so much as this year. I think it’s the lack of snow. This fall has been unseasonably warm here in Ontario. I’m used to bundling up to go Christmas shopping and watching the snow fall as I wrap my presents.
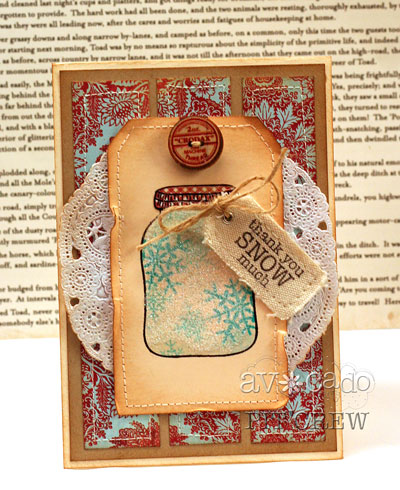
I’m hoping the gift of snow for Christmas will be one I receive this year. The thought of which was inspiration for this card.  It’s a sweet mason jar full of flurries and this project incorporates a couple stamp sets from Avocado Arts. You’ve seen the fun and sweet Brrr! and the Nerdy Snow Peeps stamp set from me before and this design also gives you a sneak peek at the upcoming Avocado Arts stamp set. I know you’re dying to know what this one is called. How does Sweet Treat Sweetie sound? Don’t you just adore the AA stamp set names?

If you haven’t guessed, the mason jar is part of the new set. To create this tag accent, I’ve first stamped the mason jar image onto the tag and then onto some Eclipse Tape. I cut out the mason jar image from the INSIDE leaving just the negative shape left for reverse masking with. Mask off the outside of the mason jar image and stamp your snowflakes inside.  A little sponging around the edges helps add a little dimension too. Next apply a thin layer of liquid glue over the image and sprinkle with a clear iridescent glitter. You don’t want to much glue or your stamping details will blur.

The Avocado Arts team have some more fun sneak peeks to share with you. Why not stop by for a little inspiration?

Supplies:

Thanks for dropping in!

The Most Wonderful Time of the Year…

It’s the most wonderful time of the year for more than one reason. While Christmas is first and foremost in my mind this time of year, I love all the new paper crafting product on the horizon.

Hero Arts is always one of the first to kick off this fun and exciting time of the year in the crafting world. This year is no exception and I’ve fallen for quite a few of the new 2012 stamps. Who am I kidding? I’d have fun with them all but I only have so many hours in the day.I can’t wait until my new stamps arrive! A little Christmas present to myself. Woo hoo!

Have you seen them yet? Ellen Hutson LLC is having a great sale on the new stamps so be sure to stop by and check them out. Hurry! It’s just from now until December 15th. Here’s the link.

Happy stamping!

Tinsel Time

It’s looking like Christmas everywhere I go now. I love all the fabulous holiday decorations. How about a little tinsel tree card to put my blog in the festive spirit as well?

This is a super simple card and I’ve created this fun tinsel tree with some fine tinsel trim from Webster’s Pages and an adhesive sheet. To create it, simply cut the adhesive sheet into a triangle shape.Remove the backing from one side of the adhesive sheet and apply your strips of tinsel trim. Once the shape is covered, press tinsel well into the adhesive sheet and then trim stray tinsel from edges. Remove other backing sheet and apply to your card.

Quick Tip: To easily cut a perfect triangle, first cut a rectangle to the size of the height and width of the base of the triangle. Mark the midpoint along the width and cut on an angle from the opposite corners to the midpoint for your equal perfect  triangle.


Supplies:

Thanks for stopping by!