Holiday goodies combine two of my very favorite things of the holidays…giving to others and enjoying some great seasonal treats. In my household, candy cane bark is a must-make candy each year and we also love to share it with others. To make it even more special this year, I’ve crafted this fun little mason jar to pretty up my gift.
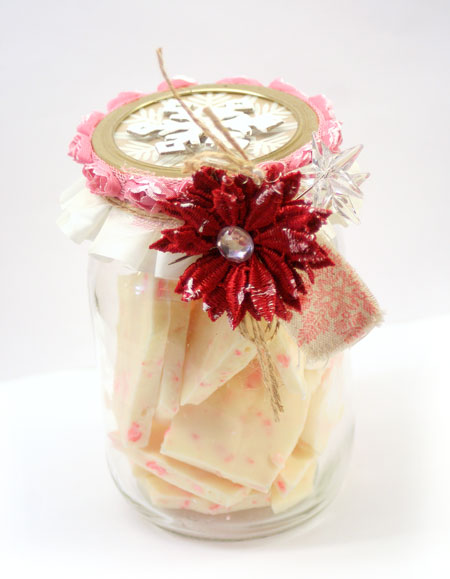 This project uses a pint-sized mason jar I had on hand and then embellished it. They are fun and quick to create and have limitless possibilities for personalizing. I love that I can put them together with some of my favorite goodies and Glue Dots® adhesives for a fast project.

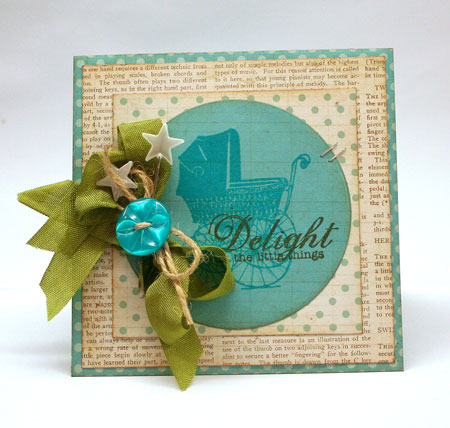
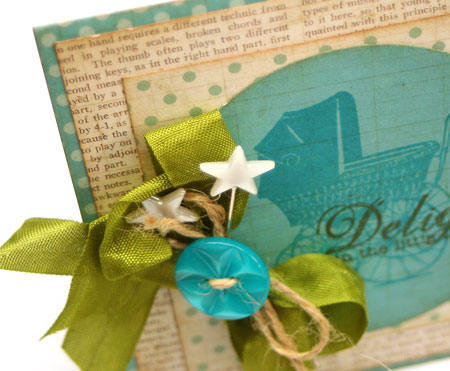
I started off my project by trimming up the mason jar ring with some sweet and frilly trims. I took my color combo straight from the goodies themselves..cream, pink and a touch of red from the candy canes.
Continuous Lines Glue Dots® are perfect for adding on trims. They are just like Craft Glue Dots® only it’s one continuous line of adhesive. I simply press the glue line onto the mason jar ring and then remove the backing. Press on your trims and you’re done.
Quick Tip: Looking to add a snowy look? Just brush on Picket Fence Distress Crackle Paint for a quick frosty feel.
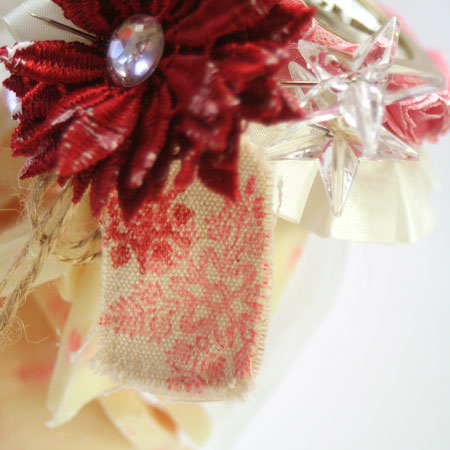
I totally have a thing right now for stamped tags. I just couldn’t resist adding this sweet canvas tag after stamping it with some little snowflakes.
Adding my flower and snowflake embellishments is easy with Craft Glue Dots®. I love how clean they are to apply and how quick it makes creating.
Candy Cane Bark Recipe
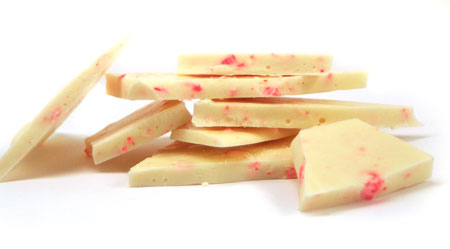
I’m not even sure you can call this a recipe. 🙂 It’s soooo easy. Place 3 cups white candy coating wafers in a quart sized glass mixing bowl. Heat in microwave on 50% power until melted. Be sure to stop at every 1 minute interval and stir to prevent scorching. When candy is melted, stir in three broken candy canes and pour onto a wax paper covered cookie sheet. Smooth out bark and place in fridge until firm. Break into pieces and enjoy.
Supplies:

I wrote this blog post while participating on the Glue Dots design team.
Happy creating!

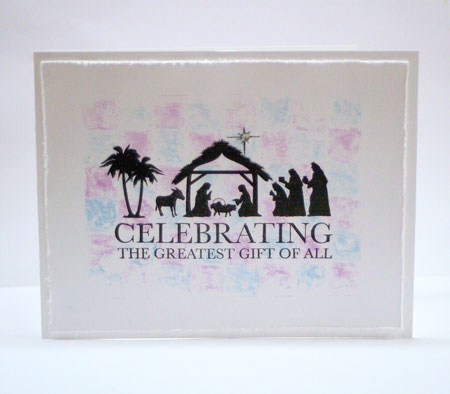
 Today I have an inspirational Christmas card to share with you and a fun new acrylic block grid technique. I hope you’ll join me today in the CLASSroom for the tutorial.


