Today I just want to say thanks.
Thanks for stopping by.
Thanks for taking the time to visit my blog.
Thanks for all the lovely comments you all leave.
Thank you for your friendship.
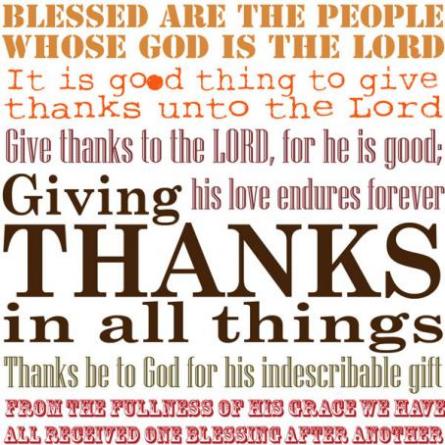
Today I thought I’d share a digital file I created a while back.
How can you use it? Just click on it to enlarge and then save it to your computer. You can print it off and use it as a card front, make an inspirational frame or even print on iron on transfer paper and iron it onto some fabric. Please feel free to use this file for your personal use only.
Giving Thanks in All Things – a digital printable gift
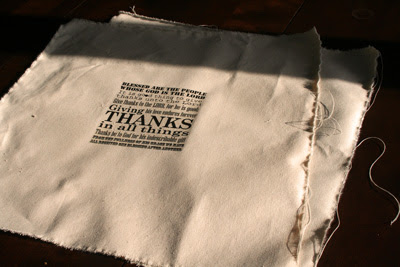
Here’s a reposted tutorial for a pillow I made using it last year. You just need to convert it to black and white first.
Transfer Art
It’s totally amazing how many things you can do with digital art once you start playing around with it. Lately I’ve been on a home decor kick and thought I’d try my hand at creating my own
Giving Thanks Canvas Pillow. I’m loving the concept that crafting projects can be practical and inspirational at the same time.

To create my pillow, I started out with some simple supplies…canvas, sewing machine and thread, my digital file, Avery T-Shirt Transfers and a pillow base. You can use a purchased pillow form but I kept this project inexpensive and simply covered up an old pillow that I just didn’t love any longer.
The Avery T-shirt transfers work well on cotton and cotton/poly blend fabrics and use an ink jet printer. I purchased mine at Staples but you can also find this product on-line or at other office supply stores.
The Giving Thanks Printable suited my thoughts for this time of year. I could have used the color version but decided to use the black and white image as I loved the graphic look of all the text. One thing you need to keep in mind when printing images is that they will be iron=on backwards. That means if you are using text, you’ll need to flip your image to make it print in reverse. There are many ways to do this depending on your software. I use Photoshop Elements and it’s very easy to do. Hit Print or Ctrl P to print your image. You’ll get a screen like my screen shot below. Simply check the flip image box and you’re good to go. If your computer doesn’t have this function…try sticking to images without text.

One other thing to mention…I actually resized the Giving Thanks Printable for this project to 6″ square.

Follow the Avery instruction sheet included in the package. Iron with no steam with firm pressure for best results. Allow to cool then carefully remove backing.

To create your pillow cover, cut (I like to tear on grain) your fabric to the desired size. I uses 21″ panels. Pin edges with outsides facing in. Stitch around edges leaving a space on one side for turning. Turn right side out and press well. Insert pillow form and stitch closed.
My pillow cover ended up a bit too large for the insert so I took the project one step further. I created a border by pinning the excess on all sides together and then stitched an even distance around the perimeter of the pillow.

So that’s it! A fun pillow. It might be fun to sew another with a holiday image next. Also…think about all the possibilities for the Iron On T-shirt Transfers. How about ironing an image on an apron, a premade canvas tote, a pencil case or some other creative idea.
Hope you enjoy it! Happy creating!


6 responses to “giving thanks…a digital gift & tutorial”