Monthly Archives: May 2010

Up the Street

I had a super scrapping time this weekend with a beautiful kit of fabulous goodies. I love kits as they take all the work out of picking out the product. It’s a great way to design and a wonderful way to use product from different companies in some unique ways.

I’m super excited to be guest designing for Up the Street Scrapbooking using June’s fabulous kit.  I was thrilled with how “me” this kit was . So many great shabby, vintage style goodies and papers. Tara puts together fabulous kits.

While I’m busy finishing up a few more projects, here’s a sneak peek at what I’ve been working on….

flower-detail.jpg

envelope-detail.jpg

love-detail.jpg

oh-boy-paper-detail.jpg

shabby-friend-peek.jpg

Looks like fun, huh?!

Now a very busy day here. It’s my “baby’s” fifth birthday and boy does he have a list of instructions for it. Quite the character I must say! Gotta run and get busy…

Be back soon!

sketch 66

Ready for another Card Patterns sketch? It’s another fun one! This week Card Patterns is sponsored by Little Paper Shop and I’ve used the sweet Jena and Timmy digital image to create this congrats card. If you look close, you’ll see a little rhinestone bling on her finger. Little Paper Shop has both stamps and digital images and one lucky winner will win a gift certificate for playing along. Our favorite project will have a chance to be a guest designer for Card Patterns. Check out the sketch and details here.

Congrats

sketch-66-julia.jpg

Quick Tip: Make a fun pattern on your coloring by dotting the colored area with a Copic Colorless Blender Pen.

Supplies: Delovely 6×6 Mini Deck by Cosmo Cricket, sewing machine, Copic Markers, Diamond Lace Edger Punch, dymo label maker, Prima Flower

Have a beautiful day!

Framed again.

I love making frames but it’s not too often I post them two days in a row.They are both heavy on the pink but while yesterday’s was shabby and sweet, today’s is bright and fun.

inchie-frame.jpg

I’ve created a tutorial for it today at the CLASSroom, so if you’re interested, come check it out.

Have a safe & wonderful weekend!

Embedded Rhinestone Frame…a tutorial

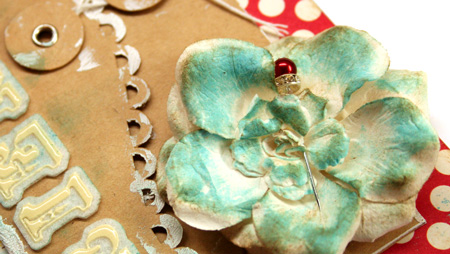
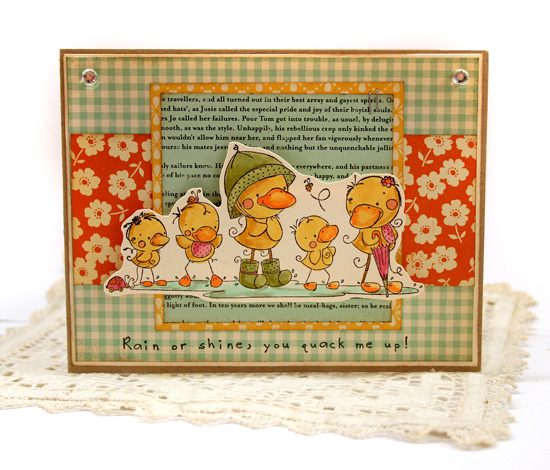
A few weeks ago, I was in a brain-storming kind of mood and came up with a fun new technique using two of my favorite products…Zva Creative Crystals and Distress Crackle Paint by Ranger. I had my fingers crossed that it would work and I’m so excited with the results.

Today I’m also challenging you to create with some paint for the Ways to Use it Challenge. I hope you’ll play along with us here.

The Embedded Rhinestones technique gives your project almost a mosaic type feel. The rhinestones become embedded in the paint and instead of sitting on top of the project, become part of it. I love how this technique covers up the adhesive lines and adds an interesting textured look.

distressed-rhinestone-frame.jpg

To start your project, first adhere your Zva crystals to the wood base of the frame. This technique can also be done on very heavy cardstock or chipboard or any surface that will take the Distress Crackle Paint well.

distress-paint-on-gems.jpg

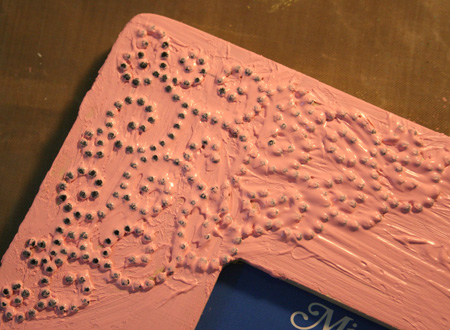
After applying the crystals, brush over the entire area with Ranger Distress Crackle Paint. For this project I’ve used the Worn Lipstick shade as it is one of my favorites. Make sure the area is covered well. You can use the brush in the lid of the crackle paint and I’ve also used a Studio line brush to work it into smaller areas.

Using tissues or paper towel, wipe off the paint from the surface of the crystals. You will need to do this a few times to clean it off well. Do not remove the paint from between the rhinestones.

drying-distress-frame.jpg

Your project should look something like this. As you allow it to dry naturally, cracks will form and give you a beautiful distressed surface.

To finish up my project, I sponged the edges with Frayed Burlap Distress Ink to highlight some of the cracking. The Vintage Text Scrapblock was randomly stamped over the surface with Pumice Stone Distress Ink.

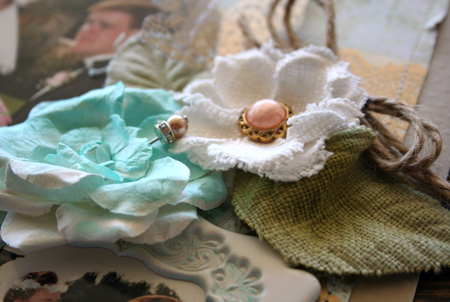
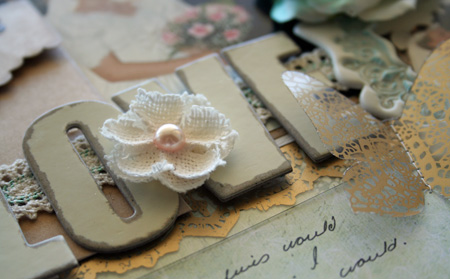
I wanted to create a fun die cut flower embellishment to accent the final design. Here I’ve used the Tim Holtz Tattered Florals die by Sizzix and die cut some sweet Jenni Bowlin Homespun papers and a vintage dictionary page. The center is a felt Zva Creative flower and a Zva Creative Crystal.

Happy creating!

Hitting the beach

It’s the Victoria Day long weekend here in Canada and we’re hoping to hit our favorite beach and then enjoy some BBQ and fireworks. Don’t you love summer long weekends? I know technically this one isn’t quite summer but we are pretending for sure!

The beach is one of our favorite places and I recently created this layout remembering a couple summers ago. I just love the banners and the hit of red in this On Vacation line from the Girls’ Paperie. I’ve blinged it up with some fun rhinestone crystals from Zva Creative.

@ the shore

at-the-shore-blog-size.jpg

The banners were so fun and easy to create using the patterned paper. I’ve zig zag stitched to accent them and add some fun texture.

at-the-shore-photo.jpg

Here’s a closeup of the beautiful Zva Creative Flourished frame. I’ve used half the frame like a bracket on the left side and the Clear Dots Crystals in the centers of the paper punched flowers.

at-the-shore-detail.jpg

Quick Tip: Use pop dots to pop up a couple of the photos to add dimension and highlight them.

Now I’m off to the beach with my camera to have some family fun!

Enjoy your day!

a gift bag and my travels

The other day I thought it would be fun to decorate a gift bag. I’ve done this a few times in the past but it was a long, long time ago. Decorating a gift bag is super easy to do, it was fun to personalize it and this project also used up some scraps I had on my desk.

This project uses the On Holiday line from The Girls’ Paperie. Love the colors combo, the banners and the fun travel theme.

paperie-gift-bag.jpg

What might not be apparent in the above picture is a couple fun little details I added to the project. Because this gift bag was for an American friend, I thought it would be fun to cut out some of the Canadian postage stamps, ink them and then pop them up on pop dots. Just to highlight where the gift was from. 🙂

paperie-bag-detail.jpg

Quick Tip: Stitch the layers before adhering them to your gift bag otherwise you won’t be able to.

And I hope you don’t mind my sharing a few photos from the Creating Keepsakes Convention in Buffalo. As I rarely get anywhere it was huge for me and I had the best time meeting friends I’d made on-line

becky-megan-and-i.jpg

Becky Olsen, Megan Hoeppner and I. I had so much fun meeting and hanging out with these uber-talented and sweet ladies.

susan-opel.jpg

I was excited to help out the fabulous Susan Opel with the Paper Crafts magazine Make ‘n Take

melissa-frances-at-make-n-t.jpg

Melissa Frances was there with a booth and I was excited to meet this talented & lovely lady.

beautiful-historic-architec.jpg

So much stunning architecture to see in Buffalo

Thanks for letting me share!

Have a beautiful day!

Back from Buffalo & sketch 65

Seriously, is this cute or what?! This week’s Card Pattern’s sketch #65 sponsor is Paper Works Co. They have a new artist, Rachelle Anne Miller, and I’m loving her darling illustrations. I received the Puddles of Fun stamp to play with. It’s a great sketch this week so play along for a chance to win something wonderful from Paper Works or a chance to be a guest designer for Card Patterns.

On a more personal note…I’m back! What a whirlwind trip to CKC Buffalo but I had a blast. The convention was wonderful and I met so many awesome people. Fun shopping, bought a new t-shirt and some scrapbooking goodies. I’m going to be high on it for a while. 🙂

You Quack Me Up

quack-me-up1.jpg

This image is colored with Copic Markers. Aren’t the ducks darling? I turned my sketch 90° to better work with my image.

quack-me-up-close.jpg

Quick Tip: I love cutting out images with fine scissors and popping them up with dimensional foam adhesive. On a detailed image like this, I leave about an 1/8th of an inch. Cut smoothly to get it to look like a die cut.

Supplies: Fly a Kit 8×8 paper pad by October Afternoon, kraft cardstock by Bazzill, Black Memento Ink by Tsukineko, rhinestones by Zva Creative, Copic Markers

Have an awesome weekend!