Archive for January, 2009

Jan 31 2009

Simply Saturday, Simply Elegant

jks-to-love-slice.jpg

It’s the last day of the month and I hope you don’t mind seeing this stamp combo one more time! While these stamps are still available in February and beyond, they are on special promotion for one last day. I just love this card design. I hope it’s OK to say that! LOL Sometimes the simplest of designs are actually my favorites. This is one that just made itself! A scrap of patterned paper fell on some black cardstock and I thought… beautiful! I love how stamping this Freesia onto the textured patterned paper makes it look like part of the actual paper.

To Love

jks-love-and-be-loved.jpg

Quick Tip: While you actually cannot see it in these photos, there is a line of scoring on the black cardstock just above and below the blue panel. A little scoring is a super easy and inexpensive way to add detail to your design.

Have a simply wonderful Saturday!

winter-julia.jpg

Stamps: Freesia Happiness (January SOTM) by Cornish Heritage Farms

Paper: Black Cardstock by Prism, 29th Street Market patterned paper (reverse side) by Cornish Heritage Farms

Ink: Black Memento ink by Tsukineko

Other: sandpaper, flower by Prima Marketing, Score-Pal, Hardware by We R Memory Keepers

11 responses so far

Jan 30 2009

A Taste of Spring Winner…

Published by Julia Stainton under Card Designs

Sorry for the delay this morning! It’s been one of those days! I have all five kids home today and it’s so cold I don’t have the heart to make them go outside! Thanks so much for all the comments and to everyone who stopped by for my giveaway. I’ve drawn the number…

Random Integer Generator

Here are your random numbers:

28

Timestamp: 2009-01-30 18:02:55 UTC

Laura is number 28 . Please e-mail me with your address and I’ll get this sweet spring package out in the mail to you! For those of you who didn’t win this time around…don’t worry. I’ve been putting together another little package and I’ll get to that in the next few weeks.

Have a fabulous weekend!

Julia

One response so far

Jan 30 2009

My Sympathies…

Every now and then you need a card that hard to make. For me…I’m always reluctant to create those sympathy designs. It’s very hard to convey your thoughts and I’d much rather design for happy occasions. Recently, one of my children’s teachers lost a family member and I created this design for her.

For inspiration, I used the latest Card Positioning Systems sketch. CPS is celebrating their 2nd anniversary and 100th sketch design this week. Yesterday and today features Cornish Heritage Farms Designs stamps. There is a fun contest so make sure you check it out!

With Sympathy

jks-with-sympathy.jpg

This design uses a color combo inspired by this beautiful Webster’s Pages paper. I paired it up with my favorite flower from the Shady Tree Studio line, Artsy Blooms. I’ve been having a lot of fun stamping on kraft lately and then coloring with colored pencils. I love the artistic look and the way the light pencil colors pop against the darker cardstock. Does the chipboard frame look a little familiar? Hint: check out yesterday’s design. I actually created today’s card first and this is the outer chipboard frame of three nested Maya Road frames. I think it looks great as a tag or a frame.

jks-with-sympathy-close.jpg

Thanks for stopping by! Have a fabulous Friday! And stay tuned…I’ll be back later in the morning to announce the winner of my giveaway.

winter-julia.jpg

Supply List:

Stamps: Artsy Blooms (Shady Tree Studio line) by Cornish Heritage Farms, With Sympathy from Mountains stamp set (Scene-It line) by Cornish Heritage Farms

Ink: Rich Cocoa & Black Memento Ink by Tsukineko, Vintage Photo Distress ink by Ranger

Paper: Suede Brown Dark, Iced Teal, Kraft cardstock by Prism, patterned paper by Webster’s Pages

Other: trim by Fancy Pants Designs, colored pencils by Prismacolor, pin by Fancy Pants Designs, ribbon by Creative Impressions

10 responses so far

Jan 29 2009

Bottoms Up!

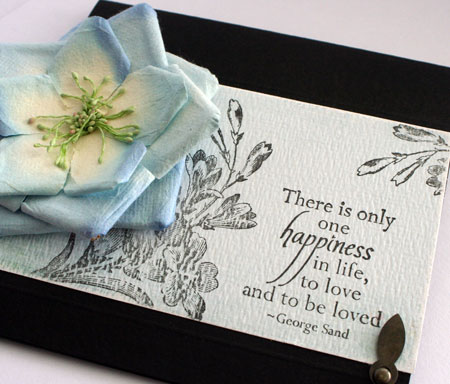
Now if you know me… you’ll definitely be wondering at the strange title for today’s post as I don’t drink. Today I’m challenging you to pull out your alcohol…no…not the drinking kind, the CRAFTING kind and play along with today’s challenge. At first you might not think there are so many alcohol based products in the crafting market but once I got thinking about it…truly there are! Copic and Prismacolor markers as well as the blending solution are alcohol based. There are lots of stamping techniques using rubbing alcohol such as polished stone. How about alcohol inks. I really needed a push to get these babies out of my stash and so my design features them today. Nothing like a challenge to push you out of your comfort zone! To play along with today’s challenge, check it out here.

 Vintage Gift Jar

jks-vintage-gift-jar-full.jpg

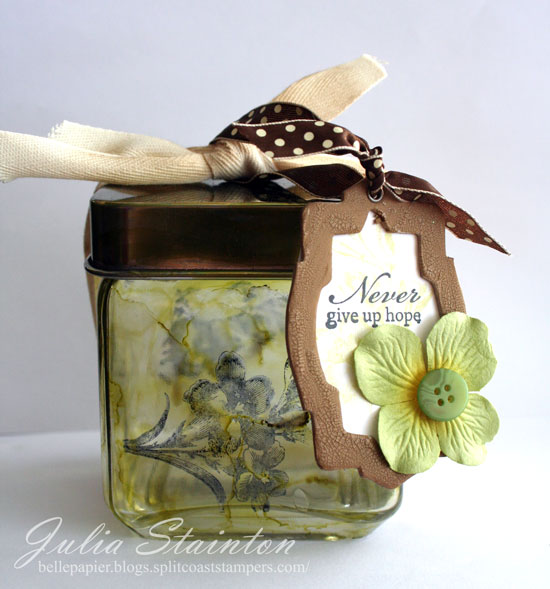
This project is actually a very inexpensive gift. I picked up the jar at the dollar store and have had a few in my stash for a while. They actually come in a few sizes and some of the larger ones hold pieces of ribbon etc. on my desk. I didn’t try anything too exciting with the inks as I’ve only played with them once before. Yikes!, now that I think of i, it was a project for my last month on the Dirty Dozen DT two years ago! Where DOES the time go?!

To get started with alcohol inks, you need a few items. First…a package of the inks, a bottle of blending solution and lastly a felt applicator tool. Trust me…I couldn’t find mine this morning and just used the felt replacement pads and I am a MESS! You’ll also want a craft mat or something to protect your work surface. It’s best if your surface is clean and dry. Glass, plastic, glossy cardstock and metal are all great surfaces for alcohol inks. To apply the ink, you can simply add a few drops of ink to your felt pad and wipe it onto the surface. This gives you a very smooth look. Alcohol inks are known for their great mixing qualities and mottled look. To get this effect, dap on a small amount of another color of alcohol ink. I used Lettuce and a small amount of Eggplant on this project. To blend the inks together, soak a fresh felt pad and apply it over the surface. You’ll love watching it create the fun look.

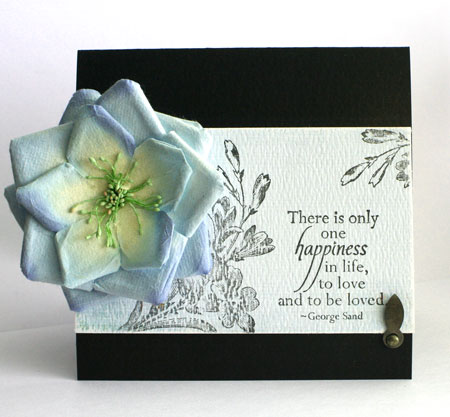
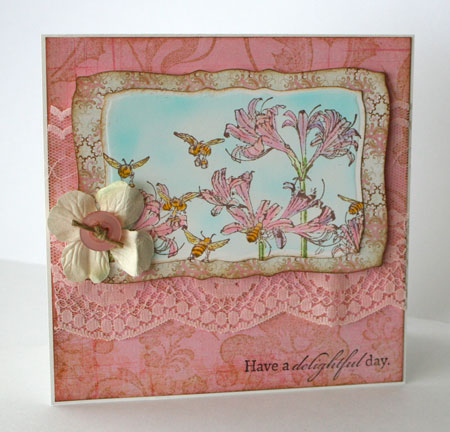
The Alcohol Inks dry very quickly but be sure they are well dried before stamping over them. You can stamp over the inked surface with Stazon ink. I used the Freesia Stamp from Cornish Heritage Farms to stamp the sides of my design. On the metal top, I stamped the Distressed Grid Scrapblock™ in Black Stazon as well.

jks-vintage-gift-jar.jpg

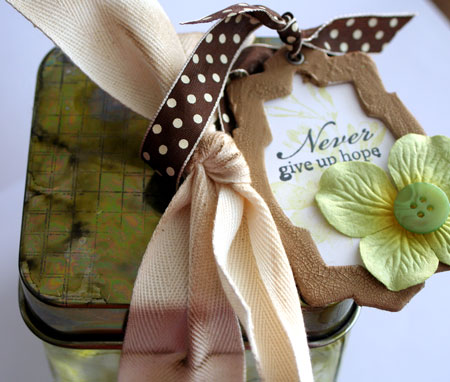
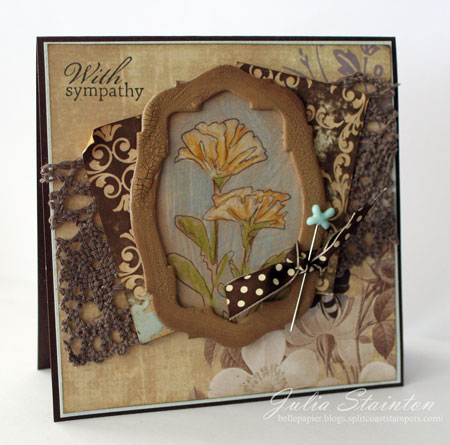
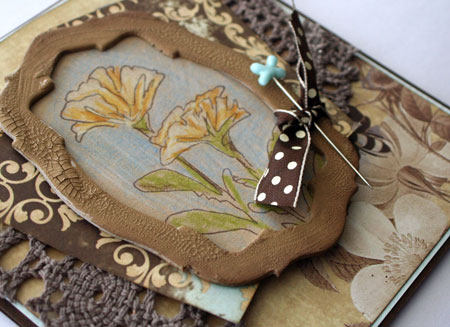
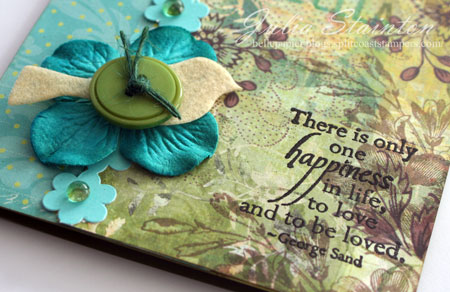
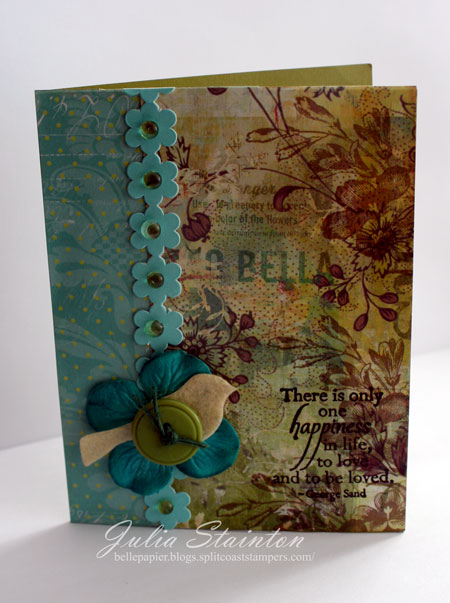
My tag is actually a Maya Road chipboard frame that I painted with Distress Crackle Paint. Can you tell I LOVE this stuff?! After stamping my sentiment onto some white cardstock, I layered it behind the chipboard before embellishing.

Quick Tip: Look for fun ways to add tags to your projects. Manilla Tags, chipboard, die-cuts, pieces of acetate all make fun tag bases.

Have fun and please STAMP responsibly! ;)

winter-julia.jpg

Supply List:

Stamps:
Freesia by Cornish Heritage Farms
Distressed Grid Scrapblock™ by Cornish Heritage Farms
sentiment from Scene-it Collection by Cornish Heritage Farms
Ink: Black Stazon Ink & Black Memento by Tsukineko, Lettuce and Eggplant Adirondack Alcohol Inks by Ranger
Paper: Simply Smooth White by Prism
Other:
Brushed Corduroy Distress Crackle Paint by Ranger
chipboard by Maya Road
twill tape
ribbon by Creative Impressions
button

14 responses so far

Jan 27 2009

A little spring?

jks-spring-happi-slice.jpg

Anyone like me feeling the winter blues? I’ve put together this little goodie package to give away. Lots of spring colors, flowers and fun things to get you designing for spring. Before I get to the giveaway…I’d like to share a quick spring card I recently created. I just love these colors for spring and actually…I never would have thought to put this all together if they hadn’t been in a pile of scraps next to each other.

 Spring Happiness

jks-spring-happiness.jpg

Quick Tip: Don’t be afraid to combine different manufacturer products together. I believe the above design uses product from 10 different companies but color and style tie them all together.

Supply List:

Stamps: Freesia & One Happiness (Jan SOTM) by Cornish Heritage Farms
Ink: Rich Cocoa Memento Ink by Tsukineko, Versamark ink by Tsukineko, Brushed Corduroy Distress ink by Ranger
Paper: Spring Willow Dark cardstock by Prism, patterned paper (teal) by Autumn Leaves, Olive patterned paper by Fancy Pants Designs
Other: flower by Prima, felt bird by Maya Road, button by Autumn Leaves, black embossing powder, stirng

My taste of spring giveaway…

jks-spring-goodies.jpg

  • Making Memories flower brads
  • Glitter Brads by Making Memories
  • Stamp by Cornish Heritage Farms
  • Copper rub-on transfers by We R Memory Keepers
  •  Basic Grey Chipboard
  • 24 sheet 8×8 paper pack by Daisy D’s

I have this bundle of spring themed goodies to send to someone this week! Just comment on this post (once please), and I’ll randomly draw a winner. This giveaway closes at 10pm EST Thursday January 29th and the winner will be announced Friday. :)

Good luck!

winter-julia.jpg

123 responses so far

Jan 27 2009

Bee-utiful Tuesday

jks-spring-bees-slice.jpg

I have some sweet bees to share with you today. I hope you don’t mind that I’m on a pink kick right now. I’m just gearing up for Valentine’s Day I guess! ;) These sweet bees are called Honey Bees and are the latest Friendly Kritters stamp. So sweet for spring and summer these would make great friendship cards, thank yous or note cards. This image was colored in with my Copic markers. Unfortunately, my camera didn’t pick up all the subtle graduations. I spent a long time coloring each flower and blending four shades so I’m a little disappointed.

Spring Bees

jks-spring-bees.jpg

To create a very subtle background for this card, I took a plain piece of my Basic Grey Bittersweet paper and stamped on it. I love the pattern and Antique Linen Distress Ink looks perfect with this Fiery Floral Scrapblock™.

If you’re looking for CHA coverage…check out Craft Critique. They have some great shots and video and are updating all the time. Wish I was there!

Have a sweet day!

winter-julia.jpg

Supply List:

Stamps: Honey Bees (Tom Allen line) by Cornish Heritage Farms
Vintage Butterflies - sentiment (Saturday Evening Post line) by Cornish Heritage Farms
Ink: Rich Cocoa Memento Ink by Tsukineko
Paper: Simply Smooth White, Bittersweet 6×6 paper pad by Basic Grey
Other: Copic Markers, Spellbinders dies, button, twine, flower by Prima, lace by Fancy Pants Designs

14 responses so far

Jan 26 2009

Dance

jks-ballerina-dreams-slice.jpg

Did you ever dream of being a ballerina? I think most little girls love to dance in some form or other. I was a bit of a dreamer as a child and while I never dreamed of being a ballerina, a princess, an artist & a mom all made the list. I’m so thankful that God has blessed me with our family and that dream has come true. This sweet Ballerina image is from the Sandra Kuck line and is so sweet! I colored the image in with my Copic markers and then cut it out. I love coloring with my Copics and am so excited that I’ll be taking a Copic Certification class in Toronto in March. I know some designers take this class at CHA but with five kids at home, right now, my place is here. As Toronto is not too far away, I’m just thrilled.

Ballerina Dreams

jks-ballerina-dreams.jpg

I wanted to go with a soft shabby style look for this card design and picked a couple of the lightest papers from Basic Grey’s Bittersweet line to set it off. A little sponging and a little stitching add to the look. I actually created this design for last week’s SCS Sketch challenge. I slightly altered the design to work for a 5.25″ square card design…my favorite.

Quick Tip: When you plan on cutting out your image, color over the lines on your design with your markers. The excess is trimmed off and you won’t be left with white edges.

Remember, you’re never too old to dream…

winter-julia.jpg

Supply List:

Stamps:
Ballerina (Sandra Kuck line) by Cornish Heritage Farms
Motivational Centers (Mona Lisa Moments line) by Cornish heritage FArms
Ink: Rich Cocoa Memento Ink, Versamark ink by Tsukineko, Vintage Photo Distress Ink by Ranger
Paper: Simply Smooth White cardstock by Prism, Bittersweet 6×6 paper pad by Basic Grey
Other: flower by Maya Road, sewing machine, black embossing powder, copic markers, ribbon by May Arts

13 responses so far

Jan 25 2009

Howdy!

Well, there’s nothing much western about me but I thought I’d have a little fun creating in a western theme for today’s design. Actually, I’ve been dying to use this gorgeous Prima “Down Home” flower for ages and pairing it up with this Paisley Pattern Scrapblock™ seemed to be a natural fit. I’ve been enjoying creating different looks with this Scrapblock™ and stamping on Kraft with Denim Adirondack Pigment ink gave a great look.  Add in a little texture, some distressing and stitching and you have a really warm, homey look.

Western Hello

jks-western-hello.jpg

Quick Tip: Add a little variation to your designs now and then by trying out a different card  size than you normally use. This card measures 4″ x 8.5″ and the extra size really helps balance off the size of this beautiful flower.

Take care and thanks for stopping by!
winter-julia.jpg

Supply List:

Stamps:
For the Men (Rummage Bin line) by Cornish Heritage Farms
Paisley Print Scrapblock™ by Cornish Heritage Farms
Ink: Denim Adirondack Pigment ink by Ranger, Black Memento Ink by Tsukineko, Walnut Distress ink by Ranger
Paper: Blush Red Dark, Kraft cardstock by Prism
Other: lace, flower embellishment by Prima, sewing machine

11 responses so far

Jan 24 2009

Simply Saturday… simply happiness

jks-one-happiness-slice.jpg

A simple, spring flavored card to share with you today. I’m so in love with January’s Freesia Stamp of the Month combo that I don’t want to put it down. Whether you want to create simple but stunning cards stamped monochromatically, or make more ornate designs…this stamp does it all. When I first saw a peek of what this stamp would be, I just knew I wanted to try stamping a tone on tone background with it and that is what I’ve done in this design. Actually…now that I think of it, this card design is not only simple, it also only uses two ink pads, three colors of cardstock and one single brad. If you’re looking for this gorgeous stamp combo, you can find it here.

Wild winter temps are moving back into Ontario so I’m bundling up at home today and enjoying dreaming of Spring!

One Happiness

jks-one-happiness.jpg

Quick Tip: Stock up on classic cardstock colors that you use often so you never run out. At the top of my must-haves Simply Smooth white, Kraft, black and a dark brown. Close behind are my favorite accent colors….Spring Willow Light, Blush Red Dark, Frosted Teal by Prism.

Have a simply wonderful day!
Supply List:
Stamps: Freesia and One Happiness (Jan 2009 SOTM) by Cornish Heritage Farms
Ink: Willow Adirondack ink by Ranger, Burnt Umber Palette Ink by Stewart Superior
Paper: Simply Smooth White, Kraft & Spring Willow light by Prism
Other: brad by Basic Grey

13 responses so far

Jan 23 2009

I’ve Scene-it

Now here’s a little design that you don’t often see here. Actually…it’s a bit of a stretch for me and not my usual style but a change of pace is always a good thing. This design is pieced together from the new Scene-it stamp set called The Ranch. If you’re someone who loves to create your own scenes…this great line all works together on the same scale. While I stuck to just using the one set, if you had the Mountains set…you could realistically add mountains in the background and basically design whatever scene your heart desires. The Ranch  is released today from Cornish Heritage Farms.

 Wanted

jks-wanted.jpg

To put together a scene, the easiest way is to plan it out on a scrap paper first. That way you can quickly see how the elements work together and which ones will need masking. When creating a scene you need to start with the foreground first and then work back to the distance. After stamping, add color to your design. I used Copic markers but watercolor, sponging with ink or colored pencils always looks great as well.

Quick Tip: Stamping scenes can be time consuming. Start out creating small scenes until you are more comfortable, then get more complex.

Take care!
winter-julia.jpg
Supply List:

Stamps: The Ranch (Scene-it line) by Cornish Heritage Farms
Ink: Black Memento by Tsukineko, Vintage Photo Distress ink by Ranger
Paper: Blush Red Dark, Kraft, Natural Smooth by Prism, Mr. Campy patterned paper by Cosmo Cricket
Other: sewing machine, labels 2 die by Spellbinders, Copic markers, buttons by Autumn Leaves, Copic airbrush

5 responses so far

Next »