Archive for December, 2008

Dec 31 2008

Kitty Hugs

Everyone needs a little hug sometimes and some days you wish you could send one through the mail to a friend who needs one. I love this darling Kitty Hugs image and that adorable little expression on kitty’s face.

Best Fishes

jks-best-fishes.jpg

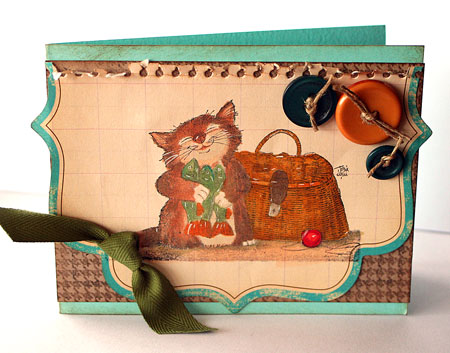
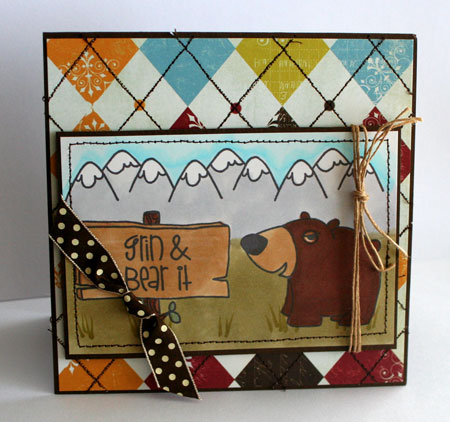
Quick Tip: When coloring fur, brush on your color in short strokes in the direction of the fur for a more natural look.

Sending you all a hug and wishing you a very happy new year!

winter-julia.jpg

Supply List:
Stamps: Kitty Hugs (Tom Allen line) by Cornish Heritage Farms, Fine Houndstooth Scrapblock™ by Cornish Heritage Farms
Ink: Black Memento by Tsukineko
Paper: Kraft, Frosted Teal by Prism, Making Memories Journaling pad
Other: buttons by Autumn leaves, cord, twill ribbon, Copic markers

10 responses so far

Dec 30 2008

Vintage Roses

One of my favorite vintage looks for stamping uses the Faux Linen technique. I love the texture and faded out look. I had a hard time getting a good photo of the muted colors…truly, it does look better in person. The texture is most apparent in the top left corner where you can see the sanded and sponging technique the best. This stamp is the new Thomas Kinkade release from Cornish Heritage Farms called A Perfect Yellow Rose.

Vintage Roses

jks-vintage-roses-2.jpg

The Faux Linen technique can be used on any stamped image including background stamps, floral sprays and scenes. Stamp your image on glossy cardstock and color with dye markers if desired. Sand the glossy surface in both directions to get a weave texture effect and remove the glossy. Wipe a light brown or distress ink across the surface to age it and lightly pick up the texture.

Quick Tip: A heavier grit sandpaper will give you a more pronounced effect. Experiment with the look you like best.

The yellow rose is the symbol of both joy and friendship. Wishing you both today, my friends,

winter-julia.jpg

Supply List:
Stamps: A Perfect Yellow Rose (Thomas Kinkade line), Picotage Print Backgrounder by Cornish Heritage Farms
Ink: Burnt Umber Palette Ink by Stewart Superior, Brushed Corduroy Distress Ink by Ranger
Paper: Glossy Cardstock by Ranger, Simply Smooth White by Prism, kraft by Prism
Other: dye based markers, sandpaper, pin by Fancy Pants Designs, ribbon by Fancy Pants designs

8 responses so far

Dec 29 2008

Just Grin and Bear It!

Oy! I think I have some kids overloaded on holiday sugar, late nights and so many new things they have no idea what to do with themselves. If the way this morning has started out will be the way the day will go…yikes! What is it with the post-Christmas let-down? I guess I’ll just have to grin and bear it. Wish me luck!;)

I’ve got another  peek at a one of Kim Hughes’ new CHA stamp releases for you today, Bear Hugs. Seriously this is the CUTEST set and so totally on trend.I can’t wait to find some more time to use it as I have loads of ideas for it swirling around in my head. For more sneak peeks…check out the CHF Creative Blog

Grin and Bear It

jks-grin-and-bear-it.jpg

Quick Tip: Stitch elements on your patterned paper to accent them and add texture and interest to your design.

Thanks for stopping by!

winter-julia.jpg

Supply List:

Stamps: Bear Hugs (Kim Hughes Line) by Cornish Heritage Farms

Ink: Black Memento Ink by Tsukineko

Paper: Simply Smooth White, Suede Brown Dark cardstock by Prism, All Fall 8×8 paper pack by Fancy Pants Designs

Other: sewing machine, ribbon by Creative Impressions, hemp cord, markers by Copic

8 responses so far

Dec 28 2008

Thinking ahead…

I’ve been having fun over the past couple days, just relaxing, reading, spending time with my family and doing a little stamping. While I love Christmas, it’s actually nice to have a little change of pace and think ahead to other holidays throughout the year. I’ve had this adorable Easter Basket stamp on my desk for a couple weeks now and I’m so glad I found some time to play with it. I just adore the Saturday Evening Post images. They have such a great classic and vintage look to them.

Easter Bunny

jks-easter-bunny.jpg

This design is very simple, I just stamped and colored it with my Copic Markers.

Quick Tip: If you’re not great at tying bows, simply knotting a short piece of ribbon and adhering to the design is an easy alternative. It also fits into an envelope better. :)

Have a great day!

winter-julia.jpg

Supply List:

Stamps: Easter Basket (Saturday Evening Post line) by Cornish Heritage Farms

Ink: Rich Cocoa Memento Ink by Tsukineko

Paper: Simply Smooth White cardstock by Prism, patterned paper by My Mind’s Eye

Other: ribbon by May Arts, markers by Copic

4 responses so far

Dec 27 2008

A Little Peek…

January is always one of those cold nasty months that I love staying indoors and simply staying warm. There is one fabulous thing about January though. I LOVE seeing all the new craft product releases for CHA. Kim Hughes has been busy creating some of her most fabulous releases to date (IMHO) and there will be four new sets release this January 6th. I have a sneak peek for you today on one of the sets, Spring Trees. There are lots of exciting samples on the CHF Creative Blog so check it out daily as well.

Hello Deer

jks-hello-deer.jpg

Spring Birds

jks-spring-birds.jpg

Have a fabulous day!

winter-julia.jpg

5 responses so far

Dec 25 2008

Merry Christmas

I just wanted to take the time this morning to wish you a very special Christmas. Amidst the  business of family and food and presents, I just wanted to sit down and think about the true meaning of Christmas, the greatest gift of all.

For unto us a child is born, unto us a son is given: and the government shall be upon his shoulder: and his name shall be called Wonderful, Counsellor, The mighty God, The everlasting Father, The Prince of Peace. Of the increase of his government and peace there shall be no end Isaiah 9:6,7

And the angel said unto her, Fear not, Mary: for thou hast found favour with God. And, behold, thou shalt conceive in thy womb, and bring forth a son, and shalt call his name JESUS. He shall be great, and shall be called the Son of the Highest: and the Lord God shall give unto him the throne of his father David: And he shall reign over the house of Jacob for ever; and of his kingdom there shall be no end. Luke 1:30-33

jks-night-before-christmas.jpg

Wishing you a very special Christmas

winter-julia.jpg

9 responses so far

Dec 24 2008

A Last-minute Holiday Recipe…

Published by Julia Stainton under recipes

Eggnog Bread…Love this recipe. If you have a bread machine, this is so quick to make up and we look forward to it all year. Wish you could buy eggnog off-season! and so…I’m busy with all my Christmas preparations right now. It’s always such a crazy time of year. You may be like me and busy in the kitchen or looking for something new to try. I just put this recipe in the bread machine and thought I’d pop in and share it here with you. Enjoy! If you’re looking for some more fun holiday recipes…I shared some of my favorite holiday baking recipes here last year.

Holiday Eggnog Bread

{this recipes makes a 2 pound loaf}

3/4 cup eggnog

1/3 cup water

1 egg

2 tablespoons butter or margarine cut up

4 cups bread flour (I just used all-purpose)

3 tablespoons sugar

1 teaspoon salt

1/2 teaspoon ground nutmeg

1 1/2 teaspoons bread machine yeast

1/2 cup mixed candied fruits and peels

Add all ingredient to the machine according to manufacturer’s directions. Select basic white bread cycle. Drizzle Cooled loaf with Eggnog Glaze…as follows…

Eggnog Glaze: In a small mixing bowl mix together 1 cup sifted powdered sugar and tnough eggnog to make a glaze….drizzling consistency.

Wishing you a wonderful holiday season and blessed Christmas!

winter-julia.jpg

5 responses so far

Dec 23 2008

Just a Note…

Just a fun little note today. I love how this card turned out. I love music and I’m sure you know by now that the Aged Sheet Music Scrapblock™ is one of my absolute favorites. Think about it. For so many of our celebrations in life, music is always a big part of them. I decided to experiment a little with this stamp and try something different. While patterned paper makes designing quick and easy, I love going back to stamping techniques again and again for their versatility and there is something so satisfying about creating your own backgrounds from scratch. It’s simply yours and very unique.

Rhinestone Note

To create my “custom patterned paper” background, I stamped my Scrapblock™ onto white cardstock with Versamark Ink. I then embossed it with clear embossing powder to form a resist. Now for the fun albeit messy part. On a protected surface, I sprayed different colors of Glimmer Mist. You can dry carefully with your heat gun to speed up the process. Wipe excess ink from embossing to make the design pop.

Quick Tip: Shake Glimmer Mist well before using to make sure the shimmer particles are not stuck to the bottom of the bottle.

Thanks for stopping by, especially in this very busy season!

winter-julia.jpg

Supply List:

Stamps: Aged Sheet Music Scrapblock™, Classic Essential Expressions (mona Lisa Moments line) by Cornish Heritage Farms
Ink: Versamark by Tsukineko, Black Stazone by Tsukineko
Paper: White simply Smooth cardstock, black, by Prism
Other: May Road Clear note, chipboard by Maya Road, rhinestones by Westim Crafts, sewing machines, Worn Lipstick Distress Crackle Paint  , Glimmer Mist

9 responses so far

Dec 22 2008

It’s a Wrap

Three more days until Christmas! Yikes! I have a lot still to do. Actually, we woke up this morning to a sick daughter. It seems she has anotherStrep infection so we’re just back from the clinic instead of trying to finish up some last minute shopping. I’m not sure why but she gets sick EVERY Christmas. Poor kid. I was joking this morning that I should just book her appointment for next year now. Sorry I’m a little late posting this challenge post. Days like this happen sometimes!

While I’m scurrying around trying to get things done, I do have a challenge for you. Do you have any last minute wrapping to do? This challenge is to create some quick, fun wrap for one of those presents you are giving this year. Gift bags, wrapping paper, baskets, tags…any form of quick wrapping ideas will work.

We have lots of fun wrap ideas to share with you today. Check out these ideas!   Kim, Lesley, Kristine, Carole, Becky, Jen

Winter Vintage Gift Box

{Project removed for publication}

My project began with a simple light tan octagonal box that I picked up at a local store. (Canadian Tire if you live in Canada like me. :) ) To keep the project simple and quick, I stamped it first with the Distressed Grid Scrapblock on the top of the box and then with the various vintage signs from the Winter Vintage Signage Set. I also stamped the “signs” on each of the six sides and then added a little distress ink to enhance the vintage look. Some fun trim adds some color to the box and by change I found this darling piece of October Afternoon paper that coordinate perfectly to make a simple one layer tag.

Quick Tip: Layer Scrapblock™ patterns with other stamped elements to tie the design together.

Happy wrapping!

winter-julia.jpg

Supply List:

Stamps: Winter Vintage Signage (Rummage Bin Line) by Cornish Heritage Farms,Distressed Grid Scrapblock™ by Cornish Heritage Farms

Ink: Rich Cocoa Memento Ink by Tsukinkeo, Vintage Photo Distress Ink by Ranger, Copper Brilliance Ink by Tsukineko

Paper: October Afternoon

Other: trim by Fancy Pants Designs, ribbon by May Arts, safety pin by Creative Impressions

13 responses so far

Dec 21 2008

Snowy Kindness

Need a special holiday thank you? Thanks what I designed this card for. To put in with a hostess gift for a friend. December’s Stamp of the Month is one of my favorites and a couple of stamps I’ll be using again and again. I love how beautiful this fir branch is stamped in greens, but especially in the white Stazon Ink on a Clear Card Sheet. This card may be simple with very few layers but the hand-stitching and the die cut window make it a little special.

Kindess Beautifies

jks-kindness-like-snow.jpg

To create this card, I stamped a Clear Card Sheet with the fir branch  in White Stazon on the reverse side. I then flipped it and stamped the sentiment in Black Stazon on the front. While it wouldn’t look like a difference here in the photo, in real life it adds a little dimension and makes the sentiment easier to read and stamp. The window is die cut and embossed with my Labels one Spellbinders die and then the clear sheet adhered behind. To add some color, I die cut a solid patterned paper panel for the inside and then stitched around the front of the card with red embroidery thread.

Quick Tip: Change up the red to a more neutral icy color such as blue or purple and use this design all winter long.

jks-kindness-slice.jpg

Wishing you a beautiful Sunday!

winter-julia.jpg

Supply List:

Stamps: Fir Branch SOTM by Cornish Heritage Farms
Ink: White & Black Stazon by Tsukineko
Paper: Kraft by Prism, patterned paper by Basic Grey
Other: snowflakes by Creative Impressions, die by Spellbinders, embroidery thread, paper piercer, clear card sheet by Cornish Heritage Farms 

8 responses so far

Next »