
I recently got my new Spellbinders dies and wow…I’m having fun with these new shapes. I love how I can use these Spellbinders dies in my Cuttlebug so that I didn’t have to purchase an entire new die-cutting system. I went for a warm and homey look for this design. Don’t you think pie always brings thoughts of warm cozy kitchens? Some stitching, homey lace, buttons and a vintage-style flower completes the look.
Just in case anyone is trying to get hold of me…I’m off for minor surgery this morning….a Septoplasty on my nose to hopefully cure the dreadful sinus headaches I constantly get. Depending on how I’m feeling…it may be a few days before I respond to any e-mails. I do have blog posts pre-published for the next few days though, so you’ll have lots to see if you visit. 🙂
Sweetie-Pie
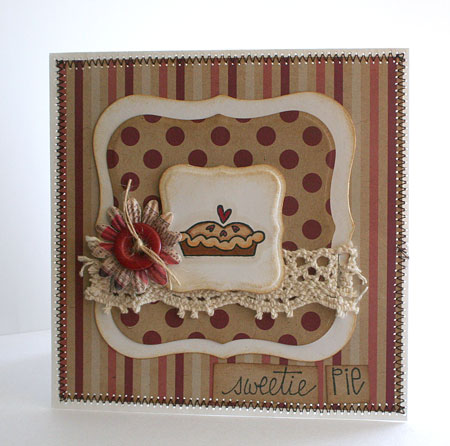
To emboss Spellbinders dies, you need the embossing mat. Inside the packaging there are great “recipes” for”sandwiches” of plates to make these dies work in your machine. If you don’t have the mat, you can still emboss by hand using a stylus. My pie was super quick and simple to stamp and then color in with my Copic markers.
Quick Tip: To match the kraft color of the patterned paper to stamp my sentiment, I simply flipped over the kraft printed paper and used the plain reverse side.
Have a warm and wonderful day!

Supply List:
Stamps: The Birds and the Bees
Ink:
Antique Linen Distress ink by Ranger
Tuxedo Black Memento Ink by Tsukineko
Paper:
simply smooth white by Prism
patterned paper by Making Memories
Other:
markers by Copic
dies by Spellbinders
lace by Melissa Frances
flower by Prima
stapler
sewing machine
button by AUtumn leaves
18 responses to “Sweetie pie”