Monthly Archives: July 2008

This and that…snips and scraps

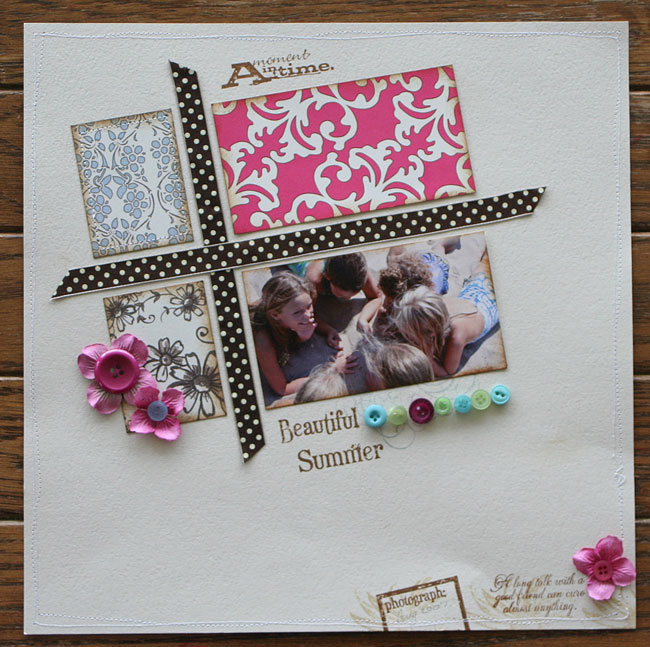
If you’re anything like me when you design, you end up with a LOT of scraps. Scraps of paper, bits and pieces of ribbons and odds and ends of embellishments. What do I do when it gets overwhelming? Try to clean up for one. Even though I try to put it away, some of it ALWAYS ends up just making itself into a card design. I love the hodgepodge of different products…they always turn into a very scrappy style card. Today for the Ways to Use it Challenge…pull out those scraps and odds and ends and work them into a design. Brownie points if you go double scrap and create in a scrappy style as well as using scraps. I hope you’ll take the time to play along with the WT177 Scrap Challenge.

Also…just a reminder…tonight is the deadline for the Cornish Heritage Farms “Can You Color” Design Team Call. If you were planning on applying, the clock is ticking. 🙂

For the Bride

jks-for-the-bride.jpg

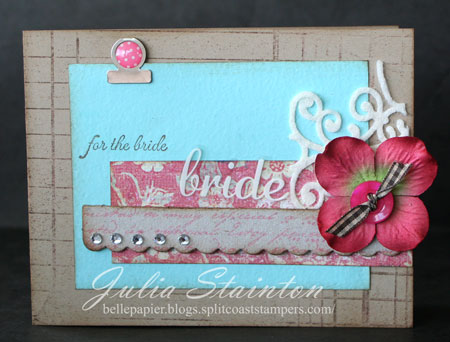
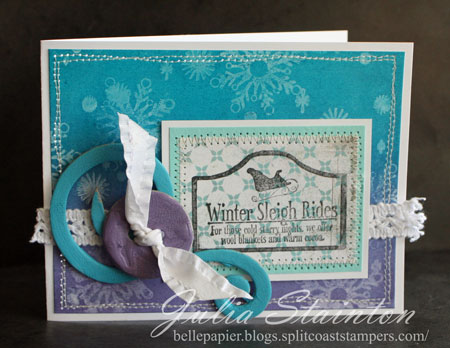
For this card, I’ll admit…I totally used things that were piled around my desk. Sometimes when cleaning up, things make there way into a pile and they seem to put themselves together. I always find this super fun…a project I just don’t have to think about. I found this Heidi Swapp bride transparency style Silhouettes sticker and decided to make a scrappy shower card for my neice. She’s getting married this October and I’m sure there will be showers planned soon.

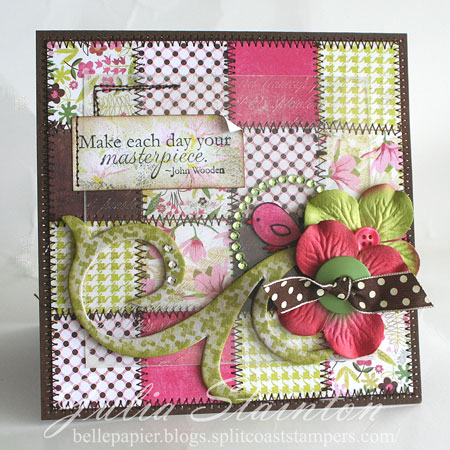
Even when not designing around a stamped image, I love including stamping in my designs. Sentiments are always a great way to include stamping…you always need a sentiment and with rubber stamps…you can use them over and over. Some of my favorite stamps for versatility are Backgrounders and Scrapblocksâ„¢. They add pattern, texture, style and interest to layers such as cardstock, patterned paper, chipboard and embellishments. 4.5″x 5.75″ and 6’x6′ respectively, these big rubber stamps can be used to ink up large areas. I pulled out two classic and some my favorites for this card, Vintage Ledger Scrapblockâ„¢ & Spanish Script Backgrounder.

Quick Tip: Make totally unrelated products from different companies work together. To do this…use products that color coordinate and also match in style.

Have fun with the challenge! Check back in tomorrow…I’m really excited about tomorrow’s design. 🙂

Julia

Supply List:

Stamps:
-Vintage Ledger Scrapblock by CHF
-Spanish Script Backgrounder by CHF
-Script Essential Expressions by CHF

Ink:
-Burnt Umber Palette Ink by Stewart Superior
-Worn Lipstick and Brushed Corduroy Distress inks by Ranger

Paper:
-Frosted Teal and Kraft cardstock by Prism Papers
-patterned paper by My Mind’s Eye

Other:
-flower by Prima
-button by Autumn Leaves,
-die cut felt by Prima
-tab by Making Memories
-rhinestone stickers by MAMBI
-chipboard unknown
-ribbon by Creative Impressions

A Blue Christmas…

Anyone up for a Blue Christmas? I think this is my favorite Elvis image yet! Seriously stunning in person… this stamp is so beautiful all you need to do is stamp it! A little blue, a little black velvet and a little bling…what else do you need?

Blue Christmas

jks-blue-christmas.jpg

Basic Grey Paper and MAMBI rhinestones from Jacksonbelle Embellishments.

Have a fabulous day! I’ll be back tomorrow with a WT challenge and a little break from Christmas.

Julia 

Supply List:

Stamps:
Blue Christmas (Elvis line) by CHF
Christmas Expressions (Mona Lisa Moments line) by CHF

Ink:
Black Palette ink by STewart superior

Paper:
Simply Smooth White and Black cardstock by Prism Papers
Figgy Pudding 6×6 paper pad by Basic Grey

Other:
black velvet ribbon by Creative Impressions
rhinestones by Me and My Big Ideas

Christmas Critters…

More Christmas! I’m so excited about this huge head start…makes me feel like I just may be a little more organized this Christmas. Wonder if I should start making up my gift list? 😉 Just kidding! Actually…I used to start about August and really have all my shopping done in October. I think that was when I had less kids and I actually liked to shop!

Decorate the Season

jks-decorate-the-season.jpg

These darling little critters are from the Tom Allen Friendly Kritters line. The image is absolutely adorable…don’t you love how they are decorating the cone instead of a tree? I’m hoping to find some time to make some Christmas decorations using this image. I colored this design using my Copic markers and some more of that gorgeous Basic Grey Figgy Pudding paper pad.

Quick Tip: When coloring with Copic markers…you can go back in with a white gel pen and add highlights to help make the image pop.

At CHF, we’re having on-line classes each Tuesday night to help you get a head start on Christmas. Tonight Lisa Strahl is our designer host with a great Kim Hughes project. I’m up for next Tuesday and the latest class on our line-up…

jks-evlis-gift-box-banner.jpg

Lori’s going to be holding this class LIVE from Graceland. Cool or What?!

You can click on the banner above or check out all the classes here.

Happy Tuesday!
Julia

Stamps:
-O’ Christmas Cone (Tom Allen line) by CHF
-Decorate the Season (Tom Allen line) by CHF

Ink:
=Burnt Umber Palette ink by Stewart Superior
-Pitch Black Adirondack ink by Ranger

Paper:
-Simply Smooth White cardstock by Prism Papers
-Blush Red Dark cardstock by Prism Papers
-Kraft cardstock by Prism Papers
-6×6 Figgy Pudding paper pad by Basic Grey

Other:
rhinestone circle – Me and My Big Ideas
-markers by Copic
-ribbon by Creative Impressions
-button by Autumn Leaves

Ghosting…

There are so many different ways and techniques you can use a brayer for. One of my favorite ways to use the brayer is for inking up large detailed stamps, Backgrounders or Scrapblocksâ„¢. Today I decided to pull it out and use it for a simple ghosting technique. One of my favorites when I first started stamping, I loved creating my own backgrounds and how the ink resists and the image appears. It’s always great to take some time and go back to your old techniques and find new looks and ideas for them.

As always…at CHF we have a Monday challenge and this week we’re focusing on the brayer and ways to use them. Here’s the challenge info. Hope you can play along!

Also take the time to check out these great samples and ideas by some of the other CHF Designers…

Alli, Kristine, Lisa Strahl, Dawn, Val 

Winter Sleigh Rides

jks-winter-sleigh-rides.jpg

To create this background…I first stamped my glossy cardstock with the snowflakes from Joyeux Noel and the Starry Night Backgrounder in Versamark ink. This clear ink will repel the dye ink and “ghost” through for a neat look. To apply the ink with my brayer…I inked half of roller with Stream Adirondack ink and the other half with Eggplant…leaving a slight space between to keep the inks for getting muddy on my roller. Simply roll onto the stamped glossy cardstock. While continuing to roll the ink on evenly, move the roller slightly back and forth to blend the ink into an even transition. After allowing ink to soak in, gently wipe excess ink from surface to make the resisted images pop.

Have a great Monday!
Julia

Supply List:

Stamps: Joyeaux Noel, Starry Night Backgrounder & Winter Vintage Signage (Rummage Bin line) from Cornish Heritage Farms

Ink: Black Palette ink by Stewart Superior, Versmark ink by Tsukineko, Stream and Eggplant Adirondack inks by Ranger

Paper: Glossy white cardstock by Ranger, Simply Smooth White by Prism, Teal Light Prismatic cardstock by Prism, Figgy Pudding 6×6 paper pad by Basic Grey

Other: chipboard button by Cosmo Cricket, Swirl Chipboard by Maya Road, ruffled ribbon by May Arts, sewing machine, Distress Crackle Paint by Ranger, vintage trim by Melissa Frances

Dashing…

I seem to be dashing here and there all summer long. Trying to keep all plates in the air is tricky with all my kids at home this summer. We’re trying squeeze in as much fun as possible and still get everything done and work around a lot of different schedules. One thing we did manage to do Friday before rushing back to the city for a CT Scan is to get our new boat. We’ve been wanting one for oh…the past 19 years…and the kids are super excited. As for the CT Scan…it was for my sinuses that have been giving me killer headaches for weeks. I’m hoping to be able to get some relief from that. We’ll see.

My card today involves a different kind of dashing…

Dashing Through the Snow

jks-dashing-through-the-sno.jpg

It’s kind of fun making Christmas cards this early! The frosty snowy look is fresh on a hot day and I’m excited to get ahead of the game. I just adore Lesley’s two new Rummage Bin stamp sets…Primitive Christmas and Winter Vintage Signage. The above design feature the first and I just adore that sleigh and journaling box. Make sure you check out the sets! They’re perfect for cards, layouts and gift projects.

Stamps:
-Primitive Christmas (Rummage Bin line) by CHF

Ink:
-Denim Adirondack ink by Ranger
-Burnt Umber Hybrid ink by Stewart Superior
-white Colorbox pigment ink by Clearsnap

Paper:
-Simply Smooth white cardstock by Prism Papers
-Kraft cardstock by Prism Papers
-6×6 Figgy Pudding paper pad by Basic Grey

Other:
-chipboard snowflake by Maya Road
-velvet brad by Making Memories
-twine

Here’s a few pics of our less than 24 hours mini-trip….

jks-harbor.jpgjks-just-relaxin.jpgjks-boat.jpg

What have you been up to this summer? I’d love to hear…

Take care and have a great day,

Julia 

Simply Saturday, Beautiful Summer…

It’s Saturday and I usually share a simple design with you on this day each week. Until now I’ve always shared a simple card design but today I’ve decided to share a simple layout. I know that some stampers and other papercrafters can find the large 12×12 format intimidating but really…scrapbooking can be as simple or as difficult as you like. Don’t be afraid of white space, don’t be afraid of just adding one picture…make it simple and have fun with it.

One great place to start with a scrapbooking page is to use a sketch. They layout for the project below was inspired by June’s challenge on Webster’s Pages Inspire Me site. I tweaked it a little by adding an angle to the design. A little stamping for the title and quote and some patterned paper makes for a quick easy project.

Beautiful Summer

jks-beautiful-summer-layout.jpg

This layout was inspired by a fun photo I took last summer. There were lots of little girls on the beach that we know well…all friends and they looked so darling all chatting in a circle. The quote at the bottom…A long talk with a good friend can cure anything.

I’m at the beach for part of the day today. I’m hoping the sun and the break will be good for this summer cold I have right now.

Thanks for stopping by! Have an awesome weekend!
Julia

Supply List:

Stamps:
-flower, flourish, and beautiful sentiment from Beautiful set (The Rummage Bin line) By CHF
-photograph box from Photo Op stamp set (The Rummage Bin line) By CHF

Ink: Burnt Umber Palette Ink by Stewart Superior, Brushed Corduroy Distress Ink by Ranger

Paper: Cardstock by Prism Papers, patterned paper by Webster’s Pages

Other: Buttons by Autumn Leaves, flowers by Prima, sewing machine, ribbon by Creative Impressions

And Sew On….

You know how I love to sew…It was actually my creative outlet for many years when I was first married. I inherited my grandmother’s ancient Singer sewing machine and stitched up a storm. As my children grew, I found myself being drawn back to photography and it wasn’t too long until I was immersed in scrapbooking and papercrafting. I love being able to combine both my sewing and papercrafting loves together.

This week on www.splitcoaststampers.com they are celebrating the fourth anniversary of the Dirty Dozen Design Team with a week full of great Dare to Get Dirty challenges for the Fan Club. I offered to host a stitching challenge and if you are a fan club member…be sure to play along! Here’s the link…just click on the Friday thread. 🙂 If you’d love to start stitching but need a jumping off point…check out my All-Stitched Up tutorial.

Make Each Day a Masterpiece

jks-dtgd-design.jpg

For this design I started out by cutting out 1/25″ squares from Basic Grey Sultry paper and adhering them to my card base. Zig Zag stitching in lines around each square gives it a fun textured and quilted look. I wanted to add some stamping to the design without covering up the “quilt” so I decided to add in a clear layer. I cut a Clear Card Sheet to 4″ square and stamped my French Script Backgrounder on it in White Stazon. Sorry you can’t see it well in the photograph but if you look close…you may see it.

jks-dtgd-closeup.jpg

To add in more stamping and some added interest…I stamped the new Pinwheel Backgrounder onto my chipboard flourish. I’m just tickled with how close a match it is for the Sultry Houndstooth print. Tucked into my rhinestone circle…I added a darling little bird from the Kim Hughes Pretty Birds set. The sentiment is one of my faves…Make Each Day a Masterpiece. Too often we get bogged down with life and details and forget that.

Happy stitching! Have a fabulous weekend!
Julia

Supply List:

Stamps:
-sentiment from Motivational Centers (Mona Lisa Moments line) By CHF
-French Script Backgrounder by Cornish Heritage Farms
-Pinwheel Backgrounder by Cornish Heritage Farms
-bird from Pretty Birds set (Kim Hughes line) by Cornish Heritage Farms

Ink:
-White Stazon ink by Tsukineko
-Lettuce Adirondack ink by Ranger
-Black Palette ink by Stewart Superior

Paper:
-Brown Suede Dark by Prism Papers
-Sultry 6×6 paper pad by Basic Grey

Other:
-Clear Card Sheets by Cornish Heritage Farms
-chipboard flourish by Maya Road
-flowers by Prima
-button by Autumn Leaves
-sewing machine
-rhinestone stickers by Me and My Big IDeas
-ribbon by Creative Impressions