
Pockets…we all have them and they are pretty useful things to have. It is amazing what you can put in a pocket. LOL You should see what comes out of my middle child’s pockets! I have to be careful every time I do the laundry. This week the Ways to Use it Challenge is to find ways to make POCKETS on or part of your designs. Create a little pocket on the front to tuck in a note or tag, incorporate a fabric pocket or make a pocket card. Use your creativity and have some fun! Feel free to join us at WT130!
Coffee Friend Gift Card Pocket
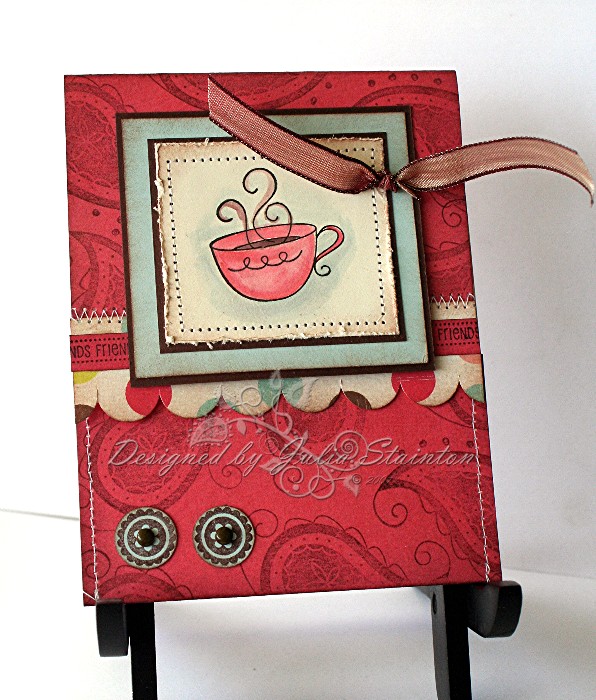
I had so much fun designing this card a few months ago, I just had to try it again. My original card design HERE. I thought a Starbucks gift card would be perfect in one of these designs as a gift and so I pulled out my Lizzie Anne Designs simply singles image and had some fun with it. Simply Singles can all be purchased separately and are a great way to add to your collection. Lizzie Anne Designs stamps can be purchased at Lizzie Anne Designs or Jacksonbelle Embellishments. Supply List for this design below…tutorial to follow that…
Open Design
Supply List:
Cardstock: Watercolor paper, soft sky, Chocolate Chip, Very Vanilla – Stampin Up
Patterned paper: Tres Jolie line – My Mind’s Eye
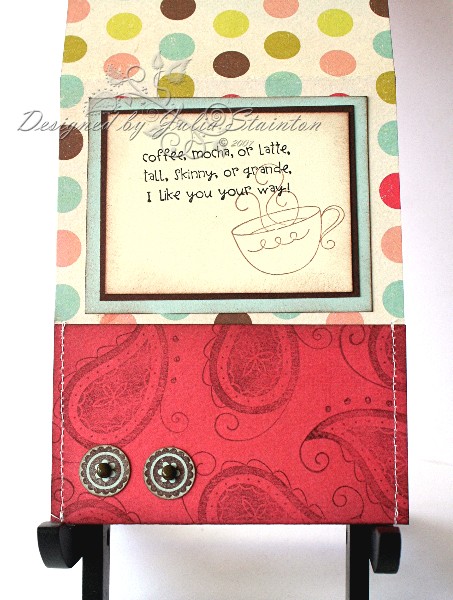
Stamps: Latte Cup, Latte saying, Big Paisley, Shapers and Stitches – Lizzie Anne Designs
Ink: Close to Cocoa, Chocolate Chip, Black – Stampin Up
Other: brads – Heidi Swapp, sewing machine, ribbon – May Arts, Slit Punch –
Stampin Up
* * * * *
Julia’s Gift Card Pocket Design Tutorial
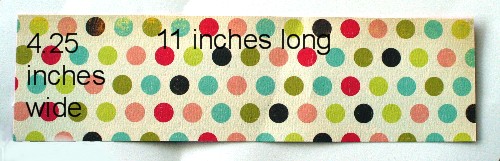
1. Cut your cardstock or patterned paper to size… 4.25 x 11″ long. If you are using 12×12 paper, feel free to make the length 12″ for a little extra overhang.
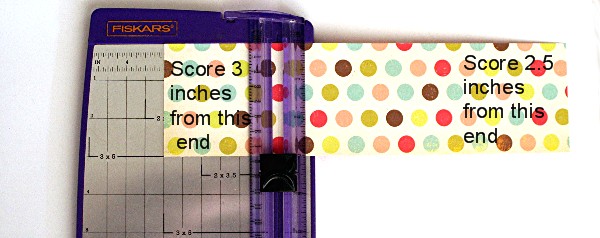
2. Score card at 2 1/2″ from the bottom and 3 ” from the top to create your flaps. Stamp your design if desired.
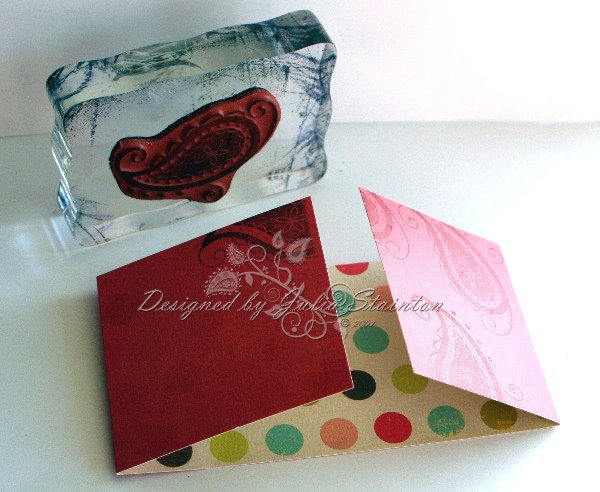
3. Fold flaps towards center. Stitch or adhere side edges of bottom panel. Terrifically Tacky Tape works well for this. This creates a little pocket to enclose your gift card into.
4. Use slit punch to make scalloped edge. For slit punch scallops tutorial see this post. You may also use a small 4.25 x 1″ strip of coordinating paper to create this overlapping flap if you desire.
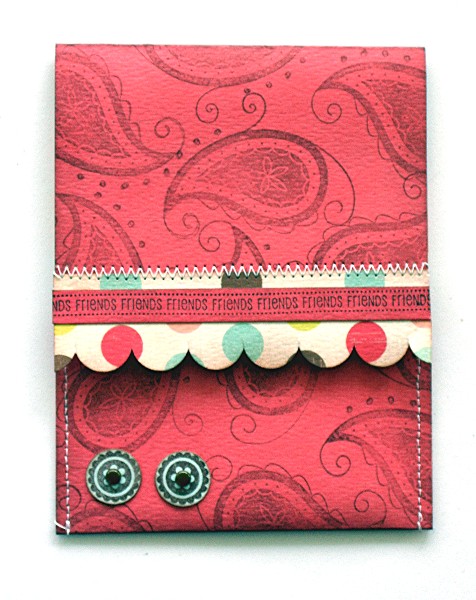
5. Overlap layers slightly and adhere together. Stitch if desired. Embellish with stamped strip if desired.
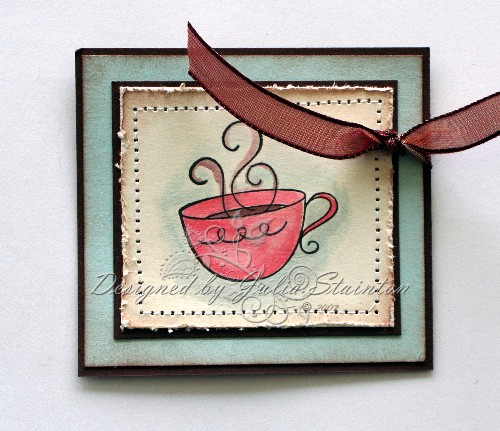
6. Create image layer. I used a matted stamped panel. Embellish as desired.
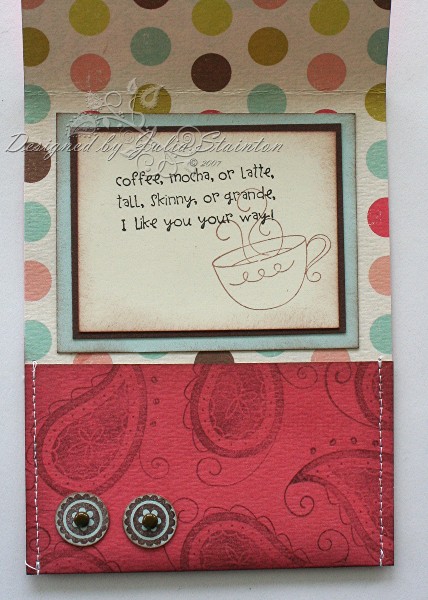
7. Create inside sentiment panel. Adhere to inside of card.
* * * * * *
Variations: Create an card insert with sentiment or invitation on it.
* * * * *
Please feel free to use this tutorial for your own personal use. You may use this tutorial for workshops with permission but please link my blog if you print it out. My e-mail is at the top of the sidebar if you have any questions. Thanks!
Pingback: Poket Card | More More Pics
Pingback: Create A Card | AllGraphicsOnline.com