Archive for September, 2007

Sep 30 2007

Fiskars Mini Precision Scissors {C’est Bon}

jks-fiskars-scissors-2.jpg

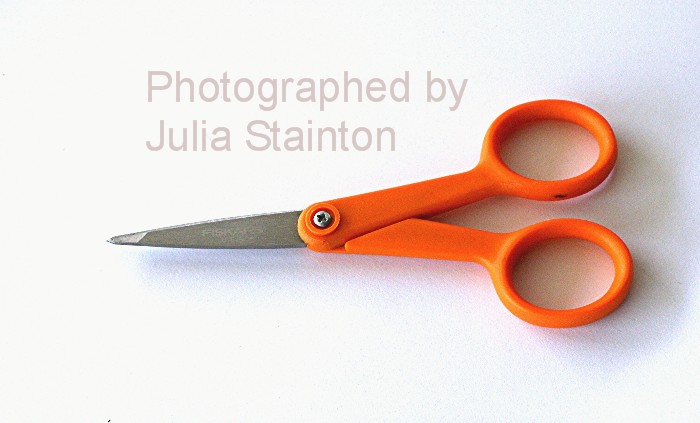
I just love my Fiskars Mini Precision Scissors. I just wouldn’t want to do papercrafting without them. They’re not very fun or glamorous…just a bright orange work-house type product I use everyday. Actually, what got me thinking about them was a question I was asked about what product did you not think you needed at first but could not do without now. I managed to think up a few and this was one of them so I decided to feature it on today’s {C’est Bon} entry and I used my pair of Fiskars scissors in both of today’s designs.

I originally didn’t think I needed them. I thought they were just scissors, I can manage with those I already have. And I did. I managed with my old kitchen scissors for quite a while as I learned papercrafting. And then, I tried a pair of my friend’s scissors out at a crop a couple years ago. I was sold. I went out and purchased my pair that same week. Actually, I use them so much. At my craft desk, at the sewing machine…they’ve managed to make it to the computer desk many times as well. I must admit. I now own THREE pairs! LOL When one pair wanders off, I still have more to fall back on till they all make their way home to my craft desk.

What I like about the Fiskars mini scissors…

  • small
  • affordable
  • great precision blades
  • light
  • durable and long lasting
  • sharp pointed ends for tiny cuts
  • comfortable to hold and use

What I use mine for…

  • trimming small pieces of paper
  • threads
  • closely trimming around chipboard
  • paper piecing
  • cutting out designs to pop up and layer
  • making fringes

Where can you find them?

Where can’t you find them?! LOL Michael’s, Office supply stores, Craft Stores, scrapbooking and stamping stores…I guarentee you, you won’t have to look too far! :)

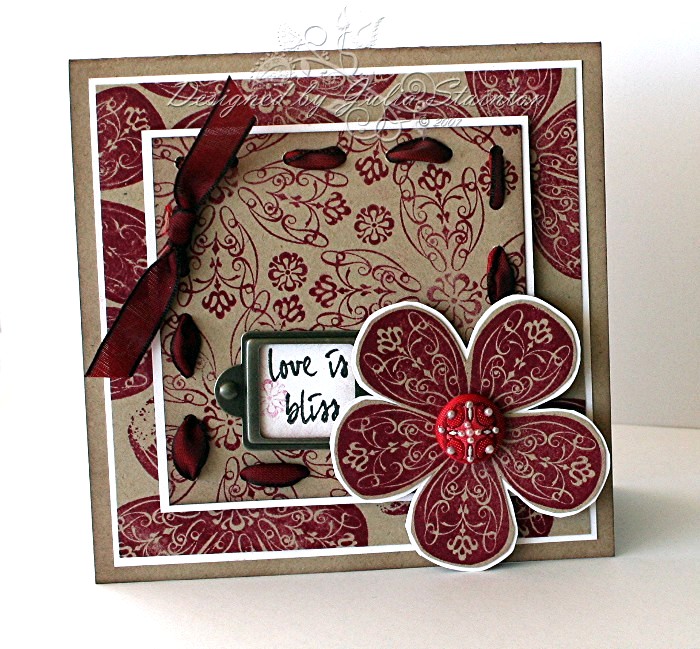
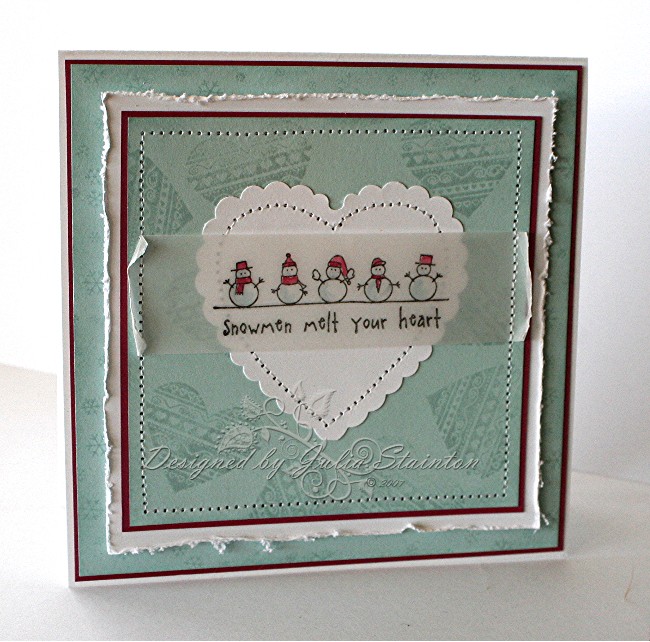
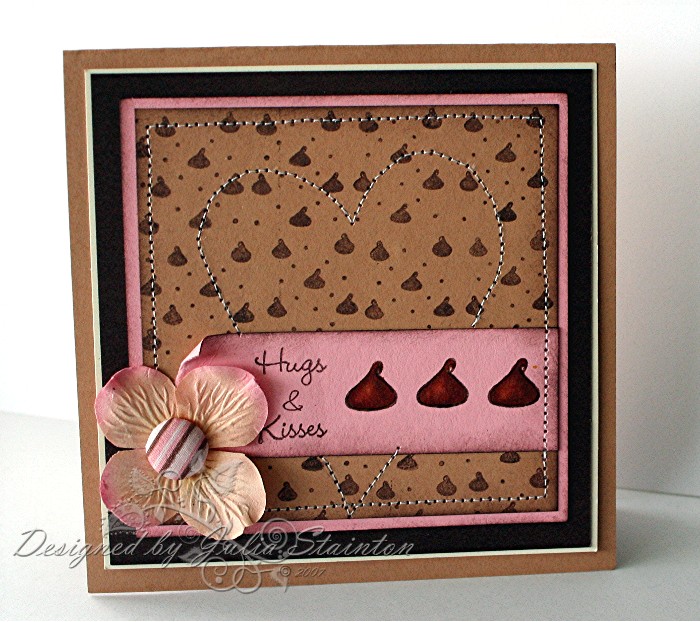
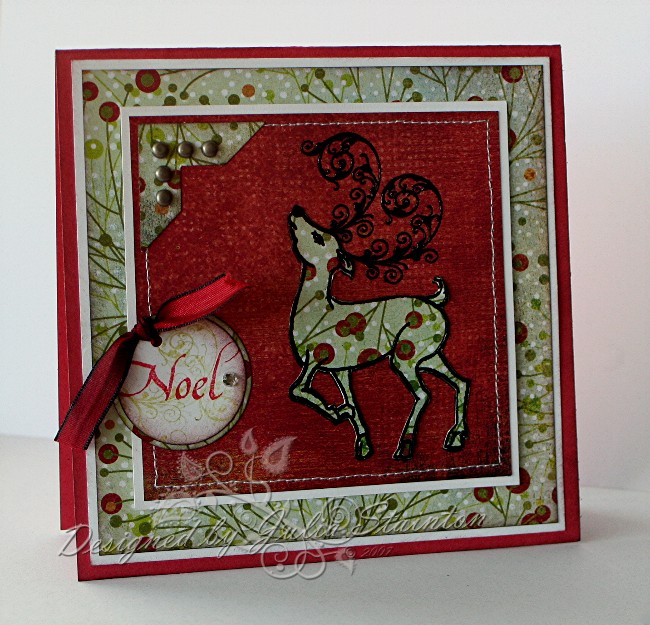
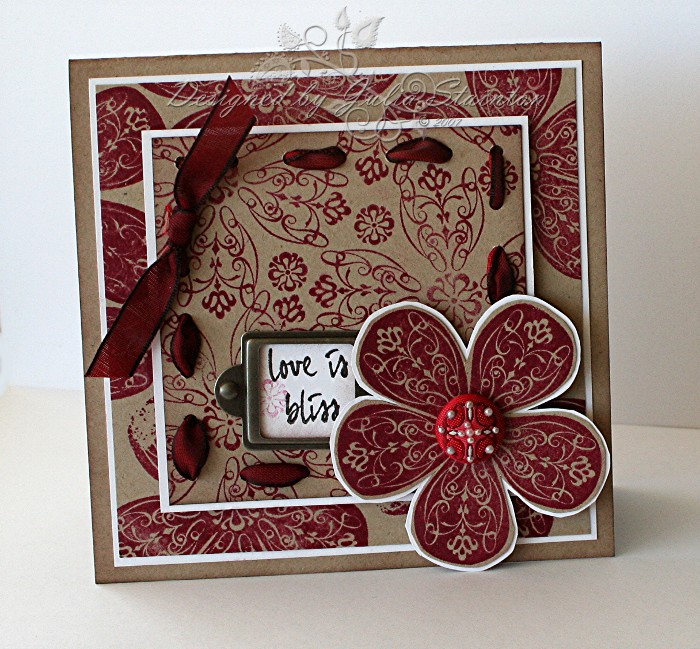
As for my samples…below you will find my Noel Reindeer design. I used my scissors for carefully trimming out my paper pieced reindeer. In my previous post…just scroll down an entry, I used my scissors to cut out my flower and then after matting it with white, cut it out again. I love how fine and close I can get with my Fiskars mini scissors. :)

Noel Reindeer

jks-noel-reindeer-2.jpg

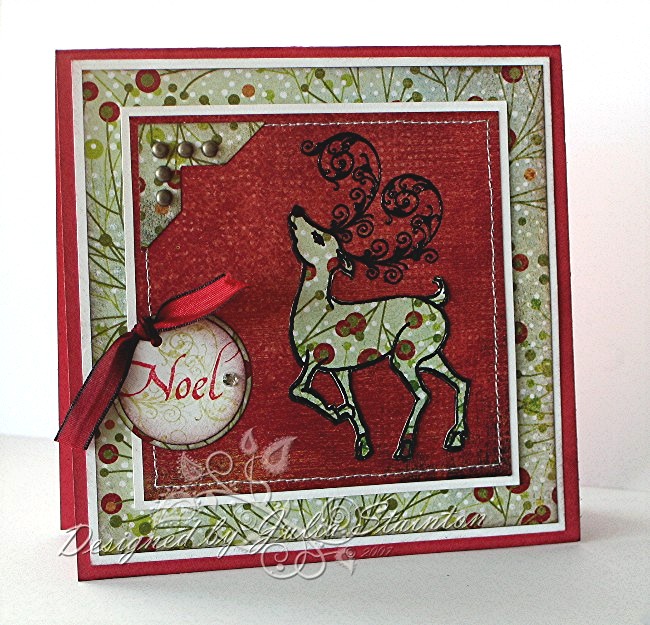
For this design, I started out with my new reindeer stamp from Flourishes! I tell you, I gasped when I first saw it. It is soooo pretty! I just adore those flourishes for the antlers. I just couldn’t wait to make a card design with it. And I KNOW you’ll be seeing this stamp again soon in the future. This new stamp set is called Flourished Christmas is soon to be released on October 3rd along with 2 other beautiful sets. I just know you are going to love them all!

I decided to try paper piecing my reindeer by stamping it on this beautiful Fruitcake Basic Grey patterned paper. I acutally only used one 12×12 piece. The textured red you see as the main image background is the reverse side of the green winter spray paper. The reindeer was stamped first onto my red square layer with Versmark and embossed with Black embossing powder. Now, I’m not a big embossing powder user BUT this black really makes the antlers pop and shine and looks soooo festive. The reindeer was stamped and embossed again in the same manner onto the more patterned side of a scrap of the patterned paper.

And this is where my scissors come in…cutting out that detailed reindeer. Just cut very carefully just to the outside of the that black embossing and then adhere over the stamped deer on the red square layer. Very easy and a beautiful look for this card.

For the rest of the card design, a simple layout you see a lot from me. I just love square cards and the area available for enhancing. My main card base is made from Ruby Red cardstock and is 5.5″ square. I layered it with whisper whtie cardstock and then my patterned paper. All edges were sponged with my Close to Cocoa ink. On the center panel, I stitched the edges with white thread on my sewing machine before adhering that panel to the card design.

For embellishments and sentiment…the last things I always add… a little corner treatment created from my photo corner punch from Stampin Up. I set it with five mini pewter brads for definition. The sentiment was stamped in Ruby Red with the lovely Noel sentiment (one of many in this set) and then punched with my 1 3/8″ circle punch. It looked a little plain and so hmmmm….what to do?! I looked at my flourished antlers and yay! They made a beautiful flourished background when stamped in Old Olive. After punching a hole for the tag, a beautiful scrap of May Arts ribbon was the perfect finishing touch.

So of my designs, I think hmmmm, others I like and some I just love. This is one of those times. I’m saving this Christmas design for someone special. :)

A Note: This {C’est Bon} article is my honest opinion and is written just to share with you. I have no affiliation with the Fiskars company in any way. If you have a question about this product, I will try and answer it to the best of my ability by editing an answer into this entry. If you like these {C’est Bon} entries, you may want to check out some you missed. Just click on the {C’est Bon} category heading under the title and it will bring up them all. :) Wishing you a wonderful week!


14 responses so far

Sep 30 2007

A Little Boho…

Published by Julia Stainton under Card Designs

Boho Blossoms….I LOVE it! This is the fourth stamp set soon to be available from My Favorite Things Stamps on Monday. It has been asked Monday when? 12:01 am EST if you just can’t wait any longer! :) hey! That’s not to far away! :)

When I first got a glimpse of drawings for this new Boho Blossoms set I must admit, I gasped! I just love the flourishes and that boho look. It is just soooo pretty and so “me”. LOL Not that I’m pretty…far from it! I just meant that it was very much my style! This set is super flexible, with two large flowers and two hearts as well as a ton of great words that work together and a few other odd flourishes…it is sure to be a keeper!

Love is Bliss

jks-love-is-bliss-2.jpg


For this design, I decided to keep the focus totally on stamping and there isn’t a scrap of patterned paper in sight! The stamps were so beautiful and ornate, I just had to try them on their own. For that matter, I limited my supplies to two colors of cardstock and two colors of ink. Added with the images and a couple of elegant embellishments…well, I’m pretty happy with how it turned out. :)

So…. for the details, they are really pretty simple! Square layers of kraft matted with whisper white and stamped with Purely Pomegranate, in both of the floral stamps. The ribbon was stitched through holes lined up with the Mat Pack and punched out with the Crop-a-dile. For the sentiment, the fun thing about this design is the words come separate and you can design your own phrases. I love it!

Quick Tip: Line all the word stamps up how you wish them stamped right on the clear acrylic block. You can stamp them on some scratch paper to see if they are perfectly lined up. That way, when you go to stamp on your project, you just have to do it once. :)

For the main flower of this design, I stamped it once and then cut it out. After adhering to some white cardstock, I then trimmed it out again. For the center of this flower, I used one of my favorite ever embellishments…a K & Company Stitched Brad. They are GORGEOUS! I love the rich look they add and one of the few I have left worked perfectly for this design. :)

Now, you may be thinking…where is Sunday’s {C’est Bon} entry. Dont’ worry…it is still coming! I have a design for it but still have to do the writing. I’ll give you a hint though…. something I used to create this design is part of today’s C’est Bon article. Bear with me! Sunday’s are busy days here but I will be back!

31 responses so far

Sep 29 2007

Day Three of the Sneak Peeks…

Published by Julia Stainton under Card Designs

It’s almost October 1st and yay… the third day of sneak peeks for the FIVE new-releases from My Favorite Things stamps. Now I have some great news for you! Kim is putting together a great special this month for those of you who just have to have it all! All five sets for $65! There will be a button link on the web-site on Monday if you wish to take advantage of this special. Stay tuned tomorrow and Monday for the last two sets to get peeks at. :) And today’s featured peek, Meet me at the Cafe… I decided to use a different spin on the set. It is a large one with lots of great images. Make sure you check out the other designs by the rest of the Design Team. You can find links to their blogs, HERE.

Bon Ami

jks-bon-ami.jpg

When I saw the little poodle and the awning as part of this set, I just had to use them together! The song…How much is that doggie in the window…kept going through my head. LOL Do you know how annoying that song gets after a while?! LOL Well, I did have a lot of fun with this design. :)

The awning was the first piece that I designed. I just knew I wanted to paper piece it together in different designs. Actually, this is pieced together from one sheet of double side paper. I had some scraps left over from another design project so I stamped it once on the front and then once on the back…in different places of course! Leaving the pink paisley side solid, I simply cut out the yellow/green color and adhered it on top.

I also knew I wanted to include some slit punch scallops in this design. I thought they would coordinate well with the scalloped awning. I punched them out of the paisley My Mind’s Eye paper and then layered it over a striped panel that had the bottom edge distressed.

The main image panel, I stamped the poodle off set on the design so she would be looking into the empty space. She is colored with Copic Markers and then the flourish stamp from the same set is stamped in the bottom right. A little Doodlebug Designs bling decorates the flourish. I always love adding a little stitching to my designs and this time I added some zig zag stitching around the image and at the top of the design.

The main card base of this design was cut from Purely Pomegranate…one of my favorite colors this year. I stamped the flower swirls from Behind the Scenes over the Soft Sky layer at the top of the design. A couple last finishing touches…a beautiful white Prima flower set with a Making memories Crystal Brad and then the sentiment. I love the Bon Ami French sentiment wtih the poodle. Dog’s are man’s (and woman’s) best friend right? A little paper piercing along the bottom draws the eye to the sentiment.

Have a very happy Saturday! No simply Saturday design today but I’ll resume next week! :)

13 responses so far

Sep 28 2007

My heart melts…

Published by Julia Stainton under Card Designs, Holiday

My heart just melts for these DARLING little snowmen! I made this card the other…right after my other snowmen design. I just couldn’t put them down. So cute! It has been a busy day here with all the kids home. Running around everywhere…my job as a chauffeur, you know! LOL I’m also coming down with something…SO not fun. I seem to have lost my voicce…I’m just glad I can still type! And so, I’m going to make this short. :)

Melt Your Heart

jks-snowmen-melt-your-heart-vellum.jpg

I wanted to play up on the heart part of the sentiment so I punched out a scalloped heart with my Giga Marvy punch. After stamping my heart shapes from the new Heart 2 Heart stamp set from Lizzie Anne Designs, I adhere the shape to my layer and stitched it on my sewing machine. I then matted my layer with Pomegranate and whisper white cardstock and distressed the outer edge of the panel with my Heidi Swapp edge distresser.

For the image, I simply stamped it onto some cardstock vellum for a Frosty look and then colored in my snowmen image with my Copic Makers. To attach my vellum strip and to frame the layer, I stitched around the edges of the panel.

The main card base of this design is a 5.25″ square card base of whisper white. It is layered with Purely Pomegranate and then a Snowflurry stamped piece of Soft Sky Cardstock. I love this color combo! The white and soft sky really feel like winter but that warmth comes from the Pomegranate and hints at the “heart” of this design.

Snowmen Close-up...to enlarge, click on design

jks-snowmen-thumbnail.jpg

Supply List:

Cardstock: Whisper white, Purely Pomegranate, Soft Sky, vellum - SU

Stamps: Snowmen, Snowflurry, Heart 2 Heart - Lizzie Anne Designs

Ink: Black Palette Hybrid Ink - Stewart Superior

Other: sewing machine, heart punch - Marvy, Copic Markers

16 responses so far

Sep 28 2007

It’s Wild…

Published by Julia Stainton under Card Designs

It is wild at my house today. Days off school always do that! Five kids make a lot of noise. Running around, disputing (the nice way to say it), excited for a day off, swinging from the chandeliers…well, I haven’t had anyone do that for the past 14 years but there was one outrageous 2yo at one point! LOL I’m glad he’s calmed down a little since then!

I have something else Wild to share with you today! I love this new stamp set by My Favorite Things! It’s a Jungle out There is sooo fun and flexible! It reminds me of my family ;) , the movie Madagascar, the African Lion Safari… many many things! I think it would be great for babies, boys … pretty much anyone! The set contains a safari girl, elephant, giraffe, lion, monkey, foliage and some really great sentiments and will be released on October 1st. I decided to have a little fun with the elephant for this design and create a little card for my son, Benjamin. I’m going to surprise him with it in his lunch box next week. It says… Don’t Forget and inside…. I love you. :)

Don’t Forget!

jks-dont-forget.jpg

For this design, I decided to give this week’s SCS Sketch challenge a whirl and layered it up with my My Mind’s Eye patterned paper. The layers were all sponged with Close to Cocoa ink and then matted with Wild Wasabi. I love pairing up this greeen with Soft Sky and it really looks great with this paper line. On the outer layer, I used my sewing machine to stitch a border and then distressed the edges to add a border.

For my main panel, I created a little scene on some Soft Sky Cardstock. I just LOVE how flexible these branches are! With the soft polymer stamp, you can twist them and change them up each time, adding a very nautral look to the foliage. The leaves come in solid or outline stamps… you can use which style works best with your design. I think this foliage if fabulous! It would be great to mix up with all sorts of sets if you like creating scenes.

Quick Tip: To get depth to leaves, branches, flower etc. in designs…. use repetition stamping. Stamp a first impression image and then stamp again once or twice without reinking to create depth and layering.

I decided to have a little fun with the elephant and stamp him on some dotted paper from the same collection. I actually stamped him twice. One image I cut out the full shape and then for the second, just the head and truck. I layered this on top with some foam tape to make it pop out a little.

As for embellishments, there was already a lot going on with the layout and paper so I kept it super simple. A new Daisy D’s button tied wtih a scrap of May Arts ribbon was the perfect touch. I’m hoping Benjamin likes it! I had so much fun making it. :)

Another link to share… one of my cards this month is a Paper Craft on-line bonus … Love, Peace Hope :)

Have a great weekend!

14 responses so far

Next »