
Yippee! New paper, ink, stamps… I just couldn’t resist pulling them out and making this card to try them out! I can’t decide what my favorite new color is! I just adore the Pomegranate, the Groovy Guava, Soft Sky…those are my top picks but I love the others too. The Soft Sky is gorgeous but I must say…I’m going to go through Cool Caribbean withdrawal! I purchased quite a bit of cardstock so I don’t run out. I’m really going to have to find an option to replace it from another company who has a similar color that is current. Any suggestions? 🙂
To keep this card simple, I reused a layout from last week’s Simple Saturday card! LOL I loved it’s clean lines and thought using it again would make this quick and easy for me. This time around, it is a stamped-style version. 🙂 I’m up at the lake for the day today and wanted to design this card quickly yesterday as I had lots to do. Saturday cards should be simple, IMHO. 🙂 Time for family is so important.
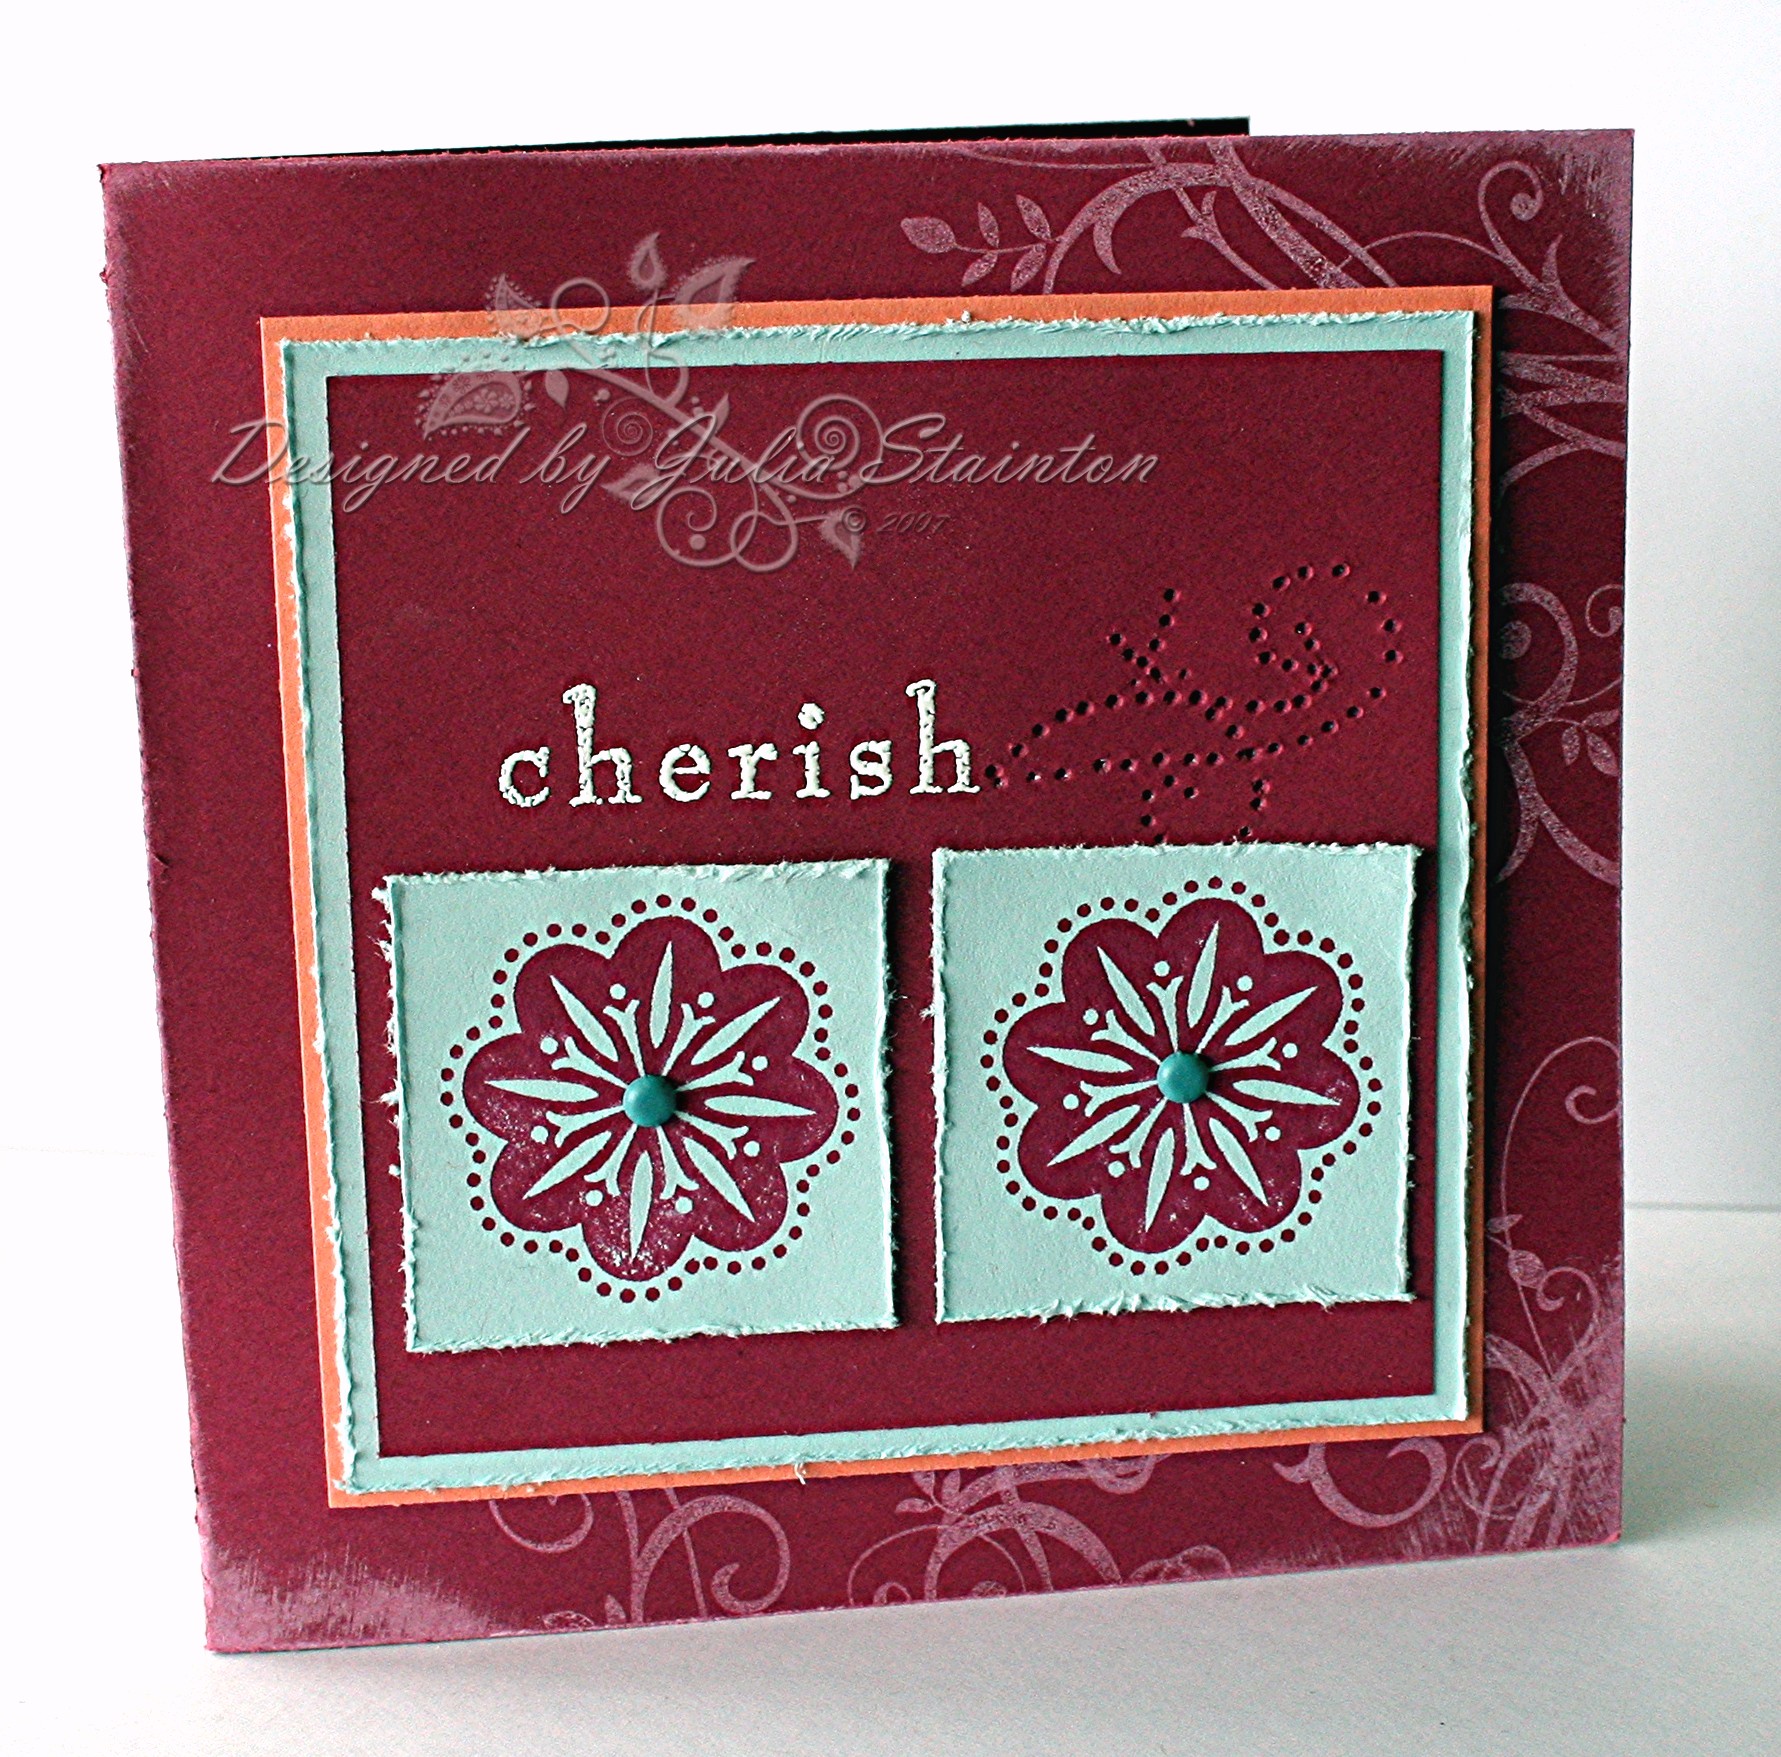
Baroque Cherish

For this card, I just decided to reuse last week’s layout as I mentioned above. I made a 5.25″ square card base from Pomegranate cardstock and stamped on it with the flourish stamp and my new Canvas Hybrid ink. I also inked the edges with it…wow….I LOVE how fast it dries! I’m always so impatient with white craft and tend to smear it! LOL I added layers in Soft Sky and Groovy Guava and stamped the decorative flower stamp on each of the square panels. These little Soft Sky layers and the larger one are all distressed on the edges with my little pink Heidi Swapp distressing tool for texture. To add a little more dimension, I inserted little Wedgewood blue brads by Making Memories in the centers. The cherish sentiment was stamped in Versamark and embossed with white embossing powder. I wanted to add one more touch, but couldn’t decide what to do! I finally decided to try stamping the flourish on a scrap piece of paper. Choosing a flourish section I thought might work well, I laid it over the layer and then pierced the design through the scrap paper and into the layer using my paper piercer and my mat pack.
Supply List:
Cardstock: Purely Pomegranate, Soft Sky, Groovy Guava – Stampin Up
Stamps: Baroque Motifs – Stampin Up
Ink: Purely Pomegranate – STampin Up, Canvas Hybrid Ink, Versamark – Tsunkineko
Other: brads & Paper Piercer- Making Memories, White embossing Powder – Stampendous, Edge Distresser – Heidi Swapp


