
I wanted to have a little fun this morning with the color challenge. Joshua is sick again! This time a cold and fever…yesterday afternoon and evening, he did nothing but cry. Poor little guy! This spring weather is going to help right?! Soon I hope! Anyway….I decided to take some creative time for me this morning while Joshua is content on the couch watching Veggie Tales. He adores Veggies Tales movies. Joshua still doesn’t talk but he has been able to “sing” the theme song in tune for almost 6 months now!
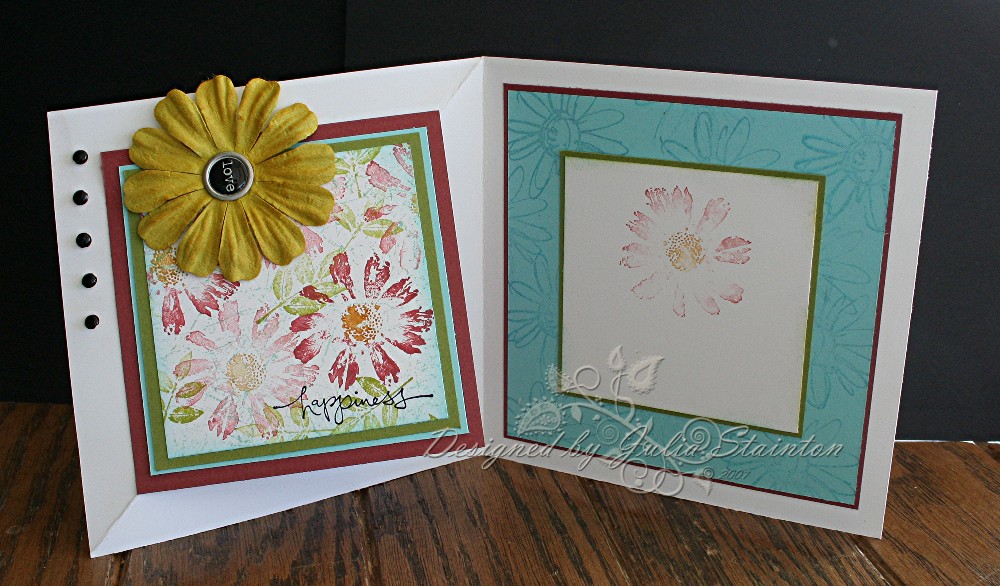
Happiness Simple Diagonal Tri-fold

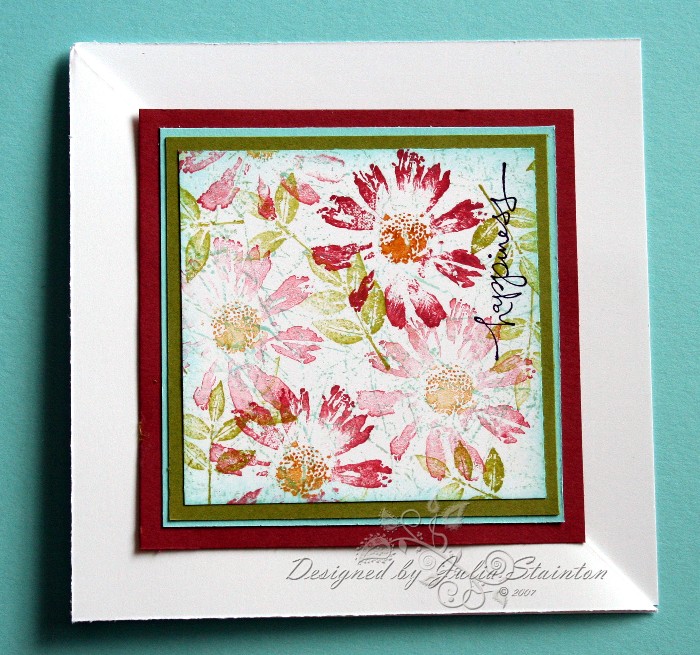
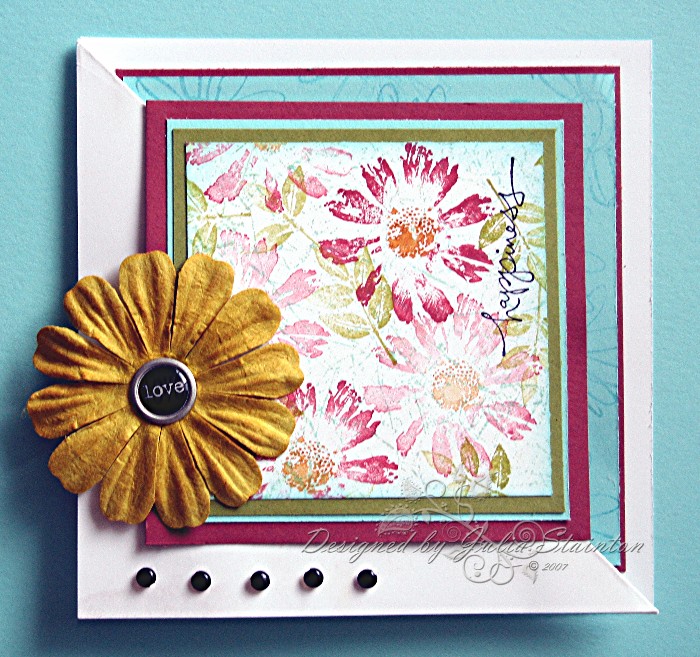
For this card I wanted to give my simple diagonal tri-fold another whirl. It is a really simple fold/card design to do once you’ve done one. I’ve had a few requests so I thought I’d combine today’s color challenge and a quick tutorial to give you a better visual. (For the original card I made in a more traditional style click here.)Today’s color challenge was to use Cool Caribbean, Cranberry Crisp and More Mustard together with the option of adding Old Olive. I decided to pair them up with lots of white for a fresh and fun look to these colors. My central image panel is stamped SU’s Petal Prints stamp set. I just love how flexible these daisies are and I also wanted the image to still work well once it is pivoted. To ink up the daisies, I first colored the centres with my More Mustard marker. Because Cranberry Crisp is one of SU’s “In Colors” there is no matching marker. I really hope they change that next year! I just carefully inked the petals by inking them carefully along the side of my ink pad and turning them until totally inked. Not as fast but it works! The images are all stamped with first and second impressions…I love how this saves time but also, how it adds depth to the panel. It appears that some of the flowers are more to the background. After randombly stamping the leaves in Old Olive, I stamped the whole panel with Cool Caribbean and Magenta’s fabulous crackle background stamp. I just love this 3×3 inch stamp to fill in space, add texture and pull things together. Because of its random crinkle look…it is so easy to use and doesn’t leave obvious lines when you repeatedly stamp it over large areas. I added a retired K & Company charm to the center of the Prima flower for a touch of black “pop” and added the row of black brads to the bottom for balance and interest.
Quick Tip…If you don’t have the exact color you need of your silk or paper flower embellishments…sponge them with ink or rub with chalk. This also adds interest!
Open view – notice how front panel has swung to the inside and turned 90° (for close up click on pic)
Supply List:
Cardstock: Whisper White, Cranberry Crisp, Cool Caribbean, Old Olive – SU
Stamps: Petal Prints, Warm Words – SU, Crackle Background stamp – Magenta
Ink: Cool Caribbean, Basic Black, Old Olive, More Mustard, Cranberry Crisp
Other: Prima Flower, charm – K & Company, black brads – unknown
Simple Diagonal Tri-fold Tutorial
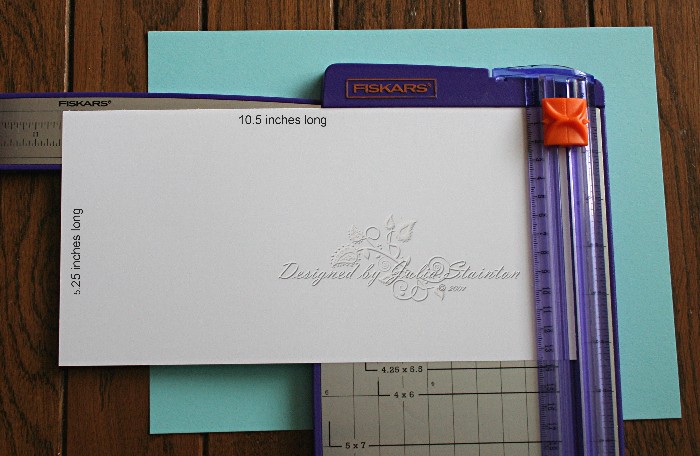
And now finally the tutorial! This is a great square card variation as it requires no extra tools than you would normally use to make a card…just your papercutter, adhesive and if possible, a bone folder. If you need to see a picture in greater detail…just click on it!
1. Cut a large 5 1/4″ x 10.5″ rectangle from your cardstock. Fold in half into a 5.25″ square. Make sure the hinged side of the card is on the left.
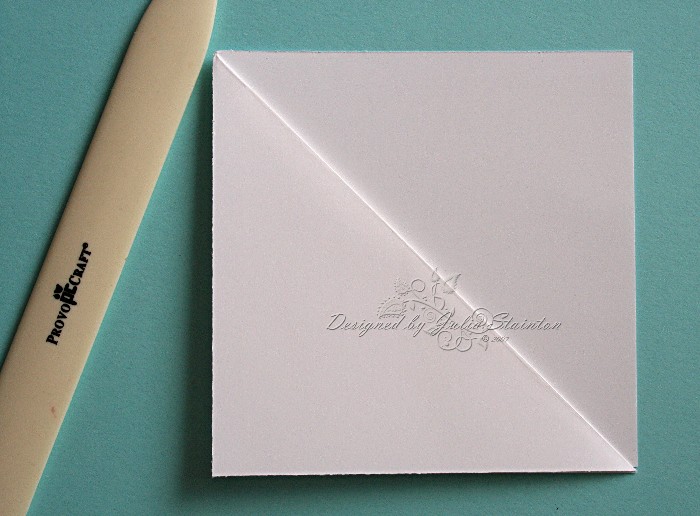
2. Take top right hand corner “A” and fold across on a diagonal to the bottom left hand corner “B”. Press with bone folder to get a crisp crease. You now have your basic card.
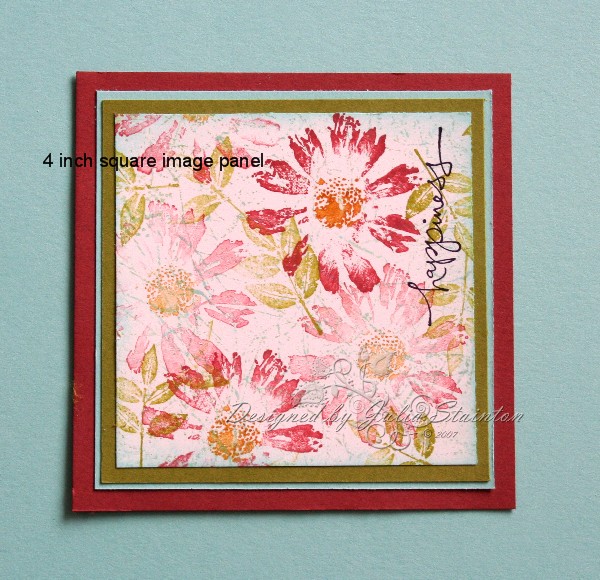
3. Make an square image panel for your card front. The largest mat on both my cards is 4″ square.
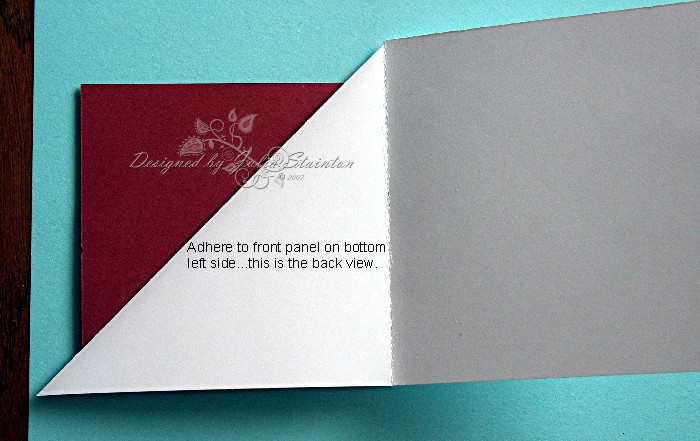
4. Apply adhesive to bottom left half of the matted image panel. Do NO adhere the entire panel…it will stick the the inside of your card. Adhere to card front being careful to line up the corners of the image panel with the diagonal fold.
5. Decorate inside of your card. This will peek up from behind your central image panel and become part of the design so take this into consideration when you design it. I chose a 4.5″ square panel that I matted with a 4 5/8″ mat. For ease of writing on the inside, I also added a smaller 3 1/2″ square layer with a stamped off image. This panel is smaller than the 4″ front panel and is not visible until you open the card.
6. Add any extra embellishments if you desire.


21 responses to “Simple Diagonal Tri-fold Tutorial”