
It’s Thursday again and time for another Ways to Use it Challenge on SCS! This week my challenge is to use Glossy Paper on your design project. All are welcome….if you’d like to play along click WT105! Lots of info and two techniques for you today, so enjoy!
Faux Linen
For this challenge I decided to use the Faux Linen technique. It has been quite a while since I used this and I love the vintage look you can get with it. To do the Faux Linen technique, you simply need glossy paper and sandpaper along with your regular stamps and ink. First stamp your image on the glossy paper then take some medium grit sandpaper and first sand one way and then turn 90° and sand the other way. This should remove the shine of the glossy paper and if you look closely, give you a little sanded grid. Take a sponge and rub ink into the paper…it will pick up more in the sanded grooves and give you a fabric-like texture. Easy! Enjoy!
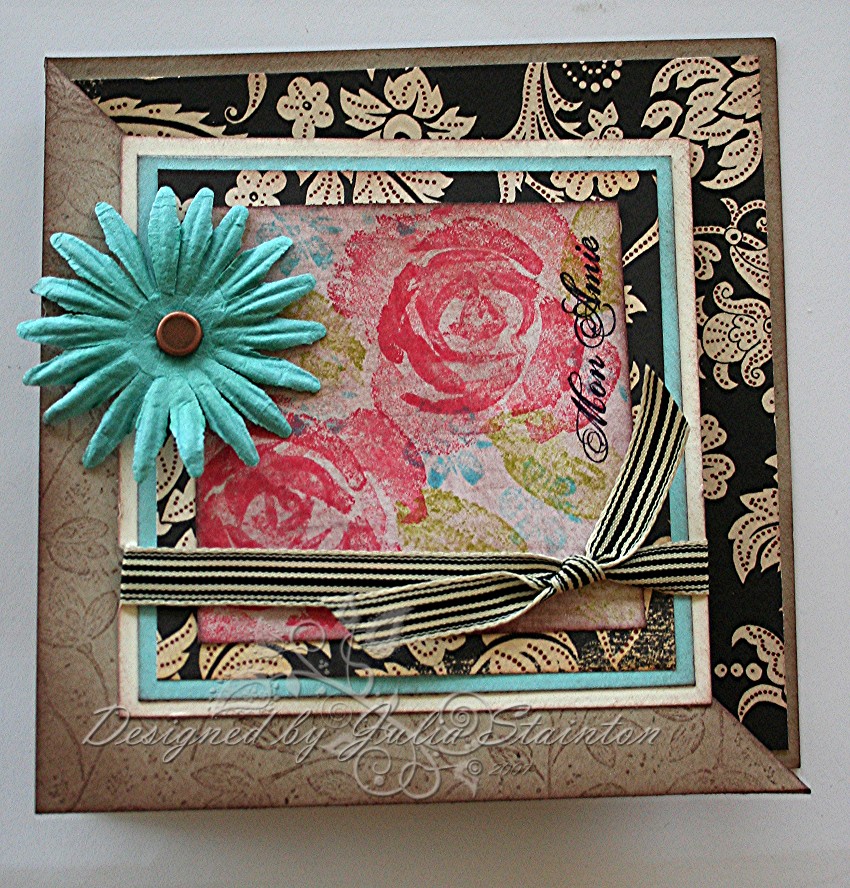
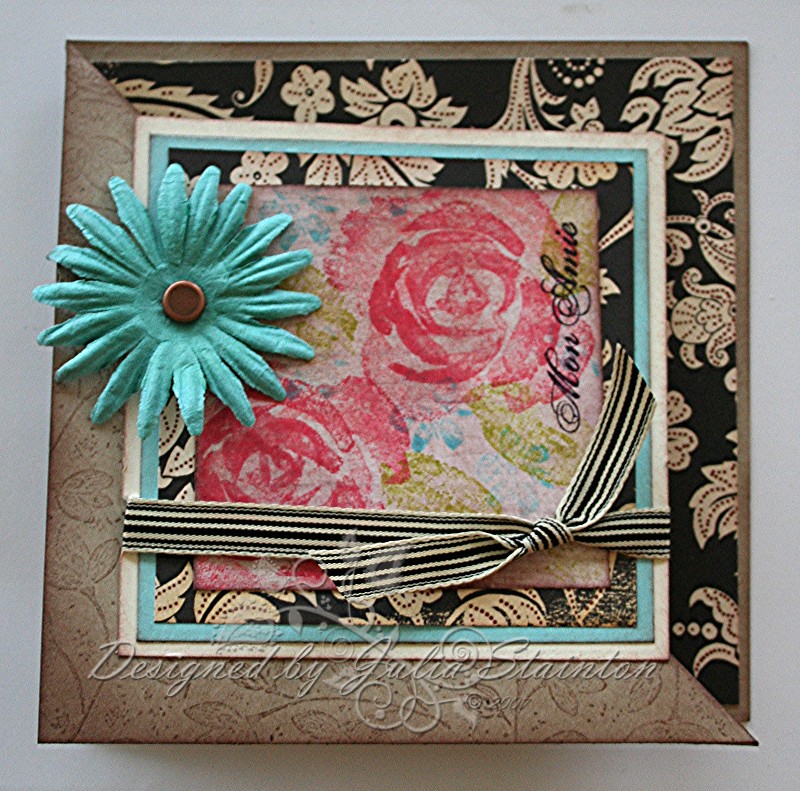
Mon Amie Simple Diagonal Tri-fold Card
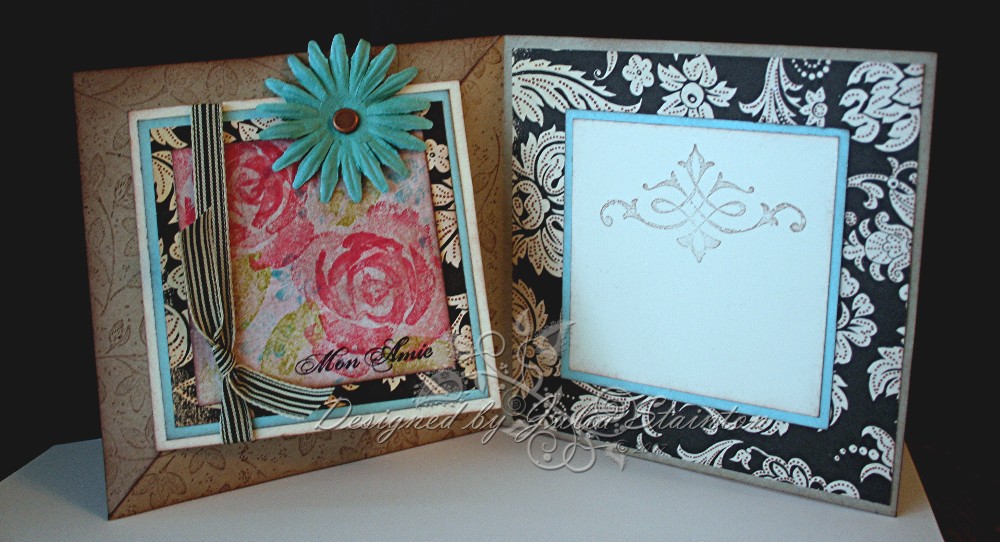
This fun, easy diagonal trifold card gives you a peek at the inside. The card opens by pulling the bottom left hand corner. The diagonal fold, allows this card to swing and pivot so that it appears on the inside of the card when opened….so much fun! I love how it immediately makes the inside of the card very special. The central image was stamped with my favorite roses set from SU and then sanded in the above Faux Linene Technique. I then rubbed in the Close to Cocoa ink and added extra to the edges. The main image was then matted with squares of cardstock…the outer mat measures 4″square. For Fold directions, read on…
Simple Diagonal Tri-fold Card Technique
I just adore the Triangle Tri-fold card that Beate recently did a tutorial for. I decided to design a simpler version of it and share the instructions with you. First cut your cardstock base to 5.25″ x 10.5″…fold in half. With the hinge at the left hand side…take the top right hand corner and fold on the diagonal so that it meets the bottom left hand corner of the card front. Press well. Unfold card. If you wish to decorate/stamp the card front…you actually decorate the left inside panel as you actually never see what is traditionally the card front. I rolled the unfolded diagonal section with the matching wheel to Carte Postale in Close to Cocoa Ink and sponged the inks with the same ink. To decorate the inside that also peeks out…I cut a square 4″ piece of this beautiful Autumn Leaves Patterned Paper. A layered square is mounted onto the patterned paper panel to create a nice space for you to write your sentiment and sign the card. This layer is designed smaller than the front square panel so that it hides discreetly inside when the card is closed.
After finishing the insides of the card, fold the card closed and the front flap back down. Tie ribbon around panel and then adere ONLY the bottom left half of the card with strong adhesive. I added a beautiful Prima flower with brad center for decoration. I purchased my gorgeous Prima flower box from Jacksonbelle and the fabulous striped ribbon from Anna Wight.
Inside View (click on pic to enlarge)
Supply List:
Cardstock: Kraft, Very Vanilla, Glossy White, Cool Caribbean – SU
Patterned paper: Autumn Leaves
Stamps: Roses in Winter, Carte Postale – SU
Ink: Close to Cocoa, Rose Red, Regal Rose, Old Olive, Tempting Turquoise, Black – SU
Other: Essentials Collection “Lucid” – Prima, ribbon, Thumbtack Brad – karen Foster Design, sandpaper